What you can do as a member?

You can do by logging in.
- Retention of various tool data
- Site theme change
- Game bookmarking feature
- Provide feedback on the website
★ NEW: Season 6 Midseason Patch Details
★ Check out our Vessel of Hatred expansion guide
★ Learn more about the Spiritborn class
★ Conquer Nahantu with our best Builds!
★ Season 6 Guide (Season of Hatred Rising)
┗ Realmwalker Boss Guide | Seething Opals
This is a Blood Lance endgame build for Season 5 of Diablo 4 (D4). Read on to learn the Skill Tree, as well as all the Best Gear, Aspects, Affixes, Paragon Board, and how to play the build for Season 5.
List of Contents
| Click on a Link to Jump to a Section! | |||||
|---|---|---|---|---|---|
| Build Summary | |
|---|---|
 Blood Lance Necromancer Blood Lance Necromancer |
|
| Focus: Leveling, Helltide | |
|
|
|
The Blood Lance Necromancer build capitalizes on using the Blood Orbs spawned by your blood skills and uses them as the primary source of your resource regeneration and damage amplification via Blood Lance related aspects to greatly ramp up your damage and defeat hordes of mobs with ease.
We maximize our HP to increase Overpower damage and Critical Strike and Damage to achieve millions of damage while throwing unlimited amounts of Blood Lances to enemies.
Leveling Guide
| Click on a Link to Jump to a Section! | |||||
|---|---|---|---|---|---|
| Skill List |
|---|
┗
┗
┗
|
┗
┗
┗
|
┗
┗
┗
|
┗
┗
┗
┗
┗
|
┗
┗
┗
┗
┗
┗
┗
┗
|
┗
┗
┗
┗
┗
|
| Skeleton Warriors | Skeleton Mages | Golem |
|---|---|---|
 Skirmisher Skirmisher Sacrifice |
 Bone BoneSacrifice |
 Iron IronSacrifice |
For your Book of the Dead, we will focus on sacrificing all summons for a Necromancer only playstyle.
Our sacrifices will be Skirmisher for Warriors, Bone for Mages and Iron for the Golem which would grant us Critical Strike Chance, Damage, and Overpower damage which are all important stats that the build severely needs.
| Click on a Link to Jump to a Section! | |||||
|---|---|---|---|---|---|
| Gear | Aspect and Affixes |
|---|---|
| Head | ・Max Life ★★ ・Maximum Resource ・Armor★ ・Cooldown Reduction |
| Chest | ・Max Life ・Blood Lance Duration ・Damage Reduction from enemies affected by blood skills ・+ Rank to Blood Lance★★★ |
| Gloves | ・Max Life ・+ Rank to Blood Lance★★★ ・Attack Speed ・+ Max Life Temper: ・ Blood Attack Speed ・ Corpse Tendrils Size |
| Pants | ・Max Life ・Overpower Damage ★★★ ・Curse Duration ・ + Rank to Curse Skills |
| Boots | ・Max Life ・Max Life ★★★ ・Resistance to all Elements ・Intelligence Temper: ・ Movement Speed ・ Corpse Tendrils Size |
| Amulet | ・Max Life ・Attack Speed ・Critical Strike Chance ・Ranks of Tides of Blood ★★★ Temper: ・ Blood Attack Speed ・ Blood Orb Restores Essence |
| Ring | ・Critical Strike Chance ・Critical Strike Damage ・Attack Speed Temper: ・ Blood Attack Speed ・ Blood Orb Restores Essence |
| Ring | ・Attack Speed ・Critical Strike Chance ・Lucky Hit Chance ・+ Rank to Core Skills |
| Weapon | ・Max Life ・Over Power Damage ・Intelligence Temper: ・ Bone Storm Duration ・ Blood Attack Speed |
| Offhand Weapon | ・Max Life ・Over Power Damage ・Intelligence Temper: ・ Bone Storm Duration ・ Blood Attack Speed |
This is our Aspect and Gear setup for the Blood Lance build. For our Mythic Uniques, we slot in Harlequin Crest and Ring of Starless Skies for our Mythics due to their damage reduction and resource saving effects. Both can also increase our overall performance thanks to their Core Skill buff (+rank to skills).
For regular Uniques, we equip Blood Moon Breeches for the bonus Overpower damage to cursed units which synergizes well with Decrepify while having a good stat set save for Curse Duration. Additionally, we also require a Mutilator Plate to enhance our Blood Orb generation and also increase our Blood Lance's damage.
For our Aspects, we simply need to equip the two Blood Lance affixes Hungry Blood and Gore Quills to strengthen our mob clear. We also equipped Rathma's Chosen to grant us a massive Attack Speed steroid that can greatly ramp up our DPS, Overpower Triggers, and to spread our Blood Lance to multiple units. Grasping Veins is also equipped for the extra critical strike chance and damage which will top up our Critical Strike chance to max value.
| Gear Change | ||
|---|---|---|
|
(Head) |
> |
|
|
(Chest) |
> |
|
We highly recommend getting Shielding Storm to replace Harlequin Crest as the extra barrier we get from Bone Storm will be able to compensate the damage reduction we would otherwise get from the mythic helm.
For the ring, we'll want to replace Ring of Starless Skies with Aspect of Potent Blood. This will allow us to generate extra Essence that the Ring of Starless Skies would have otherwise saved us from spending.
| Click on a Link to Jump to a Section! | |||||
|---|---|---|---|---|---|

For the Starting Board, we'll take the right path to take some damage stats but also scale down to get the resistance nodes.
We slotted in a Control glyph to maximize its effect thanks to the 70 Intelligence we can get from the starter board and maximize our damage against Decrepified enemies.

We slot in the Dominate glyph for the second board and take all the Willpower nodes we can within its radius. Avoid the Blood Orb healing nodes as what we want from the board are its Overpower effects and the healing bonus it gives will not be valuable for our build.
We'll also want to make a detour and open two paragon boards from here so we'll make a route to the left gate to open the Bone Graft board and a path to the right to obtain several magic and rare damage nodes and another paragon board.

This is a small board and we won't be taking any bone nodes nor the board's legendary node. Instead, we'll simply take the closest route possible and get the Essence per kill nodes to ensure that we're always topped up with Essence when dealing with mob groups.

On the Blood Bath board, We'll want to hit every magic and rare node except for the healing nodes near the glyph node.
We'll want to slot in Essence and take all Dexterity nodes in its radius to maximize the 100% Critical strike chance we have when using Corpse Tendrils and Bone Storm together.

For the last board, we chose Flesh Eater as it has one of the better magic and rare nodes for non-blood builds as it allows us to get extra elemental resistance and damage to elites which our build is weak against.
For the actual glyph we'll use, we want to slot in Undaunted to get extra damage reduction and increased damage while Fortified which is extremely easy to attain with this build.
| Click on a Link to Jump to a Section! | |||||
|---|---|---|---|---|---|
| Armor | Jewelry | Weapons |
|---|---|---|
 Royal Ruby Royal Ruby
|
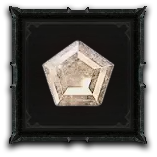 Royal Diamond Royal Diamond
|
 Royal Ruby Royal Ruby
|
Similar to our Stat Affix priorities, we want to ramp up our Overpower damage as much as possible. Rubies on our Armor and Weapons will allow us to maximize our Overpower hits.
Our Accessory slot is flexible depending on our defensive needs. If we haven't hit our Armor value to 9230 yet, be sure to first equip Skulls to increase your armor to the required value. Otherwise, equip Diamonds to increase your resistances to the highest cap.
| Click on a Link to Jump to a Section! | |||||
|---|---|---|---|---|---|
| How to Play the Blood Lance Build |
|---|
Before initiating fights against mob groups, always use the debuffs that you can use. Most of the time, this would be Decrepify as there's no condition to use it save for some Essence cost and it will greatly amplify your damage thanks to Blood Moon Breeches as well as other effects we have from the build.
The second debuff would be Corpse Tendrils but to use it, you'll require an existing Corpse which won't always be available every fight. Always use Corpse Tendrils once a corpse is available and there's still a huge mob group to hasten your clears.
A unique aspect of Blood Mist is that it can be cast even when the Necromancer is stunned, petrified, or any form of Crowd Control. Use it to get out of sticky situations before resuming your Blood Lance spam.

| All Classes | |||||
|---|---|---|---|---|---|
Season 5 Blood Lance Endgame Build

Genshin Impact Walkthrough & Guides Wiki

Wuthering Waves Walkthrough & Guides Wiki

Palworld Walkthrough & Guides Wiki

Honkai: Star Rail Walkthrough & Guides Wiki

Pokemon TCG Pocket (PTCGP) Strategies & Guides Wiki

Pokemon Scarlet and Violet (SV) Walkthrough & Guides Wiki

Zenless Zone Zero Walkthrough & Guides Wiki

Path of Exile 2 (PoE 2) Walkthrough & Guides Wiki

Metaphor: ReFantazio Walkthrough & Guides Wiki

Infinity Nikki Walkthrough & Guides Wiki

Yu-Gi-Oh! Master Duel Walkthrough & Guides Wiki

Fire Emblem Heroes (FEH) Walkthrough & Guides Wiki

Diablo 4: Vessel of Hatred Walkthrough & Guides Wiki

Super Smash Bros. Ultimate Walkthrough & Guides Wiki

Elden Ring Shadow of the Erdtree Walkthrough & Guides Wiki

Once Human Walkthrough & Guides Wiki

Pokemon Brilliant Diamond and Shining Pearl (BDSP) Walkthrough & Guides Wiki

Dragon Quest Monsters: The Dark Prince Walkthrough & Guides Wiki

Cyberpunk 2077: Phantom Liberty Walkthrough & Guides Wiki

Persona 3 Reload Walkthrough & Guides Wiki
©2022 BLIZZARD ENTERTAINMENT, INC. ALL RIGHTS RESERVED.
All trademarks referenced herein are the properties of their respective owners.
The copyrights of videos of games used in our content and other intellectual property rights belong to the provider of the game.
The contents we provide on this site were created personally by members of the Game8 editorial department.
We refuse the right to reuse or repost content taken without our permission such as data or images to other sites.