Reithwin Town Maps and Points of Interest
★ All Updates for Patch 5
☆ Beginner Guides for All Starter Players
★ Simple Character Creation Guide for beginners
☆ A Full Guide to Multiclassing
★ All Side Quests and Event Points
☆ All Races and Subraces
In Baldur's Gate 3, Reithwin Town is the town you need to pass through to get to the Moonrise Towers, Gauntlet of Shar, and the Road to Baldur's Gate. Read on to view the maps of Reithwin Town, and to find out all the locations and other points of interest in the area.
List of Contents
Reithwin Town Maps
| Reithwin Town Main Map | |
| Grand Mausoleum | House of Healing Morgue |
| Sharran Sanctuary | Masons Guild Basement |
Reithwin Town Main Map
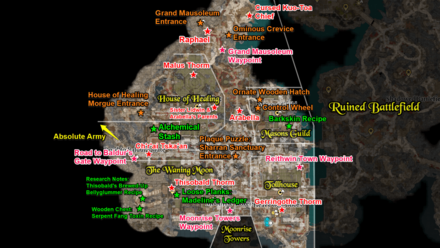
This map covers the whole portion of Reithwin Town in the Shadow-Cursed Lands overworld. You can get to the town by going southwest of the Ruined Battlefield area.
The town is composed of many locations, including the Tollhouse, Masons Guild, House of Healing, and The Waning Moon.
Shadow-Cursed Lands Maps and Points of Interest
Grand Mausoleum Map

In the northern part of Reithwin Town, you'll find the entrance to the Grand Mausoleum. You'll have to pass through here to get to the Gauntlet of Shar area.
Gauntlet of Shar Trial Guides
House of Healing Morgue Map
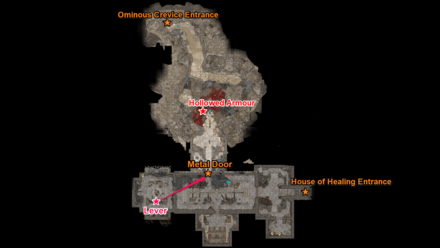
To the west of the House of Healing, you'll find the entrance to the Morgue. You can also get inside this area in the northern part of the town, in an entrance called the Ominous Crevice.
Sharran Sanctuary Map
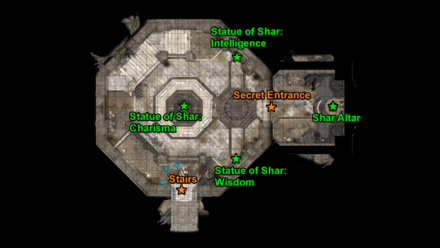
The Sharran Sanctuary is a tiny secret area beneath Reithwin Town. It can be reached by solving the plaque puzzle in the middle of the town.
Masons Guild Basement Map
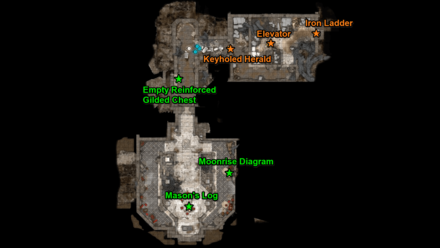
The Masons Guild Basement is a tiny area beneath the Masons Guild area in Reithwin Town. It can reached by either going in the Ornate Wooden Hatch in the Masons Guild, or interacting with the Control Wheel just outside of it.
Reithwin Town Locations
| Reithwin Tollhouse | Reithwin Masons Guild |
| The Waning Moon | Grand Mausoleum |
| House of Healing | House of Healing Morgue |
| Sharran Sanctuary | |
Reithwin Tollhouse

The Reithwin Tollhouse is located southeast of the town, just beside the entrance and the Reithwin Town Waypoint. You can find Gerringothe Thorm inside in the second floor, as well as some Visages scattered around the area.
You'll find a few locked rooms and chests around the area with gold and valuable equipment inside.
Reithwin Masons Guild
The Reithwin Masons Guild is located at the eastern part of the town. Aside from a few collectibles scattered around, the points of interest here are the two entrances to the basement.
The Waning Moon
The Waning Moon is located southwest of the town, and is where you'll find Thisobald Thorm. Behind Thisobald Thorm, there is a secret room with a couple of Alchemy recipes and other valuables inside.
Grand Mausoleum

The Grand Mausoleum is a separate area with an entrance located at the northern part of town. There's a puzzle inside that you have to get through, to get to the entrance of the Gauntlet of Shar at the end of the mausoleum.
House of Healing
The House of Healing is an area located at the northwestern part of town. Inside, you'll find Malus Thorm and his nurses, the Sisters.
House of Healing Morgue
The House of Healing Morgue is a separate area located beneath the House of Healing, and connects to another entrance located north of the Grand Mausoleum waypoint.
There are a couple of groups of enemies inside as well as various lootable equipment.
Sharran Sanctuary
The Sharran Sanctuary is a separate area located beneath the middle of the town. There are statues inside that will give you blessings that boost your stats if you pass the Saving Throw checks (if you fail, you gain debuffs instead).
These blessings can only be gained once and will wear off after a Long Rest. If you take the Ritual Dagger by the altar, you'll have to battle a group of Sentinel enemies.
Reithwin Town Points of Interest
| Reithwin Town Points of Interest |
|---|
|
|
Waypoints
Reithwin Town Waypoint
| Reithwin Town Waypoint |
|---|
 |
| Coordinates: (83, -49) |
The first waypoint that you'll encounter is the Reithwin Town Waypoint, located just near the southeastern entrance. The Tollhouse and Masons Guild areas are located beside this waypoint.
Moonrise Towers Waypoint
| Moonrise Towers Waypoint |
|---|
 |
| Coordinates: (-157, -96) |
The Moonrise Towers Waypoint is located south of Reithwin Town. You'll enter the Moonrise Towers by going further south from this waypoint.
How to Get to Moonrise Towers
Grand Mausoleum Waypoint
| Grand Mausoleum Waypoint |
|---|
 |
| Coordinates: (-173, 75) |
The Grand Mausoleum Waypoint is located at the northern part of Reithwin Town. The Grand Mausoleum entrance can be found just near this waypoint.
Road to Baldur's Gate Waypoint
| Road to Baldur's Gate Waypoint |
|---|
 |
| Coordinates: (-266, -31) |
In the western part of the town, you'll find the Road to Baldur's Gate Waypoint. There's an Absolute army past this waypoint, which will cause you to go to the Moonrise Towers prison if you go too early without having done certain quests yet.
Entrances
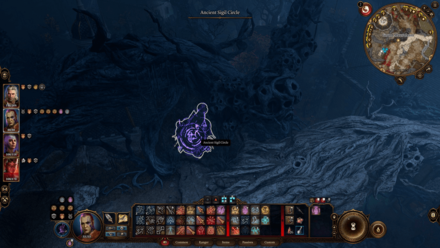
Plaque Puzzle: Sharran Sanctuary Entrance
| Plaque Puzzle: Sharran Sanctuary Entrance |
|---|
 |
| Coordinates: (153, -40) |
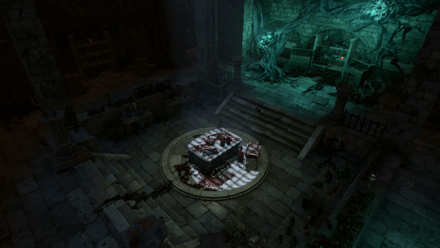
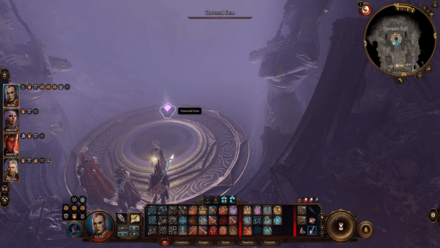
In the middle of the town, west of the Reithwin Town waypoint, you'll find a giant statue with three plaques surrounding it. You have to interact with the plaques in a specific order to open up the entrance.
The plaques read certain parts of an inscription: Our Lady of Loss, Mistress of Pain, When Night Falls, Thorm Shall Rise. You can spell this out and open the entrance by reading the plaques in this order: North, West, East.
Ornate Wooden Hatch: Masons Guild Basement Entrance
| Ornate Wooden Hatch |
|---|
 |
| Coordinates: (-128, 28) |
Inside the Masons Guild area, you'll find an Ornate Wooden Hatch. This is one of the entrances to the Masons Guild Basement.
Control Wheel: Masons Guild Basement Entrance
| Control Wheel |
|---|
 |
| Coordinates: (-131, 22) |
Not far from the Ornate Wooden Hatch entrance, located outside the Masons Guild area, you'll find a Control Wheel, which connects to an Elevator passage. This is the other entrance to the Masons Guild Basement.
Grand Mausoleum Entrance
| Grand Mausoleum Entrance |
|---|
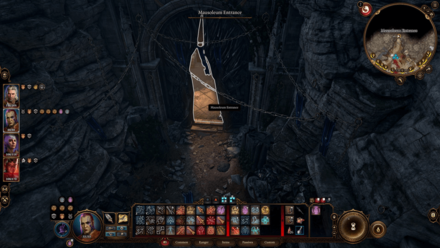 |
| Coordinates: (-190, 112) |
The Grand Mausoleum Entrance is located near the Grand Mausoleum Waypoint, due west. You may encounter Raphael outside the entrance, who will then give you the Kill Raphael's Old Enemy quest.
House of Healing Morgue Entrance
| House of Healing Morgue Entrance |
|---|
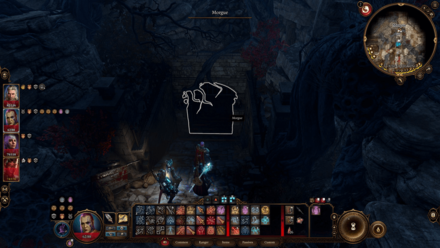 |
| Coordinates: (-254, 13 ) |
The Morgue area beneath the town has two entrances. One of them is the Morgue Entrance located west of the House of Healing.
Ominous Crevice
| Ominous Crevice |
|---|
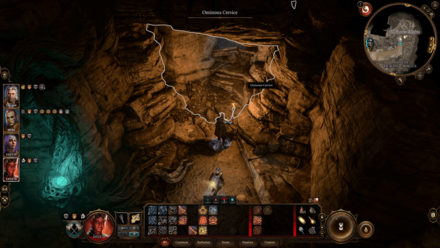 |
| Coordinates: (23, -888) |
The Ominous Crevice is the other entrance to the House of Healing Morgue. It is located by the coast at the northern part of the town.
Beings of Interest
Gerringothe Thorm
| Gerringothe Thorm |
|---|
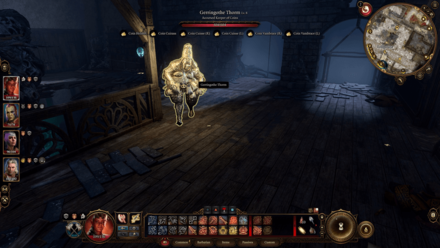 |
| Coordinates: (-109, -89) |
In the Reithwin Tollhouse, you'll find Gerringothe Thorm patrolling the second floor and periodically dropping piles of gold.
If you wish to fight her, note that she has an incredible amount of HP; this can be decreased by destroying the Visages around the Tollhouse. It's a good idea to stealthily do this before confronting the boss.
You can also avoid a fight by passing certain dialogue checks instead. You'll get the experience and rewards. If you pay her 5000 or more Gold, you can also get the Signed Trade Visa scroll.
How to Beat Gerringothe Thorm (Toll House)
Thisobald Thorm
| Thisobald Thorm |
|---|
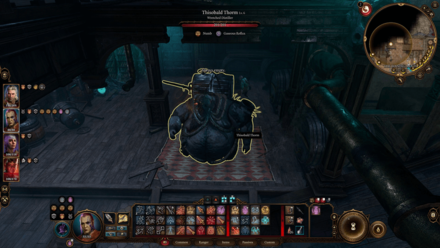 |
| Coordinates: (-227, -71) |
In the Waning Moon bar, you'll find Thisobald Thorm, who will invite you to drink with him and tell stories of your adventures.
If you fail certain checks or choose certain options, you'll go into battle with him; otherwise, you can skip the battle and gain the experience and rewards.
You can loot the Worn Key from him, which unlocks the door behind the bar.
How to Beat Thisobald Thorm (Waning Moon)
Malus Thorm
| Malus Thorm |
|---|
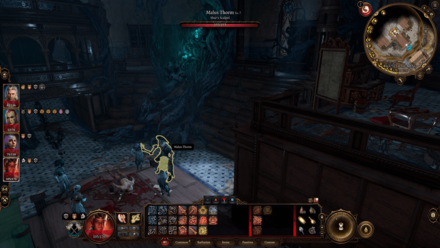 |
| Coordinates: (-199, -56) |
In the House of Healing, you'll find Malus Thorm, who is doing an operation accompanied by some nurses.
If you pass certain checks, you can skip the battle and gain the experience and rewards; otherwise, you'll have to go in battle with him and the nurses.
He has the Broken Lute, which you need to have to wake up Art Cullagh as part of the Lift the Shadow Curse quest.
How to Beat Malus Thorm (House of Healing)
Raphael
| Raphael |
|---|
 |
| Coordinates: (-184, 103) |
You can encounter Raphael outside the Grand Mausoleum. The first time you approach its entrance, you will get into a cutscene where he talks to you and gives the Kill Raphael's Old Enemy quest.
Arabella
| Arabella |
|---|
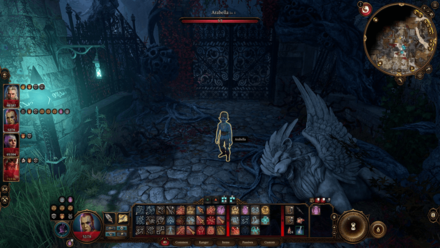 |
| Coordinates: (-152, 14) |
If you kept Arabella alive in Act 1, you'll encounter her in the outskirts of Reithwin Town, looking for her parents. You can convince her to join your camp while you look for her parents.
You can find her parents with Sister Lidwin at the House of Healing. Telling her what happened to them will get you a reward.
Sister Lidwin: Arabella's Parents
| Sister Lidwin: Arabella's Parents |
|---|
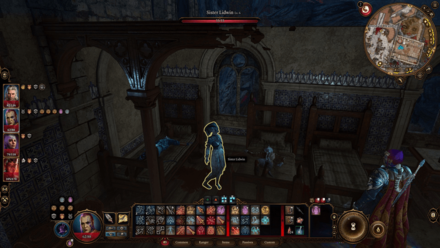 |
| Coordinates: (-182, 18) |
Sister Lidwin is one of the nurses working for Malus Thorm in the House of Healing; unlike the others, though, she's in a separate room and won't fight with the others. She is a trader and has some ingredients available for trading, even if you already defeated Malus Thorm.
She's also looking over Arabella's Parents. After finding them, you can tell Arabella what happened to them to finish her quest.
Cursed Kuo-Toa Chief
| Cursed Kuo-Toa Chief |
|---|
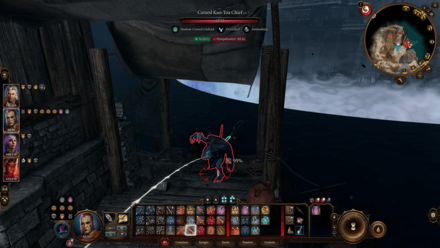 |
| Coordinates: (-136, 122) |
In the northern part of the town, surrounding a house on the beach coast, there are a bunch of Kuo-Toa enemies led by the Cursed Kuo-Toa Chief. They'll initially be invisible, so try to have a way to see Invisibility so that you don't get ambushed.
Ch'r'ai Tska'an
| Ch'r'ai Tska'an |
|---|
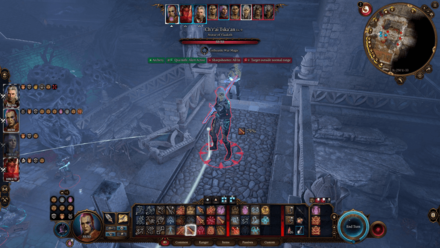 |
| Coordinates: (-250, -33) |
As you approach the Road to Baldur's Gate in the western part of the town, you might get ambushed by a group of githyankis led by Ch'r'ai Tska'an. She drops the Very Rare Hr'a'cknir Bracers upon defeat.
Valuables
Elixir of Barkskin Recipe
| Elixir of Barkskin Recipe |
|---|
 |
| Coordinates: (-110, 3) |
The Barkskin Recipe can be found on a table in the Masons Guild. Reading this allows you to craft Elixir of Barkskin potions with Alchemy.
Elixir of Barkskin Item Guide
Loose Planks: Madeline's Ledger
| Loose Planks: Madeline's Ledger |
|---|
 |
| Coordinates: (-223, -79) |
Near Thisobald Thorm's initial area in the Waning Moon, you can spot a bunch of Loose Planks with a perception check. You can find Madeline's Ledger inside, which is the item you need to get for the Punish the Wicked quest given by He Who Was.
Help He Who Was: Punish the Wicked
Wooden Chest: Serpent Fang Toxin Recipe
| Wooden Chest: Serpent Fang Toxin Recipe |
|---|
 |
| Coordinates: (-259, -90) |
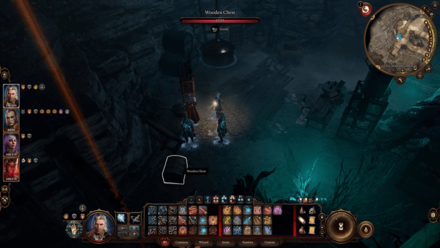
In the storage room behind the Waning Moon, you can find the Serpent Fang Toxin Recipe inside a Wooden Chest. Read this to be able to craft Serpent Fang Toxins with Alchemy.
Serpent Fang Toxin Item Guide
Research Notes: Thisobald's Brewed-Up Bellyglummer Recipe
| Thisobald's Brewed-Up Bellyglummer Recipe |
|---|
 |
| Coordinates: (-255, -84) |
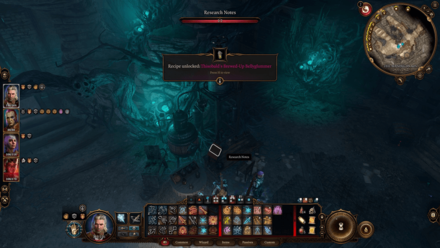
In the storage room behind the Waning Moon, you'll find some Research Notes on a table. Reading this unlocks the Thisobald's Brewed-Up Bellyglummer Recipe, allowing you to craft with Alchemy.
This also marks the Brewer's Alchemical Stash in your map, which contains ingredients to concoct the potion.
Thisobald's Brewed-Up Bellyglummer Item Guide
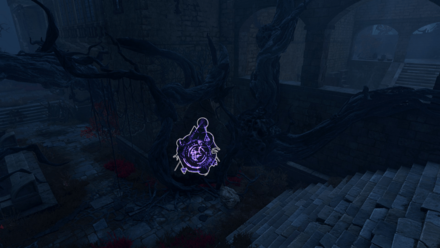
Brewer's Alchemical Stash
| Brewer's Alchemical Stash |
|---|
 |
| Coordinates: (-248, -6) |
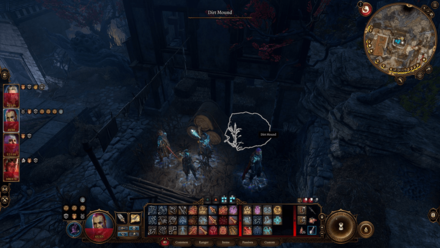
When you examine the Research Notes in the Waning Moon, you'll get a marked location pointing to a Brewer's Alchemical Stash in the map. Going to this location, you'll find the stash beneath a dirt mound and inside a chest.
The stash contains a few pieces of the rare Corpse Rose ingredient, as well as other ingredients needed for the Thisobald's Brewed-Up Bellyglummer.
Grand Mausoleum Points of Interest
| Grand Mausoleum Points of Interest |
|---|
|
|
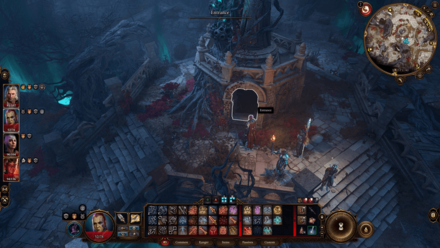
Painting Puzzle: Hidden Door
| Painting Puzzle: Hidden Door |
|---|
 |
| Coordinates: (-280, -829) |
In the Grand Mausoleum, you'll encounter a bunch of paintings on some walls. There are three of them, and you need to press the button underneath each painting to unlock the hidden doors.
The correct order for pressing these buttons is: Moonrise Towers, Grief, General. If you press the wrong order, the traps around the area will be set off, releasing poison gas.
Traversal Gem
| Traversal Gem |
|---|
 |
| Coordinates: (-277, -810) |
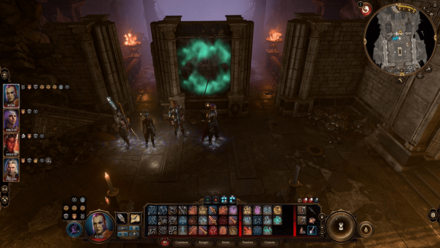
At the other end of the Grand Mausoleum, passing through the hidden door that opens upon solving the painting puzzle, you'll find a Traversal Gem. Interact with it, and you'll be sent to the Gauntlet of Shar area.
House of Healing Morgue Points of Interest
| House of Healing Morgue Points of Interest |
|---|
|
|
Metal Door
| Metal Door |
|---|
 |
| Coordinates: (44, -975) |
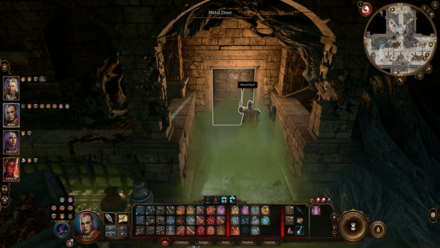
Inside the House of Healing, you'll encounter a Metal Door with a lever beside it. You'll find that it won't open and using the lever beside also has no effect.
To open this door, you'll need to use a lever located in the west room of the Morgue. This will allow you to use the lever beside the metal door, opening it.
Hollowed Armour
| Hollowed Armour |
|---|
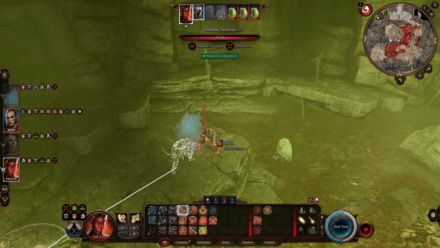 |
| Coordinates: (44, -937) |
In the middle of the Morgue area, you'll find a chasm that you can go down into. You'll find the Hollowed Armour boss, who along with other monsters, will attack you in an ambush.
Sharran Sanctuary Points of Interest
| Sharran Sanctuary Points of Interest |
|---|
|
|
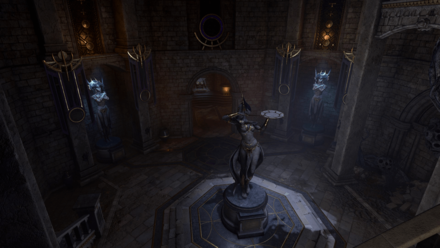
Statues of Shar
| Statues of Shar |
|---|
 |
| Coordinates: (239, -839) |
In the Sharran Sanctuary, you'll find a bunch of Shar Statues. Interact with them, then pass the Saving Throw check to get the blessing for that particular statue. There is a statue for Intelligence, Wisdom, and Charisma. If you fail the Saving Throw check, you'll gain a debuff instead of a blessing.
These blessings can be received only once per playthrough. They will also wear off after a Long Rest.
Secret Entrance
| Secret Entrance |
|---|
 |
| Coordinates: (240, -846) |
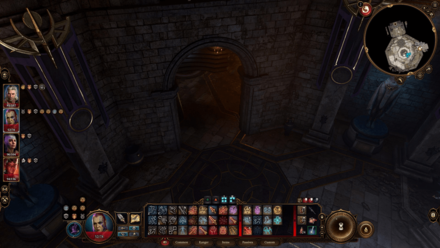
There is a secret entrance in the sanctuary, located between the two statues by the wall. To open this secret entrance, you need to interact with the statues and pass the Saving Throw for each one.
Shar Altar
| Shar Altar |
|---|
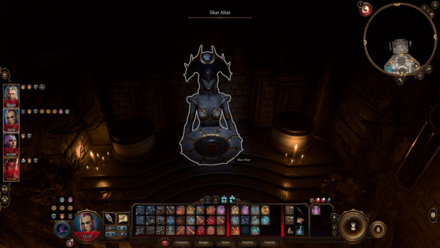 |
| Coordinates: (252, -846) |
Behind the Secret Entrance, you'll find the Shar Altar. If you choose to sacrifice your blood for the ritual using the Ritual Dagger in front of the altar, several lootables will appear around the altar.
Shar Sentinels
| Shar Sentinels |
|---|
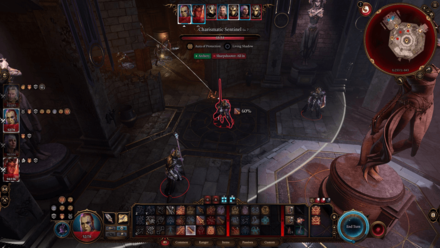 |
| Coordinates: (233, -843) |
You can choose to take the Ritual Dagger from the altar. If you do so, three Sentinels corresponding to each of the stats will appear and attack you.
Masons Guild Basement Points of Interest
| Masons Guild Basement Points of Interest |
|---|
|
|
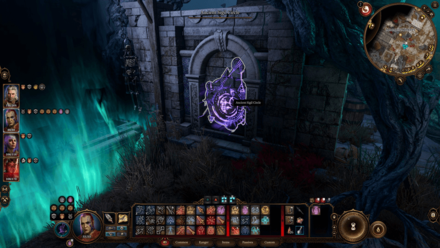
Keyholed Herald Entrance
| Keyholed Herald Entrance |
|---|
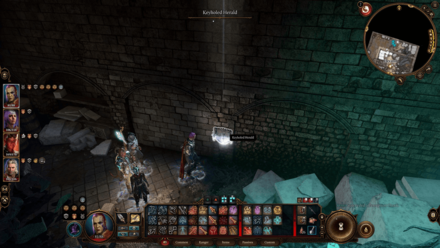 |
| Coordinates: (122, -688) |
In the Mason's Guild Basement, you'll encounter a Keyholed Herald on a wall. You'll need the Tower-Shaped Key to open this, which you can get from the tiefling Mattis in the Last Light Inn.
Empty Reinforced Gilded Chest
| Empty Reinforced Gilded Chest |
|---|
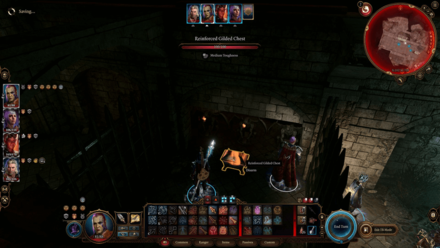 |
| Coordinates: (102, -703) |
Along the path, you'll find a Reinforced Gilded Chest, which you might notice has a trap. Ignore this chest, as this is an empty chest and activating the trap is very dangerous! If you don't notice the trap or fail on disarming it, gates will surround you and the fire traps surrounding the chest will activate.
Moonrise Diagram
| Moonrise Diagram |
|---|
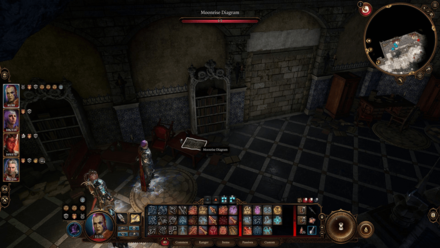 |
| Coordinates: (122, -737) |
Deep in the Masons Guild Basement, you'll find the Moonrise Diagram. Reading this marks a stash location in the Moonrise Towers.
Mason's Log
| Mason's Log |
|---|
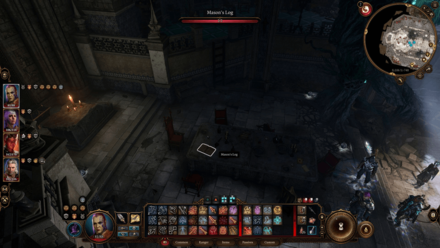 |
| Coordinates: (106, -748) |
You'll find the Mason's Log deep in the basement. Read this to finish the Investigate the Selûnite Resistance quest if you have it currently active.
Investigate the Selûnite Resistance
Baldur's Gate 3 Related Guides
Faerûn All Locations
| Prologue Locations | |
|---|---|
| Nautiloid | |
| Act 1 Locations | |
| Wilderness | Chapel Ruins |
| Emerald Grove | Owlbear Nest |
| Blighted Village | Whispering Depths |
| Putrid Bog (Sunlit Wetlands) | Overgrown Tunnel |
| The Risen Road | Zhentarim Basement |
| Goblin Camp | Mountain Pass: Rosymorn Monastery |
| Creche Y'llek | Underdark |
| Arcane Tower | Grymforge |
| Act 2 Locations | |
| Shadow-Cursed Lands | Reithwin Town |
Comment
Author

Reithwin Town Maps and Points of Interest
Rankings
- We could not find the message board you were looking for.
Gaming News


Popular Games

Genshin Impact Walkthrough & Guides Wiki
Honkai: Star Rail Walkthrough & Guides Wiki
Arknights: Endfield Walkthrough & Guides Wiki
Umamusume: Pretty Derby Walkthrough & Guides Wiki
Wuthering Waves Walkthrough & Guides Wiki
Pokemon TCG Pocket (PTCGP) Strategies & Guides Wiki
Abyss Walkthrough & Guides Wiki
Zenless Zone Zero Walkthrough & Guides Wiki
Digimon Story: Time Stranger Walkthrough & Guides Wiki
Clair Obscur: Expedition 33 Walkthrough & Guides Wiki


Recommended Games
Fire Emblem Heroes (FEH) Walkthrough & Guides Wiki
Pokemon Brilliant Diamond and Shining Pearl (BDSP) Walkthrough & Guides Wiki
Diablo 4: Vessel of Hatred Walkthrough & Guides Wiki
Super Smash Bros. Ultimate Walkthrough & Guides Wiki
Yu-Gi-Oh! Master Duel Walkthrough & Guides Wiki
Elden Ring Shadow of the Erdtree Walkthrough & Guides Wiki
Monster Hunter World Walkthrough & Guides Wiki
The Legend of Zelda: Tears of the Kingdom Walkthrough & Guides Wiki
Persona 3 Reload Walkthrough & Guides Wiki
Cyberpunk 2077: Ultimate Edition Walkthrough & Guides Wiki


All rights reserved
© 2023 Larian Studios. All rights reserved. Larian Studios is a registered trademark of arrakis nv, affiliate of Larian Studios Games ltd. All company names, brand names, trademarks and logos are the property of their respective owners. © 2020 Wizards of the coast. All rights reserved. Wizards of the coast, Baldur’s Gate, Dungeons & Dragons, D&D, and their respective logos. Are registered trademarks of wizards of the coast LLC
The copyrights of videos of games used in our content and other intellectual property rights belong to the provider of the game.
The contents we provide on this site were created personally by members of the Game8 editorial department.
We refuse the right to reuse or repost content taken without our permission such as data or images to other sites.