List of All Dungeons and Story Walkthrough
The main story of The Legend of Zelda: Link's Awakening (Remake) for the Nintendo Switch will have you go through 9 Dungeons! Here's a list of all Dungeons, including the optional Color Dungeon, and their walkthroughs!
List of Contents
List of All Dungeons
Dungeon Locations
| Icon | How to Use |
|---|---|
 | Show Names This button reveals the Name of every icon currently shown. |
 | Show Pins This button will toggle between showing and hiding all the pins that you have already marked as acquired. |
 | Fullscreen This button will change the map display to fill the screen. |
 | Search Mode Toggle This button will display a search bar which you can use to search for an individual pin by its name. |
 | Icon Mode Toggle In Search Mode, this button will toggle you back to Icon Mode, removing the search bar and displaying the icons again. |
 | All Pins This button is shown along with the Icons on the right when there are over 6 types of pins. Click it for a full selection of all available pin types. |
 | Counter Tracks the number of pins you have of a certain type. The pin type shown is set to the page and currently cannot be changed; however, all pin type counters can be viewed by clicking the checklist icon on the right side. |
| View All Counters This icon is found on the right side of the Counter. When a map has more than one pin type, click this icon to see Counters for all pin types. |
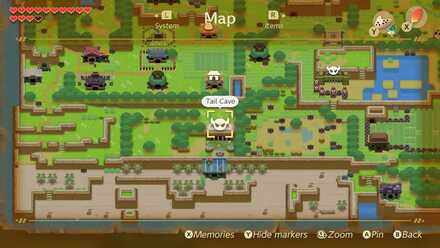
Level 1 - Tail Cave
| Tail Cave | ||
|---|---|---|
 |
||
| Dungeon | Obtainable Item | Main Boss |
| Tail Cave |
|
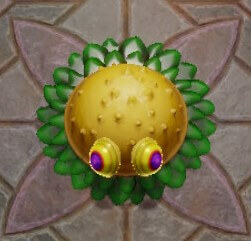 Moldorm Moldorm
|
You will first need to obtain the Tail Key from the Mysterious Forest before entering.
Level 1 - Tail Cave Walkthrough
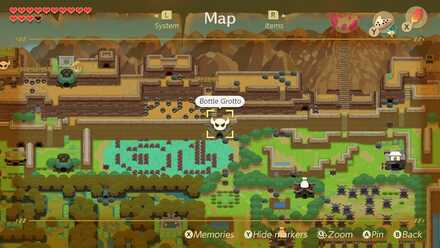
Level 2 - Bottle Grotto
| Bottle Grotto | ||
|---|---|---|
 |
||
| Dungeon | Obtainable Item | Main Boss |
| Bottle Grotto |
|
 Genie Genie
|
You must be accompanied by BowWow in order to enter.
Level 2 - Bottle Grotto Walkthrough
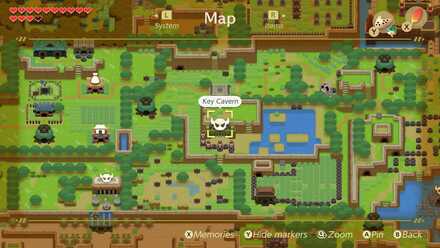
Level 3 - Key Cavern
| Key Cavern | ||
|---|---|---|
 |
||
| Dungeon | Obtainable Item | Main Boss |
| Key Cavern |
|
 Slime Eye Slime Eye
|
You first need to obtain the Slime Key by returning the five Golden Leaves to Richard in his Villa.
Level 3 - Key Cavern Walkthrough
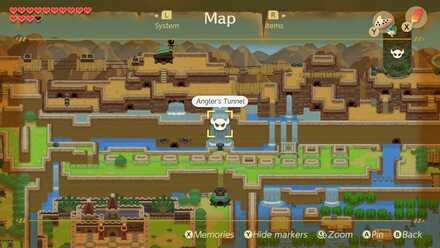
Level 4 - Angler's Tunnel
| Angler's Tunnel | ||
|---|---|---|
 |
||
| Dungeon | Obtainable Item | Main Boss |
| Angler's Tunnel |
|
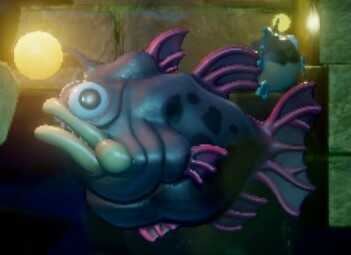 Angler Fish Angler Fish
|
You first need to obtain the Angler Key by defeating Lanmola in Yarna Desert.
Level 4 - Angler's Tunnel Walkthrough
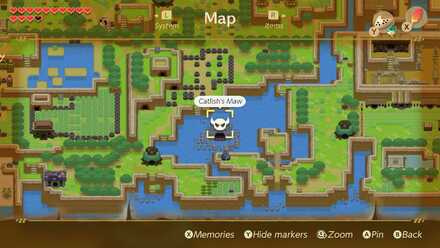
Level 5 - Catfish's Maw
| Catfish's Maw | ||
|---|---|---|
 |
||
| Dungeon | Obtainable Item | Main Boss |
| Catfish's Maw |
|
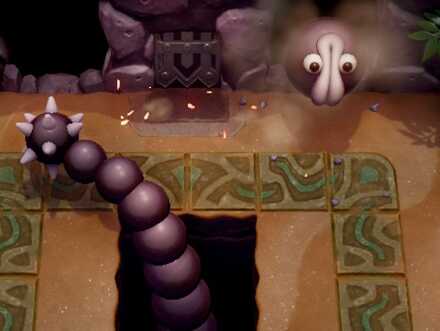 Slime Eel Slime Eel
|
You will need to have the Flippers from the previous dungeon in order to enter.
Level 5 - Catfish's Maw Walkthrough
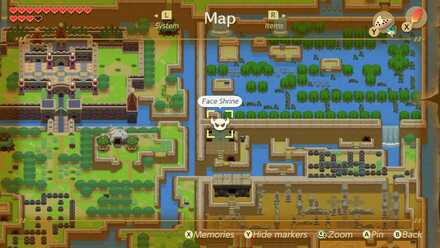
Level 6 - Face Shrine
| Face Shrine | ||
|---|---|---|
 |
||
| Dungeon | Obtainable Item | Main Boss |
| Face Shrine |
|
 Facade Facade
|
You first need to obtain the Face Key by defeating the Armos Knight at the Ancient Ruins.
Level 6 - Face Shrine Walkthrough
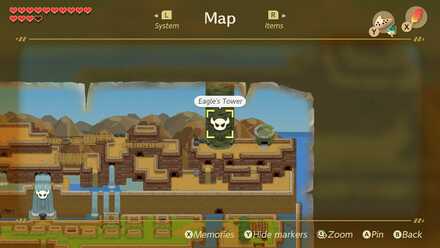
Level 7 - Eagle's Tower
| Eagle's Tower | ||
|---|---|---|
 |
||
| Dungeon | Obtainable Item | Main Boss |
| Eagle's Tower |
|
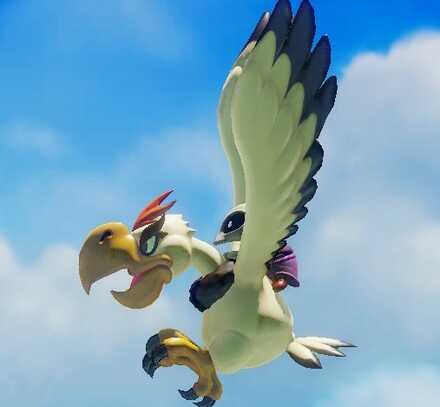 Evil Eagle Evil Eagle
|
You will first need to obtain the Bird Key from Tal Tal Heights.
Level 7 - Eagle's Tower Walkthrough
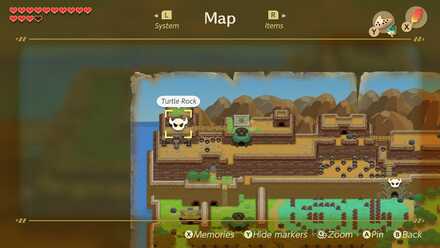
Level 8 - Turtle Rock
| Turtle Rock | ||
|---|---|---|
 |
||
| Dungeon | Obtainable Item | Main Boss |
| Turtle Rock |
|
 Hot Head Hot Head
|
You will need to have obtained the Mirror Shield from the previous dungeon to enter.
Level 8 - Turtle Rock Walkthrough
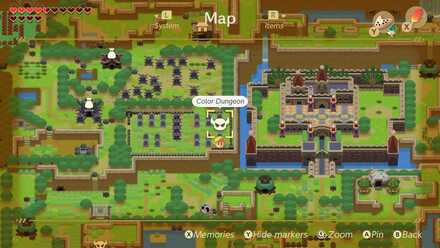
Color Dungeon (Optional)
| Color Dungeon | ||
|---|---|---|
 |
||
| Dungeon | Obtainable Item | Main Boss |
| Color Dungeon | None |
 Hardhit Beetle Hardhit Beetle
|
You will need to have obtained the Power Bracelet from Bottle Grotto to enter.
Wind Fish's Egg
| Wind Fish's Egg | ||
|---|---|---|
| Dungeon | Obtainable Item | Main Boss |
| Wind Fish's Egg | None |
 Dethl Dethl
|
The final dungeon can only be opened after collecting all Insturments of the Sirens and playing the Ballad of the Wind Fish taught by Marin in front of the egg.
Story Walkthrough
Tail Cave
| No. | Objective |
|---|---|
| 1 | After getting out of bed, speak with Tarin to receive your shield. |
| 2 | Head West, and then South to arrive at Toronbo Shores. |
| 3 | Once there, push the Sea Urchin out of the way and continue South. Continue onto the bay to find your sword . |
| 4 | Head back North toward Mabe Village, and obtain the optional Piece of Heart #1 from the well. |
| 5 | Continue North and enter the Mysterious Forest. |
| 6 | Proceed through the Mysterious Forest. A guide for getting through this area can be found below. |
| 7 | After obtaining the Toadstool and giving it to the witch to receive the Magic Powder, head back into the forest. |
| 8 | Sprinkle the magic powder on the racoon north of the Mysterious Forest entrance to reveal Tarin. Keep going to find a treasure chest with the Tail Key. |
| 9 | After obtaining the key, head south, and then west before reaching the beach. Arrive at Tail Cave, and use the key to unlock the entrance before proceeding inside. |
| 10 | Clear Tail Cave Dungeon. |
Bottle Grotto
| No. | Objective |
|---|---|
| 1 | Leave Tail Cave, and go through the Mysterious Forest toward the witch's hut. |
| 2 | Jump over the holes and pick up Piece of Heart #7 before proceeding to Tal Tal Heights. |
| 3 | Continue north and east to find Moblin's Cave. Step inside and defeat the moblin. |
| 4 | Defeat the 4 moblins in the next room, then continue to the next room to fight with the mini-boss: King Moblin. |
| 5 | Defeat King Moblin to free BowWow. |
| 6 | Go back to the Mysterious Forest, and go to where you go the Tail Key and continue west. Go north to exit the forest, then head east toward Goponga Swamp. |
| 7 | Arrive at Goponga Swamp, and have BowWow eat the plants blocking the path to the dungeon. |
| 8 | After he eats the plants blocking the dungeon, enter Bottle Grotto. |
| 9 | Clear Bottle Grotto Dungeon. |
Key Cavern
| No. | Objective |
|---|---|
| 1 | Go to Mabe Village to return BowWow, and buy a shovel from the shop. |
| 2 | Go to Richard's Villa in Ukuku Prairie and speak with him about the Slime Key. |
| 3 | Win the Yoshi Doll from Trendy Game. |
| 4 | Trade it to the Quadruplets' mother for a Ribbon. |
| 5 | Trade the Ribbon to CiaoCiao at BowWow's house for Dog Food. |
| 6 | Go to Toronbo Shores and trade the Dog Food with Sale for Bananas. |
| 7 | Trade the Bananas to Kiki the monkey near Kanelet Castle to be given a path in. |
| 8 | Kill the Mad Bomber for Golden Leaf 1. |
| 9 | Kill the crow near the west wall for Golden Leaf 2. |
| 10 | Defeat the Darknuts that appear after entering Kanelet Caste for Golden Leaf 3. |
| 11 | Bomb the left Darknut in the left wall after going up the stairs and defeat it for Golden Leaf 4. |
| 12 | Continue through the castle up to the Ball and Chain Solider. Defeat him to obtain Golden Leaf 5. |
| 13 | Return to Richard's Villa. Give him the Golden Leaves for access to Pothole Field. |
| 14 | Make your way around Pothole Field and dig in fron of the Owl statue for the Slime Key. Unlock Key Cavern and go around to enter. |
| 15 | Clear Key Cavern Dungeon. |
Angler's Tunnel
| No. | Objective |
|---|---|
| 1 | Head west toward Kanalet Castle, and find the trees just south of Seashell Mansion. |
| 2 | Cut the single patch of grass to the right of these trees to reveal a hidden staircase, and go down it. |
| 3 | Break the obstacles here and emerge. Go southeast to reach Animal Village. |
| 4 | Take the path between the southern trees to find a Walrus blocking the path. Chef Bear in the bottorm right house will tell you to bring Marin. |
| 5 | Travel back to Mabe Village and obtain the Ocarina from the Dream Shrine. |
| 6 | Head to the east part of Toronbo Shores to find Marin and have her accompany you. |
| 7 | Return to Animal Village and have Marin sing to wake the Walrus. |
| 8 | Enter the Yarna Desert and defeat the Lanmola to get the Angler Key. |
| 9 | Head toward the Bottle Grotto entrance. Move the boulders on the right and head east until you reach a ladder. |
| 10 | Go down the ladder and continue east until you see a statue. Use the Angler Key here to stop the waterfall. |
| 11 | Go back and head up through Tal Tal Heghts. |
| 12 | Continue eastward until you are outside again. Go to where the waterfall previously flowed and jump down to enter Angler's Tunnel. |
| 13 | Clear Angler's Tunnel Dungeon. |
Catfish's Maw
| No. | Objective |
|---|---|
| 1 | (Optional): Exit Angler's Tunnel and go left. Swim into the cave here and learn Manbo's Mambo. |
| 2 | Warp to Ukuku Prairie and head through Mabe Village toward Toronbo Shores. |
| 3 | (Optional): Pick up the Bow from the Mabe Village Shop for 980 Rupees. |
| 4 | Head to the far east section of Toronbo Shores. Pass by the rocks and take the Ghost to the Abandoned House just at the edge of Martha's Bay. |
| 5 | Activate the warp zone around the corner, then warp back to Ukuku Prairie and head north to the Cemetery. |
| 6 | Take the ghost to grave surrounded by flowers in the northwest part of the Cemetary to obtain the Fairy Bottle. |
| 7 | Warp back to Martha's Bay. |
| 8 | (Optional) Collect the Heart Pieces, Seashells, and Inventory Upgrade in the area. |
| 9 | Walk around to the stairs that lead into the bay. Swim to the left side of the large Catfish Statue. |
| 10 | Dive down in the whirlpool between the rocks here. Swim across to the other side to arrive at Catfish's Maw. |
| 11 | Clear Catfish's Maw Dungeon. |
Face Shrine
| No. | Objective |
|---|---|
| 1 | (Optional): Complete the Trading Sequence to obtain the Boomerang. |
| 2 | Return to Mabe Village and purchase the Bow and Arrow set for 980 rupees if you have not. |
| 3 | Warp to Animal Village and go northeast until you reach the Ancient Ruins. |
| 4 | Go through the maze until you reach Southern Face Shrine. |
| 5 | Enter the shrine and defeat Armos Knight to obtain the Face Key. |
| 6 | Go through the field north of the Ancient Ruins and swim to the island with two Armos. |
| 7 | Defeat the left Armos and travel through the cave that appears under him. |
| 8 | Use the Face Key to reveal the Face Shrine. |
| 9 | Clear Face Shrine Dungeon. |
Eagle's Tower
| No. | Objective |
|---|---|
| 1 | Go to Signpost Maze southwest of Mabe Village. |
| 2 | Follow the signs to reach Mamu and learn the Frog’s Song of Soul. |
| 3 | Push the Weather Vane in Mabe Village forward and go down the steps. |
| 4 | Play the Frog’s Song of Soul to awaken the Flying Rooster. |
| 5 | Go through the Tal Tal Mountain Range. Climb the ladder found near the area above the Angler's Tunnel entrance. |
| 6 | Enter the cave just under the Rooster House and use the Flying Rooster to fly across the abyss and obtain the Bird Key. |
| 7 | Continue east through Tal Tal Mountain until you reach the northeast most section (Eagle's Tower). |
| 8 | Lift the boulder blocking the statue and use the Bird Key to open Eagle's Tower before entering. |
| 9 | Clear Eagle's Tower Dungeon. |
Turtle Rock
| No. | Objective |
|---|---|
| 1 | Head to the Hen House, and save Marin on the bridge. |
| 2 | Use the secret staircase to head west. |
| 3 | Pass through the Flame Fountain using your Mirror Shield. |
| 4 | Play Frog's Song of Soul to awaken Turtle Rock. |
| 5 | Defeat Turtle Rock and enter the dungeon through the opening behind him. |
| 6 | Clear Turtle Rock Dungeon. |
Wind Fish's Egg
| No. | Objective |
|---|---|
| 1 | (Optional): Complete the side quests for better equipment in preparation for the final battle. |
| 2 | Stock up on Magic Powder. |
| 3 | Head to the Village Library and read 'Dark Secrets and Mysteries of Koholint'. |
| 4 | Head to Mt. Tamaranch and climb up to the Wind Fish's Egg. |
| 5 | Play Ballad of the Wind Fish, and head inside. |
| 6 | Clear Wind Fish's Egg Dungeon. |
Link's Awakening (Remake) Related Guides

| The Legend of Zelda: Link's Awakening Guides | |
|---|---|
 Walkthrough Walkthrough |
 Trading Sequence Trading Sequence |
 Maps and Locations Maps and Locations |
 Mini-Games Mini-Games |
 Tips and Tricks Tips and Tricks |
 Items and Equipment Items and Equipment |
 Enemies Enemies |
|
Author
The Legend of Zelda: Link's Awakening Walkthrough & Guides Wiki
List of All Dungeons and Story Walkthrough
improvement survey
03/2026
improving Game8's site?

Your answers will help us to improve our website.
Note: Please be sure not to enter any kind of personal information into your response.

We hope you continue to make use of Game8.
Rankings
- We could not find the message board you were looking for.
Gaming News
Popular Games

Genshin Impact Walkthrough & Guides Wiki

Honkai: Star Rail Walkthrough & Guides Wiki

Umamusume: Pretty Derby Walkthrough & Guides Wiki

Pokemon Pokopia Walkthrough & Guides Wiki

Resident Evil Requiem (RE9) Walkthrough & Guides Wiki

Monster Hunter Wilds Walkthrough & Guides Wiki

Wuthering Waves Walkthrough & Guides Wiki

Arknights: Endfield Walkthrough & Guides Wiki

Pokemon FireRed and LeafGreen (FRLG) Walkthrough & Guides Wiki

Pokemon TCG Pocket (PTCGP) Strategies & Guides Wiki
Recommended Games

Diablo 4: Vessel of Hatred Walkthrough & Guides Wiki

Cyberpunk 2077: Ultimate Edition Walkthrough & Guides Wiki

Fire Emblem Heroes (FEH) Walkthrough & Guides Wiki

Yu-Gi-Oh! Master Duel Walkthrough & Guides Wiki

Super Smash Bros. Ultimate Walkthrough & Guides Wiki

Pokemon Brilliant Diamond and Shining Pearl (BDSP) Walkthrough & Guides Wiki

Elden Ring Shadow of the Erdtree Walkthrough & Guides Wiki

Monster Hunter World Walkthrough & Guides Wiki

The Legend of Zelda: Tears of the Kingdom Walkthrough & Guides Wiki

Persona 3 Reload Walkthrough & Guides Wiki
All rights reserved
© 1993-2019 Nintendo
The copyrights of videos of games used in our content and other intellectual property rights belong to the provider of the game.
The contents we provide on this site were created personally by members of the Game8 editorial department.
We refuse the right to reuse or repost content taken without our permission such as data or images to other sites.


![Everwind Review [Early Access] | The Shaky First Step to A Very Long Journey](https://img.game8.co/4440226/ab079b1153298a042633dd1ef51e878e.png/thumb)

![Monster Hunter Stories 3 Review [First Impressions] | Simply Rejuvenating](https://img.game8.co/4438641/2a31b7702bd70e78ec8efd24661dacda.jpeg/thumb)


