Pandemonium (Disc 3) Walkthrough
This is a Story Walkthrough for Pandemonium (Disc 3) from Final Fantasy IX (FFIX, FF9). Read on for more information about objectives and bosses within this section.
List of Contents
| Previous Chapter |
Next Chapter |
|---|---|
| Terra / Bran Bal | Memoria |
Pandemonium Walkthrough
| Objectives | |
|---|---|
| 1 | Keep following Garland. |
| 2 | There will be a series of battles so prepare your equipment. |
| 3 | After the series of emotional battles, head right. |
| 4 | After the scene, keep moving until you see a grid-like room. |
| 5 | Press the button near you then head through the room. Avoid the shining nodes or else there will be an enemy encounter. |
| 6 | You will encounter a bright red orb with a floating platform above it. Interact with it and change its elevation to 4. |
| 6 | Head left. The path might seem confusing but it's pretty linear. Ride the platform when available until you reach the topmost area. |
| 7 | Follow the path then use the blue orbs to navigate the area. Once you encounter two blue platforms, use the one on the upper right. |
| 8 | Once you reach the Moogle, prepare for a boss fight. |
| Boss | Silver Dragon, Garland, and Kuja |
| 9 | Keep going straight until a cut scene occurs. |
Amdusias

Amdusias will be fought alone initially. It uses strong physical attacks and Bio magic. Freya and Amarant will join soon making the battle easier. Nothing note worthy to steal so just focus on defeating the enemy.
Amdusias Stats and Locations
Abadon

Initially fought by Steiner and Quina. Zidane joins later and, again, there are no noteworthy item to steal so just defeat it as soon as possible.
Abadon Stats and Locations
Shell Dragon
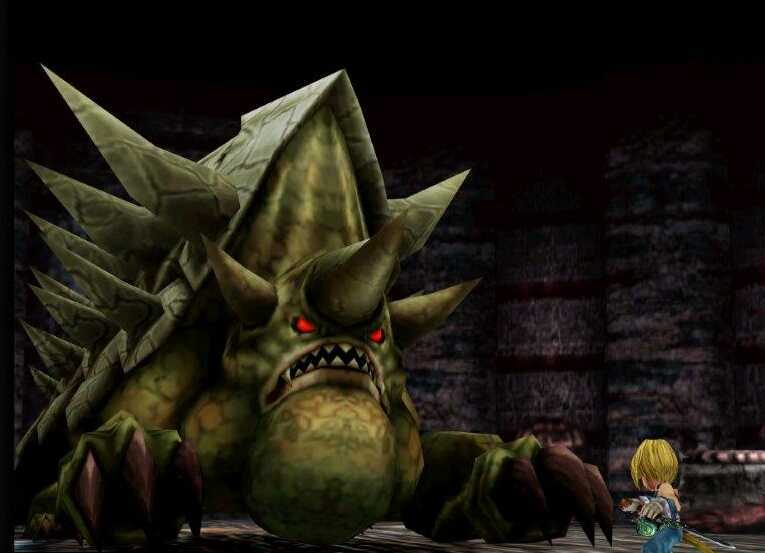
The last forced enemy encounter in this scene. Garnet joins in once Zidane's HP reaches a critical level and will restore it to full health. It is the last enemy but is also the easiest and will fall quickly from Zidane's attacks and Garnet's summons.
Shell Dragon Stats and Locations
Pandemonium - Items and Equipment
| Item | Quantity | Location |
|---|---|---|
| Holy Miter | x1 | Acquired by inspecting the control chair. |
| Gil | x20007 | Obtained by using the platform twice and proceeding to the area. |
| Carabini Mail | x1 | Located in the left-most blue warp path. |
| Elixir | x1 | Located in the right-most blue warp path. |
| Battle Boots | x1 | Found at the bottom warp. |
Holy Miter

From the Moogle's location, head straight going north until you find a chair. Inspect the chair to acquire the Holy Miter.
Carabini Mail

Keep following the path until you reach a circular area. From the center, head for the upper right elevator and use it. Then interact with the teleporter to your left. It will bring you to the lower left corner of the room. From there follow the path going right to find the Carabini Mail.
Battle Boots

Keep following the path until you reach a circular area. From the center, go at the lower left elevator and use it. Follow the path then interact with the blue light at the lower right. Then, follow another path. Interact with the next teleporter. You will appear next to a treasure chest with the Battle Boots.
Pandemonium - Shops
Moorock's Mogshop
Items
| Item Name | Price |
|---|---|
| Phoenix Down | 150 Gil |
| Annoyntment | 150 Gil |
| Hi-Potion | 200 Gil |
| Tent | 800 Gil |
| Remedy | 300 Gil |
| Vaccine | 100 Gil |
| Echo Screen | 50 Gil |
| Eye Drops | 50 Gil |
| Soft | 100 Gil |
| Antidote | 50 Gil |
| Rising Sun | 500 Gil |
Weapons
| Weapon Name | Price |
|---|---|
| Zorlin Shape | 6000 Gil |
| Orihalcon | 17000 Gil |
| Mythril Dagger | 950 Gil |
| Mage Masher | 500 Gil |
| Gladius | 2300 Gil |
| Dagger | 320 Gil |
| Defender | 9340 Gil |
| Mythril Racket | 2250 Gil |
| Bistro Fork | 10300 Gil |
| Holy Lance | 11000 Gil |
| Avenger | 16000 Gil |
Armor
| Armor Name | Price |
|---|---|
| Flash Hat | 5200 Gil |
| Coronet | 4400 Gil |
| Adaman Hat | 6100 Gil |
| Platinum Helm | 4600 Gil |
| Dragon Wrist | 4800 Gil |
| Defence Gloves | 6000 Gil |
| Platina Armor | 10500 Gil |
| Minerva's Plate | 12200 Gil |
| Demon's Vest | 10250 Gil |
Pandemonium Boss Fights
Silver Dragon

Silver Dragon the first boss you must fight in 2 consecutive boss fights. Ready some wind resistant equipment before engaging this battle. For more information about the Silver Dragon, see the link below.
How to Beat Silver Dragon
Garland

Garland may seemingly appear as a Dark Knight but his moveset actually consists of magic attacks. Prepare equipments with high magic resistance for an easier battle. For more information about Garland, see the link below.
How to Beat Garland
Kuja
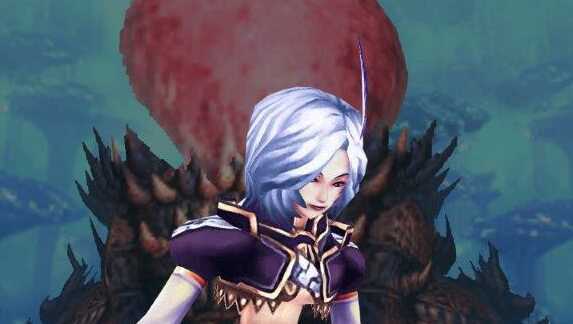
Kuja is the last boss of this set of fights. Kuja relies heavily on magic but using reflect actually works against you. For more information about Kuja, see the link below.
How to Beat Kuja
Final Fantasy IX - Related Links
 Go back to the Main Story Walkthrough Front Page
Author

Pandemonium (Disc 3) Walkthrough
Rankings
- We could not find the message board you were looking for.
Gaming News


Popular Games

Genshin Impact Walkthrough & Guides Wiki
Umamusume: Pretty Derby Walkthrough & Guides Wiki
Crimson Desert Walkthrough & Guides Wiki
Monster Hunter Stories 3: Twisted Reflection Walkthrough & Guides Wiki
Honkai: Star Rail Walkthrough & Guides Wiki
Pokemon Pokopia Walkthrough & Guides Wiki
The Seven Deadly Sins: Origin Walkthrough & Guides Wiki
Wuthering Waves Walkthrough & Guides Wiki
Zenless Zone Zero Walkthrough & Guides Wiki
Arknights: Endfield Walkthrough & Guides Wiki


Recommended Games
Fire Emblem Heroes (FEH) Walkthrough & Guides Wiki
Diablo 4: Vessel of Hatred Walkthrough & Guides Wiki
Cyberpunk 2077: Ultimate Edition Walkthrough & Guides Wiki
Yu-Gi-Oh! Master Duel Walkthrough & Guides Wiki
Super Smash Bros. Ultimate Walkthrough & Guides Wiki
Pokemon Brilliant Diamond and Shining Pearl (BDSP) Walkthrough & Guides Wiki
Elden Ring Shadow of the Erdtree Walkthrough & Guides Wiki
Monster Hunter World Walkthrough & Guides Wiki
The Legend of Zelda: Tears of the Kingdom Walkthrough & Guides Wiki
Persona 3 Reload Walkthrough & Guides Wiki


All rights reserved
© 2000, 2020 SQUARE ENIX CO., LTD. All Rights Reserved.
LOGO ILLUSTRATION:© 2000 YOSHITAKA AMANO
FINAL FANTASY, SQUARE ENIX and the SQUARE ENIX logo are registered trademarks or trademarks of Square Enix Holdings Co., Ltd.
The copyrights of videos of games used in our content and other intellectual property rights belong to the provider of the game.
The contents we provide on this site were created personally by members of the Game8 editorial department.
We refuse the right to reuse or repost content taken without our permission such as data or images to other sites.