Ashen Wolves Chapter 4: Danger in the Dark Walkthrough

This is the walkthrough for the 4th chapter of the side story DLC in Fire Emblem: Three Houses (FETH, FE3H). Read on to see what you can do in Abyss, as well as all battle info, map features, enemy data, and a strategy guide for the battle, A Harrowing Escape.
List of Contents
| Previous Chapter | Next Chapter |
|---|---|
| Chapter 3: The Rite of Rising | Chapter 5: Betrayal |
Chapter 4 - Danger in the Dark
The chapter starts with a battle, so you may proceed to the next section for battle information.
Chapter 4 Mission: A Harrowing Escape
Battle Preparations
Replenish Your Resources
You will not be able to explore the Abyss as the battle will immediately start. You will be facing waves of enemies, so make sure to replenish your battalions and check your weapon durability.
Map and Overview

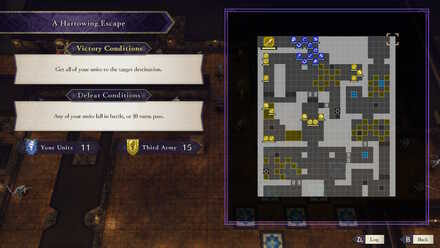
| Victory Conditions | |
|---|---|
| Get all of your units to the target destination. | |
| Defeat Conditions | |
| Any of your units fall in battle, or 10 turns pass. ↓ Any of your units fall in battle, or 17 turns pass. |
|
| # of Player Units | 11 | # of Enemy Units | 11 |
| # of Third Army Units | 15 + 1 + 2 |
Target Destination and Checkpoints

For this battle, you do not need to rout the enemies. The sole objective is to get everyone to the target destination before the said number of turns. You need to get to the first checkpoint before 10 turns pass.
Once passing the first checkpoint, you will need to get to the target destination at the top right corner before 17 turns pass.
Enemies

| Phase 1 | |||
|---|---|---|---|
| A | Golem (Guardian Golem) | B | Phantom Soldier (Dark Bishop) |
| C | Phantom Soldier (Sniper) | D | Phantom Soldier (Assassin) |
| E | Phantom Soldier (Wyvern Rider) | F | Phantom Soldier (Warrior) |
| G | Phantom Soldier (Fortress Knight) | H | Phantom Soldier (Swordmaster) |

This enemy appears once you reach the first checkpoint.
| Phase 2 | |||
|---|---|---|---|
| Golem (Guardian Golem) | |||

These enemies appear once you activate the second lever.
| Phase 3: Third Army (Phantom Soldiers) | |||
|---|---|---|---|
| 1 | Phantom Soldier (Warlock) | 2 | Phantom Soldier (Assassin) |
| Phase 3: Enemy Units (Bandits) | |||
|---|---|---|---|
| A | Bandit (Sniper) | B | Bandit (Brigand) |
| C | Bandit (Warlock) | D | Bandit (Fortress Knight) |
| E | Bandit (Warrior) | F | Bandit (Grappler) |

These enemies will appear when you open the locked door to the last checkpoint.
| Phase 4 | |||
|---|---|---|---|
| Bandit (Pegasus Knight) - 2 | |||

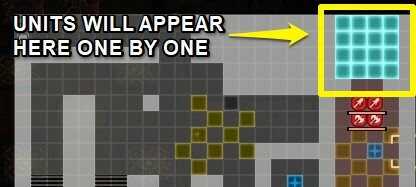
As each of your units reach the checkpoint, these units will appear one by one from the target destination. However, the first unit to go in will spawn in 2 enemies, instead.
| Phase 5 |
|---|
| Bandit (Fortress Knight) - 3 |
| Bandit (Mercenary) - 2 |
| Bandit (Warlock) - 2 |
| Bandit (Archer) - 2 |
| Bandit (Warrior) - 2 |
Chests
There are no chests in this battle.
Map Features
Terrain Types
| Tiles | Description |
|---|---|
| Wall | Cannot be crossed |
| Pillar | Cannot be crossed |
| Cavity | Navigable by fliers only |
| Stairs | Difficult for cavalry to traverse |
| Cover | +2 Def for non-fliers |
| Avo Floor | +40% Avo for non-fliers |
| Wardwood | +2 Res for non-fliers |
| Heal Tile+ | +30% HP each turn, +1 Def and +1 Res for non-fliers |
| Door | Impassable when locked, requires Door Key |
| Lever | Controls traps, weapons, and contraptions |
| Abyss Gate | Impassable when locked, requires a key |
Abyss Gates and Levers
Now with the Ashen Wolves on your side, anyone in your team can trigger the levers to activate Abyss gates.
Tips and Tricks
Focus on getting to the checkpoints

The goal of the level is to get everyone safely to the target destination. You need to get everyone to the first checkpoint on or before the 10th turn. Be careful as to not to maximize all the turns.
After getting everyone in, you will need to get to the target destination on or before the 17th turn. Take note that getting to checkpoints and interacting will objects will trigger enemy spawns, so be prepared.
Do not engage the third army
The goal of the level is to survive and get to the target destination with the least turns. For these, you should completely ignore the 3rd army chasing you, especially the golems. Just keep going out of their range and into the target destinations. Once you get in a checkpoint, the gates will close and enemies behind will not be able to chase you anymore.
Bandits will appear when you are close to the last checkpoint
When you are nearing the door to the last checkpoint, a wave of bandits will appear on the bottom side of the screen. You can also choose to ignore them, and only have your units couter them when they attack you as they are not much of a threat. If you are running low on cash, you can take them up as some of them carry Bullions.
Use Yuri and Ashe to unlock doors

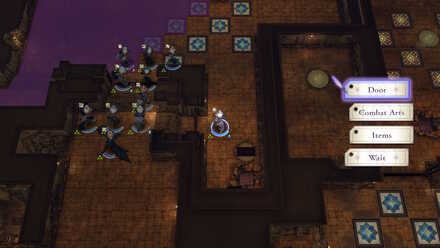
Have Yuri activate the 1st lever and open the door using his Locktouch ability. He will be able to regroup with your units immediately because of his high movement range. You also need to unlock another door to be able to get to the 2nd target destination. Alternatively, you can also use the Door Key you got from Chapter 1.
Use a mounted unit to activate the 2nd lever
When you get past the first Abyss gate, send a mounted unit to open the second set of gates quickly.
Position your units carefully
You instantly lose if any one of your units die, so be careful of placing your low-HP units in vulnerable positions. Make sure to send the tanks first to lure them in and simultaneously attack from afar.
Enemies spawn one by one when a unit gets to the last checkpoint
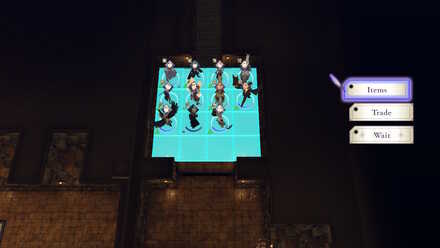
Everytime a unit comes past the last checkpoint, an enemy will appear from the target destination at the top, although the first unit will spawn 2 enemies. Make sure to get everyone in first before you rush head-on.
Chapter 4 - After the Battle
Exploring Abyss
Chapter Objectives
After the battle, you are free to wander around Abyss and talk to inhabitants and browse shops.
Balthus Now Recruitable
After this chapter, you can now recruit Balthus in Part I of the main story.
How to Recruit the Ashen Wolves
Fire Emblem: Three Houses - Related Links
 DLC - Cindered Shadows Walkthrough |
||
| DLC - Cindered Shadows | ||
|---|---|---|
| Chapter 1: The Fourth House | Chapter 2: What Lies Beneath | Chapter 3: The Rite of Rising |
| Chapter 4: Danger in the Dark | Chapter 5: Betrayal | Chapter 6: Return to Me |
| Chapter 7: Wolf Pack | ||
Comment
Author
Ashen Wolves Chapter 4: Danger in the Dark Walkthrough
improvement survey
03/2026
improving Game8's site?

Your answers will help us to improve our website.
Note: Please be sure not to enter any kind of personal information into your response.

We hope you continue to make use of Game8.
Rankings
- We could not find the message board you were looking for.
Gaming News
Popular Games

Genshin Impact Walkthrough & Guides Wiki

Honkai: Star Rail Walkthrough & Guides Wiki

Umamusume: Pretty Derby Walkthrough & Guides Wiki

Pokemon Pokopia Walkthrough & Guides Wiki

Resident Evil Requiem (RE9) Walkthrough & Guides Wiki

Monster Hunter Wilds Walkthrough & Guides Wiki

Wuthering Waves Walkthrough & Guides Wiki

Arknights: Endfield Walkthrough & Guides Wiki

Pokemon FireRed and LeafGreen (FRLG) Walkthrough & Guides Wiki

Pokemon TCG Pocket (PTCGP) Strategies & Guides Wiki
Recommended Games

Diablo 4: Vessel of Hatred Walkthrough & Guides Wiki

Cyberpunk 2077: Ultimate Edition Walkthrough & Guides Wiki

Fire Emblem Heroes (FEH) Walkthrough & Guides Wiki

Yu-Gi-Oh! Master Duel Walkthrough & Guides Wiki

Super Smash Bros. Ultimate Walkthrough & Guides Wiki

Pokemon Brilliant Diamond and Shining Pearl (BDSP) Walkthrough & Guides Wiki

Elden Ring Shadow of the Erdtree Walkthrough & Guides Wiki

Monster Hunter World Walkthrough & Guides Wiki

The Legend of Zelda: Tears of the Kingdom Walkthrough & Guides Wiki

Persona 3 Reload Walkthrough & Guides Wiki
All rights reserved
©2019 Nintendo / INTELLIGENT SYSTEMS. Co-developed by KOEI TECMO GAMES CO., LTD. Fire Emblem and Nintendo Switch are trademarks of Nintendo. © 2019 Nintendo.
The copyrights of videos of games used in our content and other intellectual property rights belong to the provider of the game.
The contents we provide on this site were created personally by members of the Game8 editorial department.
We refuse the right to reuse or repost content taken without our permission such as data or images to other sites.


![Monster Hunter Stories 3 Review [First Impressions] | Simply Rejuvenating](https://img.game8.co/4438641/2a31b7702bd70e78ec8efd24661dacda.jpeg/thumb)


