This survey will take about 1 minute.
Your answers will help us to improve our website.
Zelda: Link's Awakening (Remake)
Level 3 - Key Cavern Walkthrough
Key Cavern is the third dungeon in The Legend of Zelda: Links Awakening (Remake) for the Nintendo Switch. Read on for a guide on how to reach Key Cavern, solve its puzzles, and defeat its bosses!
| ◀︎ Previous Dungeon | Next Dungeon ▶︎︎ |
|---|---|
| Bottle Grotto | Angler's Tunnel |
List of Contents
Getting to Key Cavern
Getting to Key Cavern Objectives
| No. | Objective |
|---|---|
| 1 | Go to Mabe Village to return BowWow, and buy a shovel from the shop. |
| 2 | Go to Richard's Villa in Ukuku Prairie and speak with him about the Slime Key. |
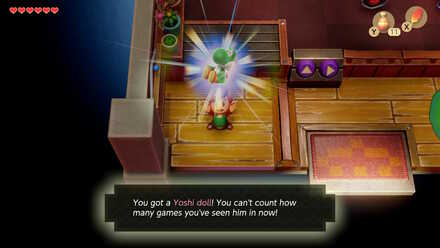
| 3 | Win the Yoshi Doll from Trendy Game. |
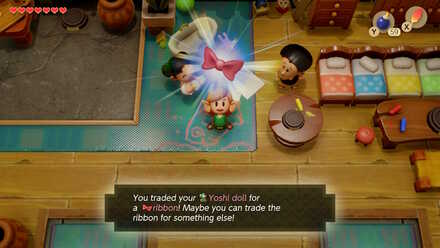
| 4 | Trade it to the Quadruplets' mother for a Ribbon. |
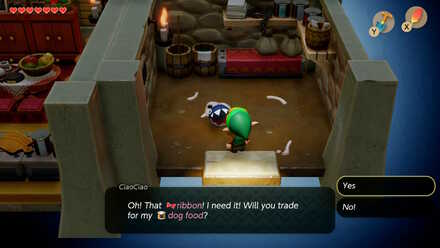
| 5 | Trade the Ribbon to CiaoCiao at BowWow's house for Dog Food. |
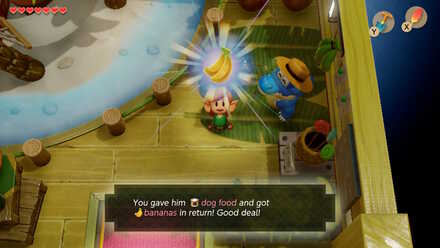
| 6 | Go to Toronbo Shores and trade the Dog Food with Sale for Bananas. |
| 7 | Trade the Bananas to Kiki the monkey near Kanelet Castle to be given a path in. |
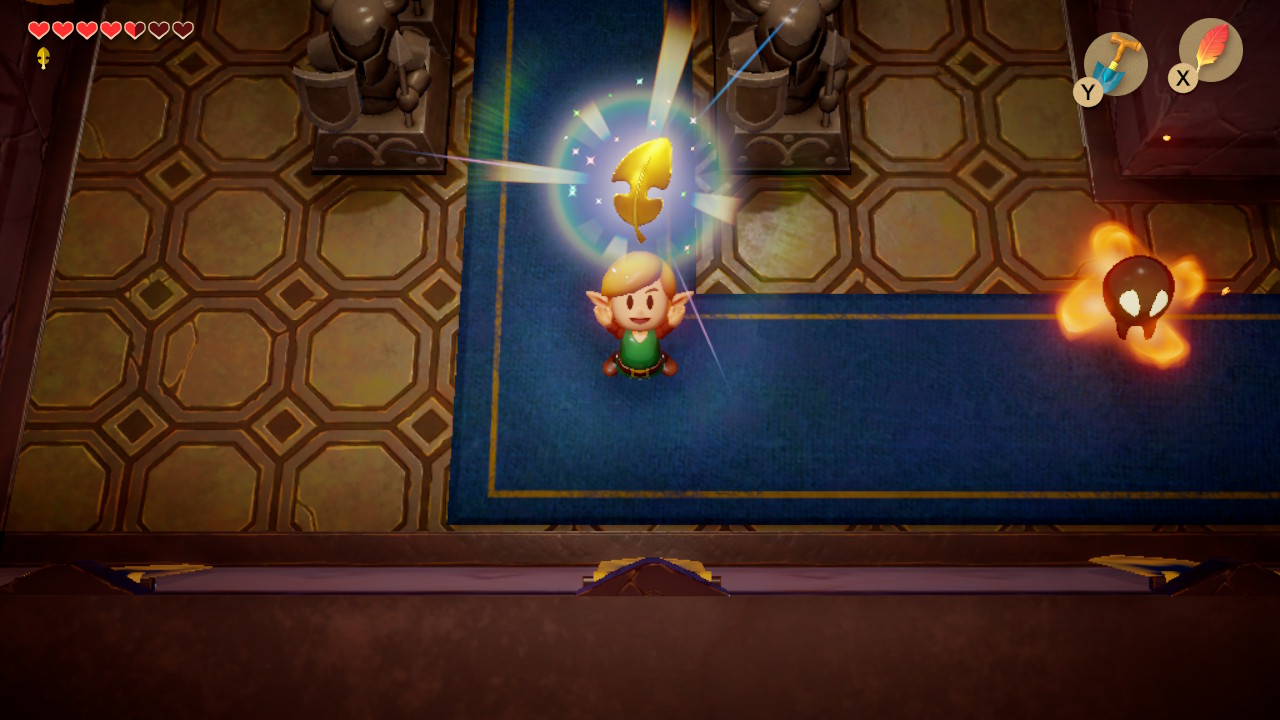
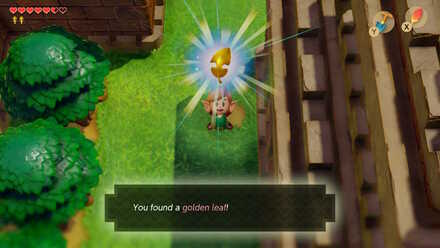
| 8 | Kill the Mad Bomber for Golden Leaf 1. |
| 9 | Kill the crow near the west wall for Golden Leaf 2. |
| 10 | Defeat the Darknuts that appear after entering Kanelet Caste for Golden Leaf 3. |
| 11 | Bomb the left Darknut in the left wall after going up the stairs and defeat it for Golden Leaf 4. |
| 12 | Continue through the castle up to the Ball and Chain Solider. Defeat him to obtain Golden Leaf 5. |
| 13 | Return to Richard's Villa. Give him the Golden Leaves for access to Pothole Field. |
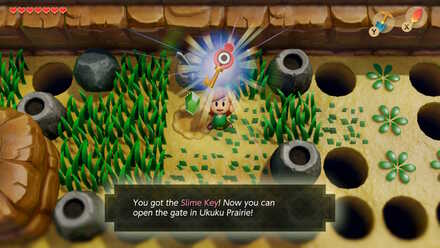
| 14 | Make your way around Pothole Field and dig in fron of the Owl statue for the Slime Key. Unlock Key Cavern and go around to enter. |
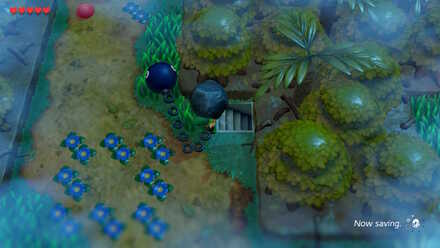
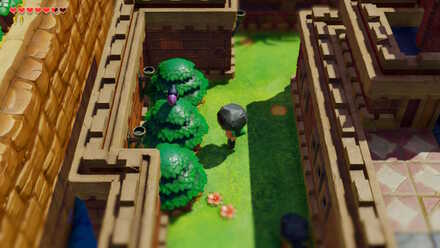
After exiting the Bottle Grotto, head south and use your new lifting powers to pick up and throw the rocks blocking your path. Return toward Mabe Village. Along the way, you can stop by the Mysterious Forest for a few pick ups.
Item Capacity Upgrade
 |
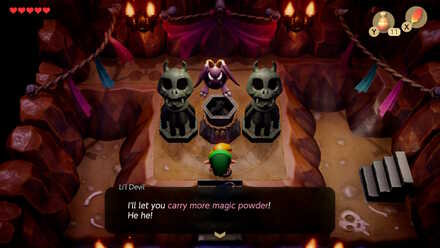 |
Lifting a rock in this corner (south of the east forest entrance) will reveal a flight of stairs. In this room there is an unlit torch. You know the drill, throw some magic powder in it. An angry Li'l Devil will come out and curse you with the ability to carry more equipment (how awful...). At first he will offer to upgrade your Magic Powder capacity, but answering 'N-No' to his question will make him offer to upgrade your Bomb capacity instead. Saying 'N-No' once more will make him offer to upgrade your arrow capacity. After that, he will recycle until you say yes to one of his questions, so choose the item capacity you want upgraded and leave (even though you may not have bombs or arrows yet, you can upgrade their capacity).
Secret Medicine
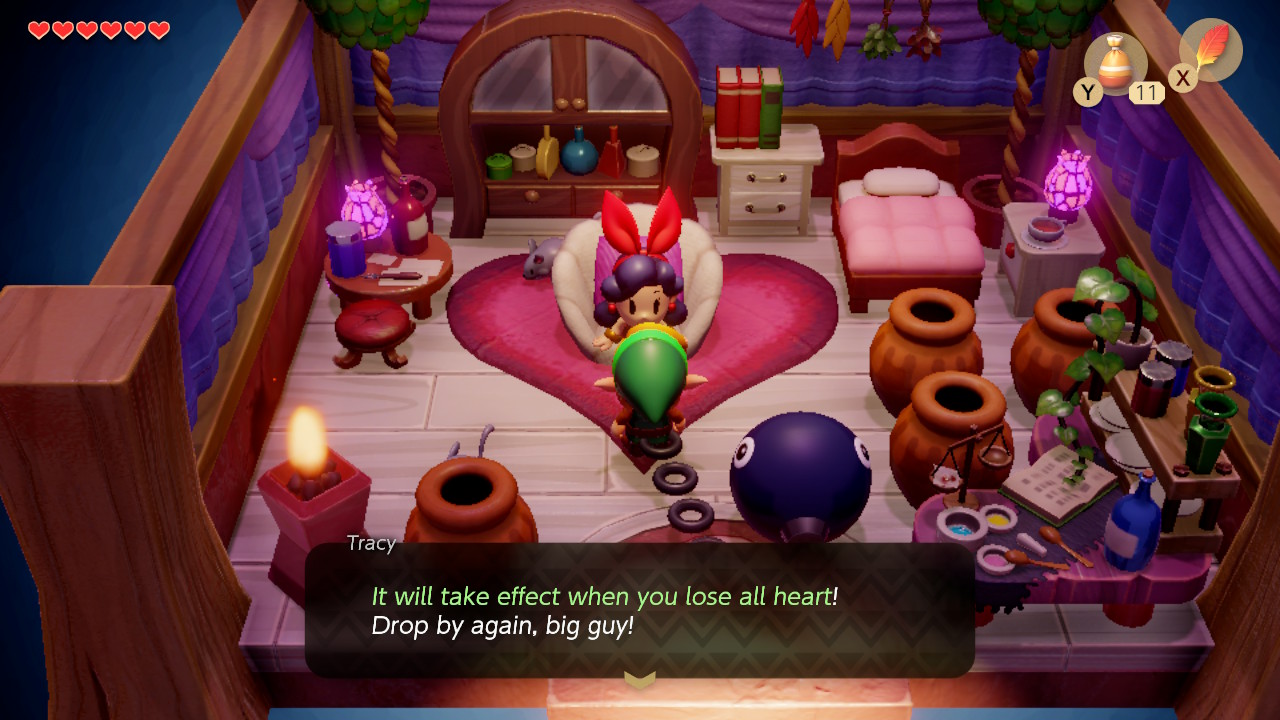
Going right from the witch's hut and jumping over the hole, then moving the boulder just north will lead you to Crazy Tracy's house. For exactly 28 rupees, she will rub her secret medicine on you, which restores your hearts when you run out. Particularly now, while you do not have many hearts, this medicine is very useful.
Piece of Heart #8
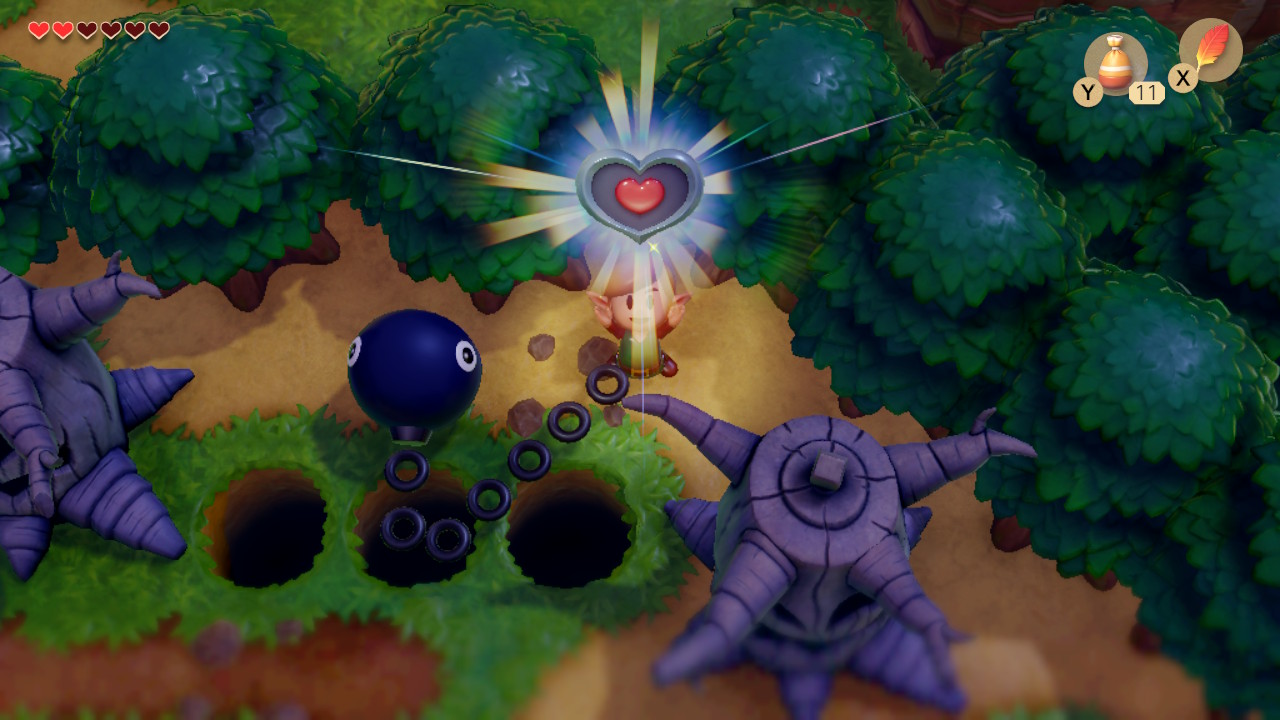
Stepping outside of Tracy's house and going right will lead you to an area with many crows and trees (North of the Cemetary). Watch out for the murder of crows swooping down at you here. You can jump over the holes here to obtain Piece of Heart #8.
Piece of Heart #9
 |
 |
 |
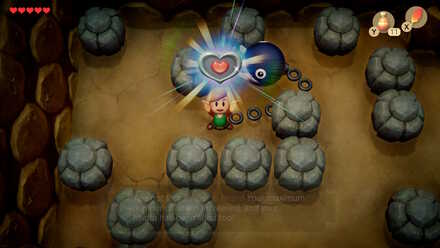 |
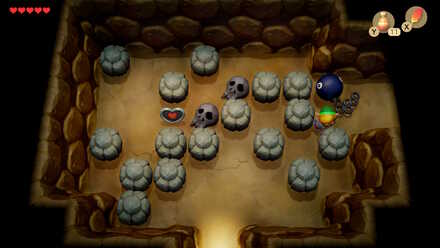
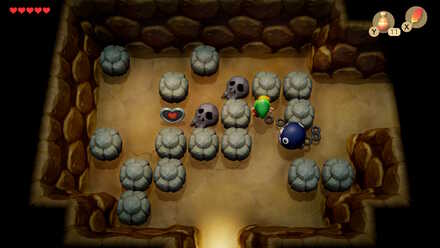
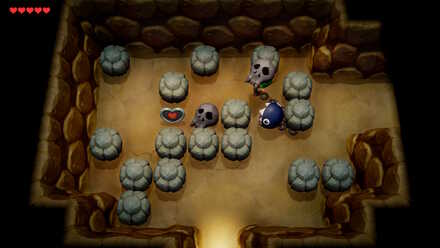
You can also revisit the cave here from the beginning of Level 1 that had a piece of heart. Step into the room and move the rocks accordingly, until you reach the skulls (see the pictures above). Lift and throw both skulls out of the way to obtain Piece of Heart #9.
Richard's Villa
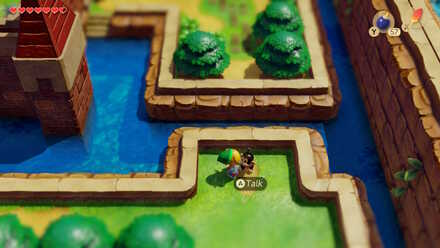
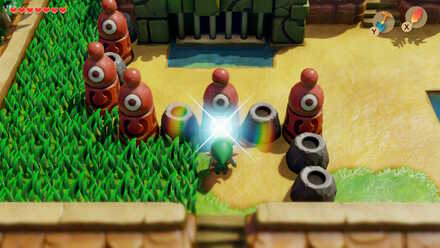
From Tracy's house, head south toward Ukuku Prairie toward a gated area with five slime statues in front of it. This is the entrance to the Key Cavern, but you cannot open it yet, so continue south until you arrive at Richard's Villa. Note that Richard will not help you out if you stil have BowWow with you, so bring him back to Mabe Village first if you have not already.
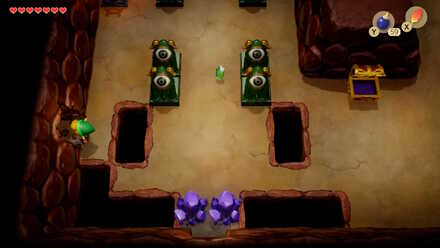
Deluxe Shovel
Talking with Richard reveals that he has the Slime Key, which will open up the Key Cavern. However, in order to obtain this key, you will first need to collect five Golden Leaves from Kanalet Castle. This will require usage of the Deluxe Shovel, which is sold in the Mabe Village Shop for 200 rupees. If you do not have enough rupees at the moment, you can repeatedly play the Trendy Game and pick up the purple rupee, which is worth 50 rupees.
Once you have secured the funds to make your purchase, go and buy the shovel. While you are here, you should pick up some bombs too (note that it is actually possible to steal these items, but if you do so, you will be forever be known as THIEF by all NPCs, and the next time you enter the shop, the shop keeper will obliterate you... You have been warned!).
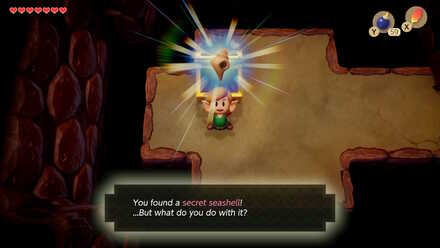
Secret Seashell #18
 |
 |
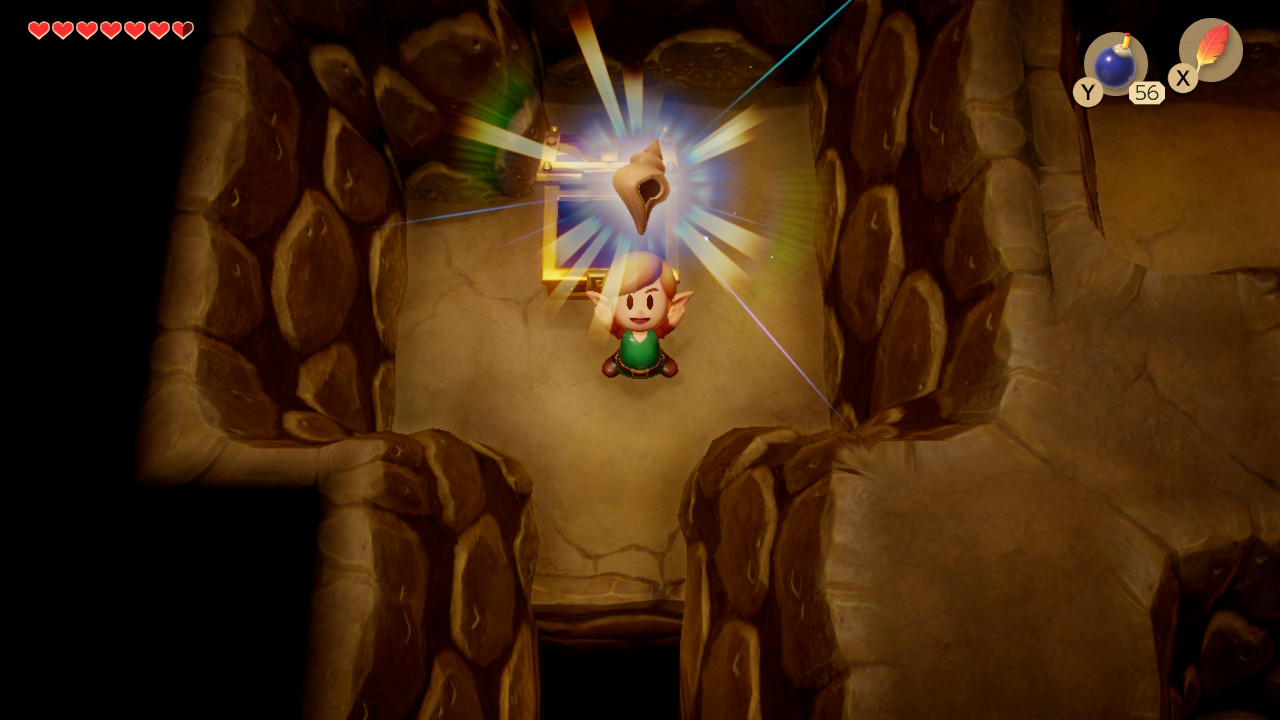
With your bombs, you can now go back to Tail Cave and blow up a wall to reveal a hidden room to obtain Secret Seashell #18!
Trading Sequence
Now it is time to go to Kanelet Castle and get those leaves! The only problem is that the front entrance is sealed off. In order to get inside, you will need the help of a monkey just east of the castle entrance. The monkey will help out, but it will cost you a bundle of delicious bananas. To get the Bananas, you will need to initiate the trading sequence (although completing it is technically not required). Here are the necessary steps to get the Bananas:
 |
 |
 |
 |
- First obtain the Yoshi Doll to initiate the side quest by paying 10 Rupees and winning it in Trendy Game (located in Mabe Village).
- Go to the Quadruplet's House in Mabe Village, located just north of the Weathercock. Talk to the mother inside to trade the Yoshi's Doll for the Ribbon.
- Go to BowWow's house and trade the Ribbon to CiaoCiao (the small Chain Chomp inside) to get the Canned Food.
- Finally, head to Toronbo Shores and trade ithe Dog Food to Sale the alligator, found in Sale's House o' Bananas, to obtain the Bananas.
Getting into Kanelet Castle
 |
 |
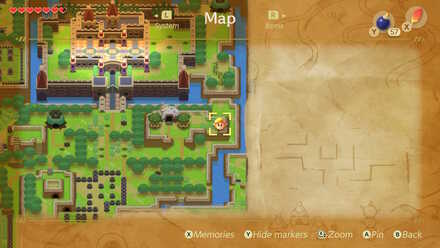
Bananas in hand, travel back to find Kiki the Monkey just east of Kanelet Castle's entrance. Talk to him and give him the Bananas to have him building a bridge, allowing you to cross over to the east wall of the castle (be sure to pick up the Twig he leaves behind as well). Cross over the bridge and walk straight forward to the back. Across from the telephone hut, there are three trees, and just under them, a cuttable patch of grass. Cut the grass and go down the stairs that are revealed.
Golden Leaf #1
Cross through the platforming section to emerge inside of the castle gates. Go right, and around the corner you will see several holes on the ground. A knight called a Mad Bomber will peek his head through and throw bombs. Attack him by waiting until he pulls out a bomb, and then quickly approach him with a sword slash or spin attack (he will retreat if you approach him before he has pulled out a bomb). Defeat him to pick up the first Golden Leaf.
Golden Leaf #2
Now go toward the west castle wall. Watch out for the Darknuts here, and find a crow perched on a tree. You will need it to come down so that you can kill it. One easy way to do so is by lifting the nearby stone and throwing it at its tree, and then attack it when it swoops down. Do so to obtain the second Golden Leaf.
Golden Leaf #3
 |
 |
After this, step inside of the castle. and encounter two Darknuts, a Zol, and a Bubble. The Bubble cannot be defeated, so stay clear of its movement and defeat the other enemies here to obtain the third Golden Leaf.
Golden Leaf #4
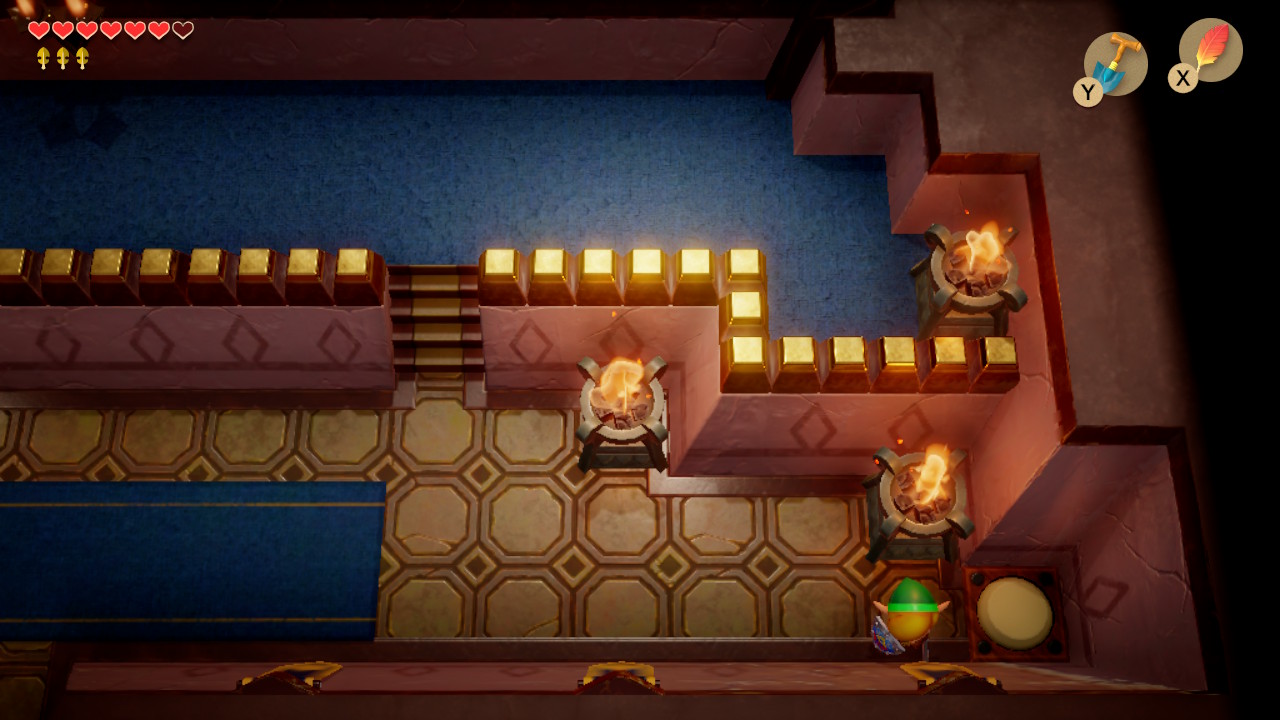
Continue moving forward and take out the Darknuts in your way by shielding them and hitting their weak point. Go to the far right wall and step on the switch here to open the castle gate. Head up the stairs here, and then go left for another flight of stairs. Emerge from the stairs and go straight down.
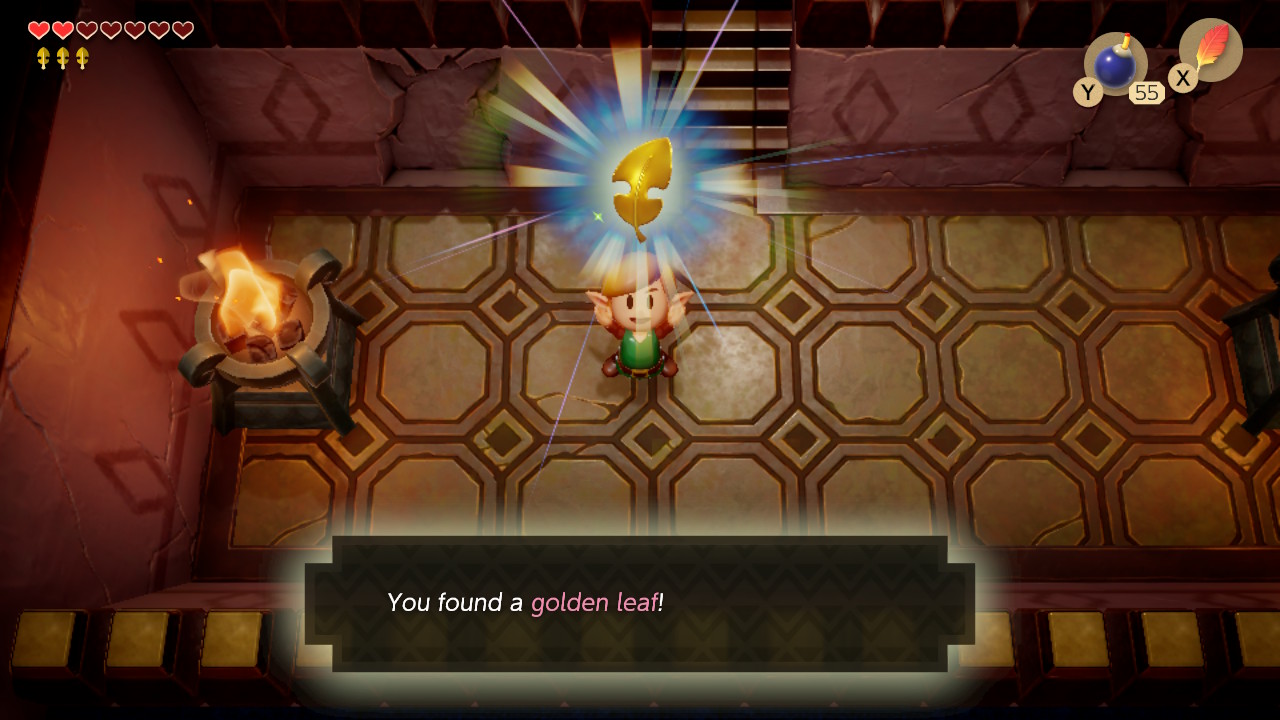
You will see two bombable walls. Bombing either of these will make a Darknut come out and attack you. Do this and defeat the one on the left side to obtain the fourth Golden Leaf. Go back up the stairs and turn right, then follow the hall to exit the inside of the castle. Once outside, go into the doorway on your right.
Golden Leaf #5
 |
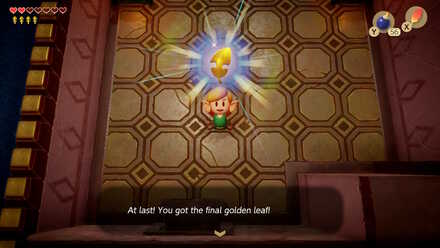 |
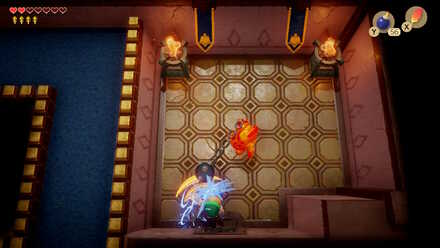
Once inside this room, the door ahead will shut. Pick up a pot and throw it at it to break it open, then proceed forward. You will encounter a mini-boss here, the Ball and Chain Soldier, who will swing his ball and chain around and throw it at you. Avoid getting hit, and swoop in for an attack when he swings and misses. Eventually he will die and drop the fifth and final Golden Leaf. Leave the castle, and return to Richard's Villa.
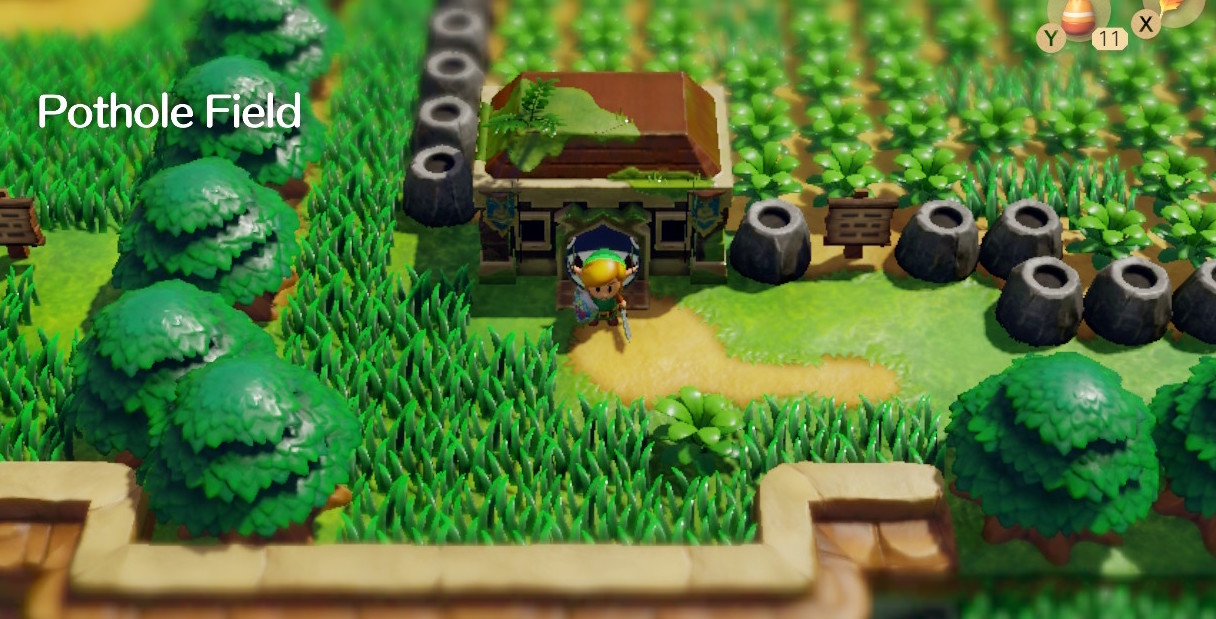
Pothole Field
Give Richard the Golden Leaves, and he will allow you to push his statue right, revealing a hidden set of stairs. While down here, push the stone you see forward into the hole and leap across to open a chest containing Secret Seashell #9. Jump back and go right, then north to climb the flight of stairs here. In the next room, head straight down and exit into Pothole Field.
The Slime Key and Piece of Heart #11
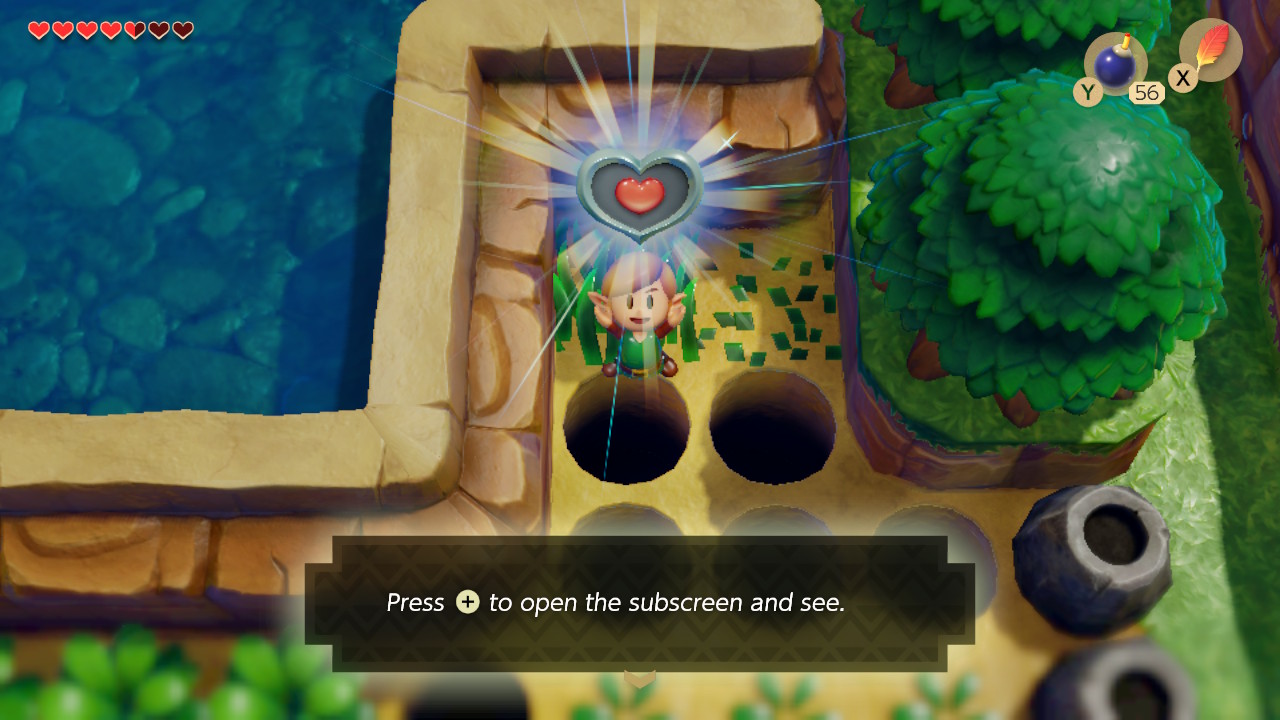
Make your way around the field by cutting the grass in the way while being careful not to fall into the potholes. Along the way, in the northeast corner, you will spot a piece of heart, separated from you by four potholes. While this item is much easier to obtain after acquiring the Pegasus Boots from the next dungeon, it is actually possible to obtain now as well. Jump forward and cut the grass, then come to the very edge of the two holes and hop forward to land right in between them and nudge forward to obtain Piece of Heart #11.
Getting into Key Cavern
 |
 |
 |
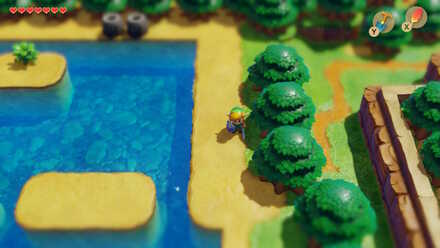 |
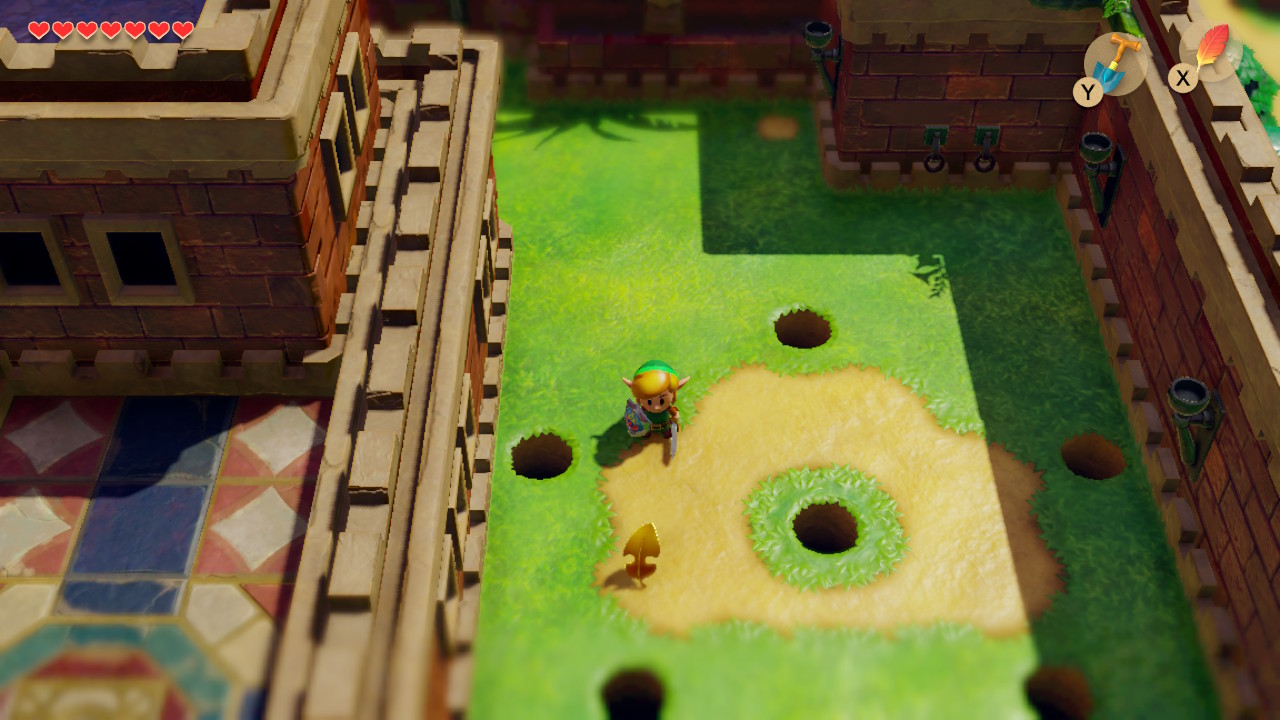
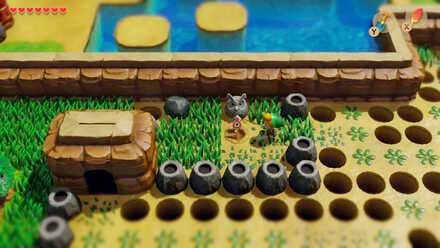
Continue your way through the field until you come across an owl statue. Use your shovel to dig in the spot directly in front of it, revealing the Slime Key. Lift the boulder to your left and go up the stairs, then insert the key into the statue here, unlocking the entrance to Key Cavern. To actually get into the dungeon, you will need to head back south towrd Richard's and walk around the outside of Pothole Field. When you see the pond, jump between platforms and make your way to the dungeon's entrance.
Level 3 - Key Cavern Dungeon Walkthrough
Key Cavern Map and Items
1F 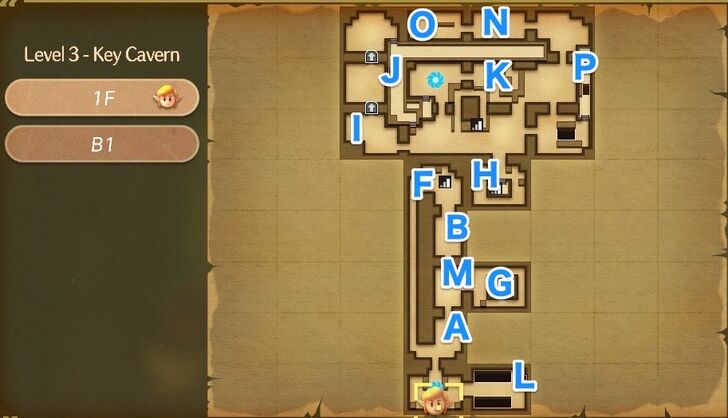 |
B1 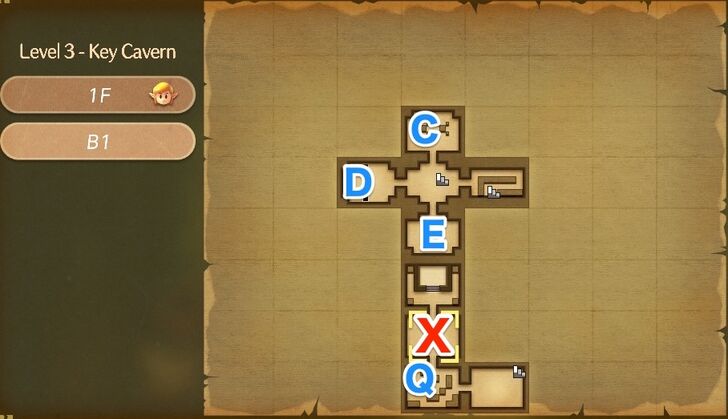 |
| Location on Map | Item |
|---|---|
| A | Small Key #1 |
| B | Trick Treasure Chest |
| C | Small Key #4 |
| D | Small Key #2 |
| E | Small Key #3 |
| F | Stone Beak |
| G | Map |
| H | Small Key #5 |
| I | Small Key #6 |
| J | 50 Rupees |
| K | Pegasus Boots |
| L | Small Key #7 |
| M | 300 Rupees |
| N | Compass |
| O | Small Key #8 |
| P | Nightmare Key |
| Q | Small Key #9 |
Key Cavern Objectives
| No. | Objective |
|---|---|
| 1 | Go straight ahead and defeat all the enemies in the second room to obtain small key #1. |
| 2 | Continue to the room with 4 locked doors. Go through the north door and defeat the foes to get a small key. Slash the crystal. Go back a room and climb the stairs to reach the chest with the Stone Beak. |
| 3 | Go one screen down and one right to find the room containing the map. |
| 4 | Go back to the room with 4 locked doors, and now go right. Continue onward and go up the stairs. Defeat the Zols that appear in this room for small key #5. |
| 5 | Go up a room, then head to the far left and enter the room here. Defeat the enemies here for small key #6. |
| 6 | Go to the previous room and go into the room to the north this time. Defeat the Dododngo Snakes to reveal a warp point. Continue into the next room and push the blocks to get the Pegasus Boots. |
| 7 | Warp back to the start of the dungeon. Go to the room on your right, and dash with the Pegasus Boots into the Vacuum Mouth. Pick up small key #7 from the chest. |
| 8 | Warp back to where you fought the mini-boss. Go to the screen right of where you got the Pegasus Boots, and go through the north doorway. Defeat the enemies in your way and continue onward to find a chest containing the compass. |
| 9 | Bomb the left wall and defeat the bombites in the next room to obtain small key #8. |
| 10 | Go back to the owl statue near the floor tiles that look like an arrow. Place a bomb at the tip of the arrow here to reveal a hidden room. |
| 11 | Go into the hidden room, and use your Pegasus Boots and Roc's Feather to dash-jump across the large gap. Continue on and do this again to reach the chest containing the Nightmare Key. |
| 12 | Go towards the door you entered to fight the mini-boss and unlock the locked block. Continue forward, unlocking all of the blocks in your way. |
| 13 | Dash into the Thwomp and pass through the platforming section. |
| 14 | Defeat the Pairodds to open the door, and go into the next room to find the Nightmare Lair. |
| 15 | Defeat Slime Eye to obtain the Sea Lily's Bell, as well as a Heart Container. |
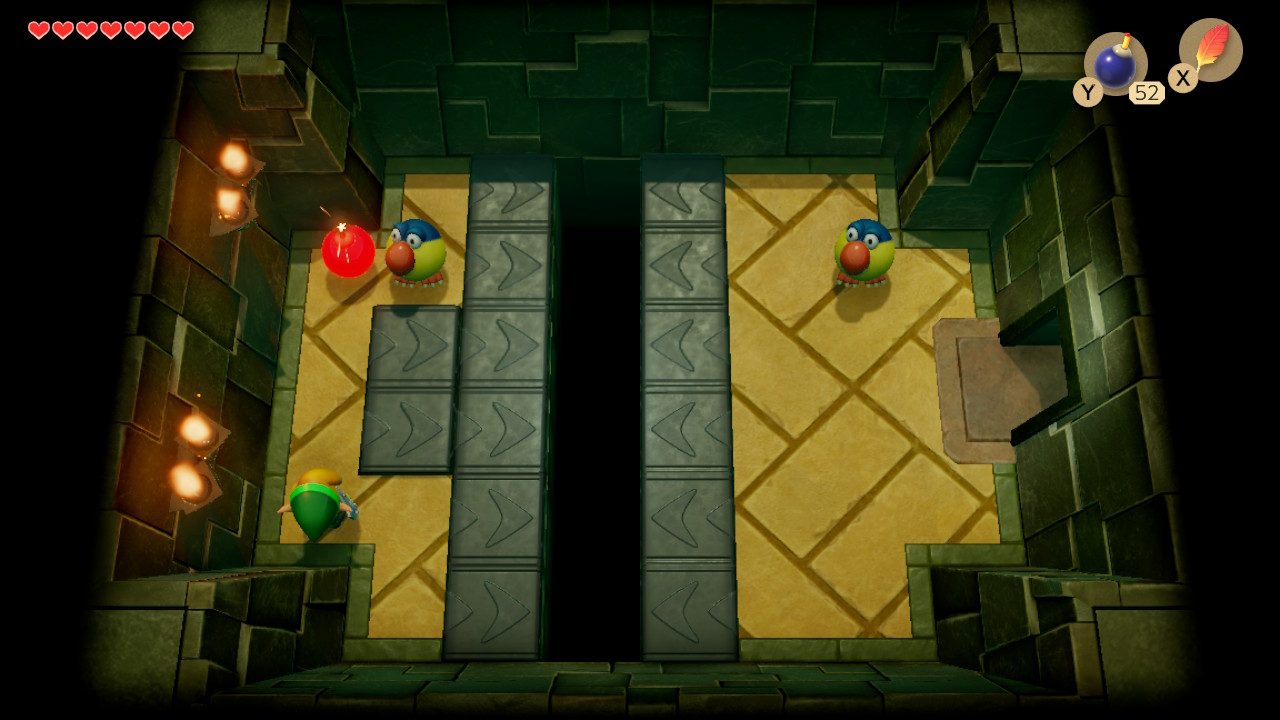
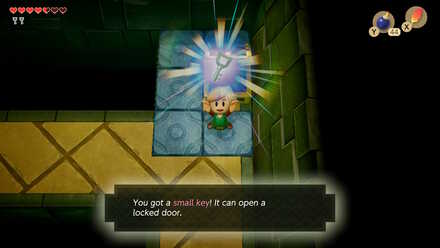
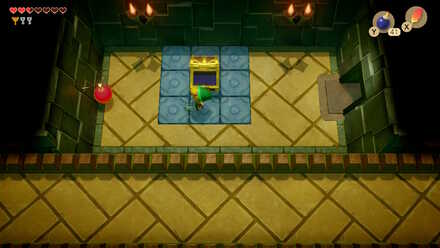
Small Key #1
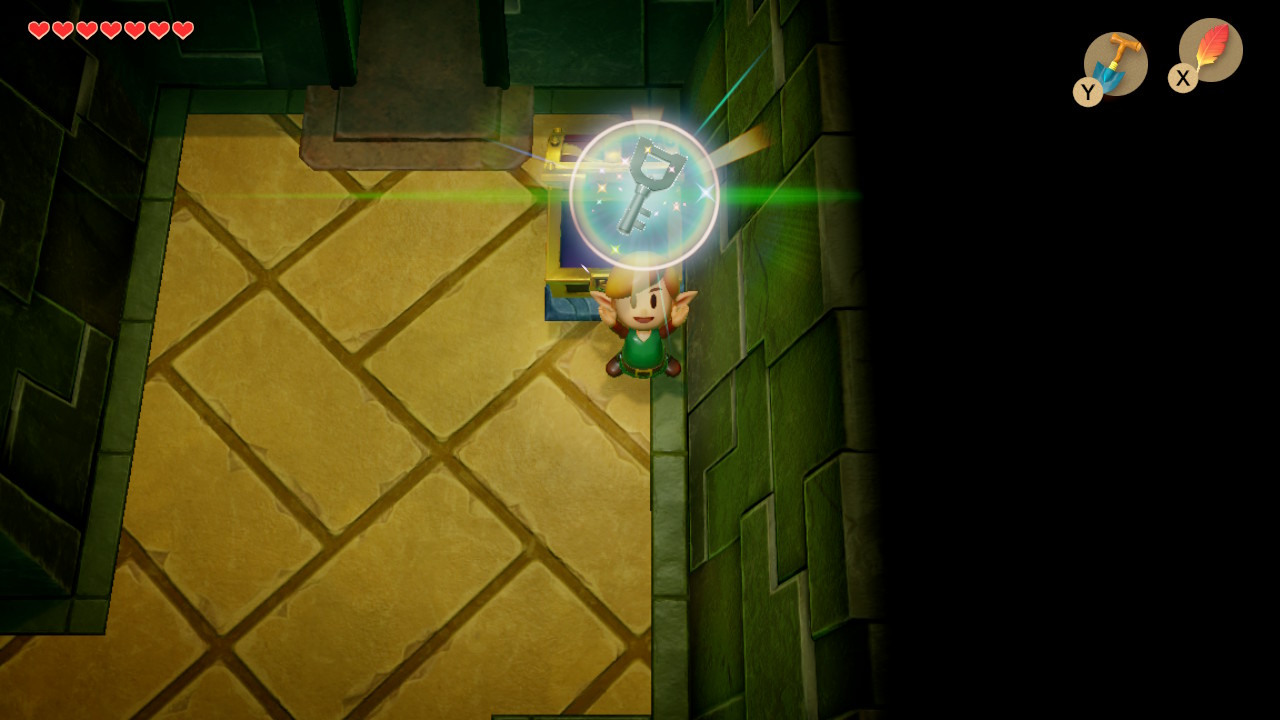
After entering the dungeon, grab a pot and throw it at the door straight ahead to smash it open, and go through it (do not worry about the room to the right just yet). The next room has a shrouded stalfos, and two bombites, as well as a red gel. Striking the bombite will cause him to move very quickly before exploding, so avoid the explosions and defeat all four enemies to reveal a chest containing small key #1.
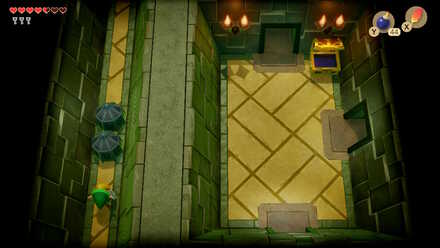
The Room with 4 Locked Doors
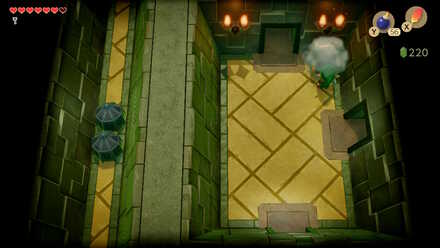 |
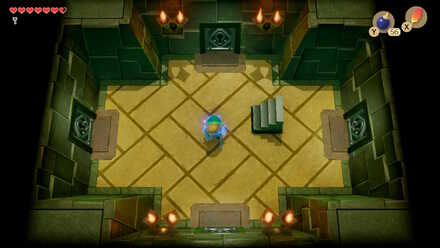 |
Go straight ahead and defeat the four Zol for a treasure chest. You can skip opening it as doing so will cause another Zol to appear. Go straight ahead into the top room. Continue on past the stalfos in this room (or defeat them if you want), and continue straight. Go into the next room, avoid the Zols, and go down the stairs. There are four locked doors here. Technically you can just go to the door on the right and proceed forward, but there are a few items that can be collected from the other rooms as well (you might as well skip the left and bottom rooms though).
While the rooms are completely skippable, the left room contains 3 hearts, and a type of enemy called a Pairodd, which cannot be defeated with your sword, so you will need to throw bombs at them. Defeating them will give you small key #2 (be sure to grab it quickly before it gets carried off by the conveyor belt). The bottom room contains these enemies as well, along with small key #3.
Stone Beak
 |
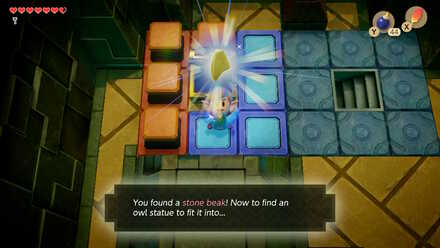 |
The top room contains a shrouded stalfos and a normal stalfos, and defeating them will net you small key #4. Strike the crystal here and leave the room. Climb back up the stairs in the room with four doors and you should now be able to open the chest containing the Stone Beak.
Map
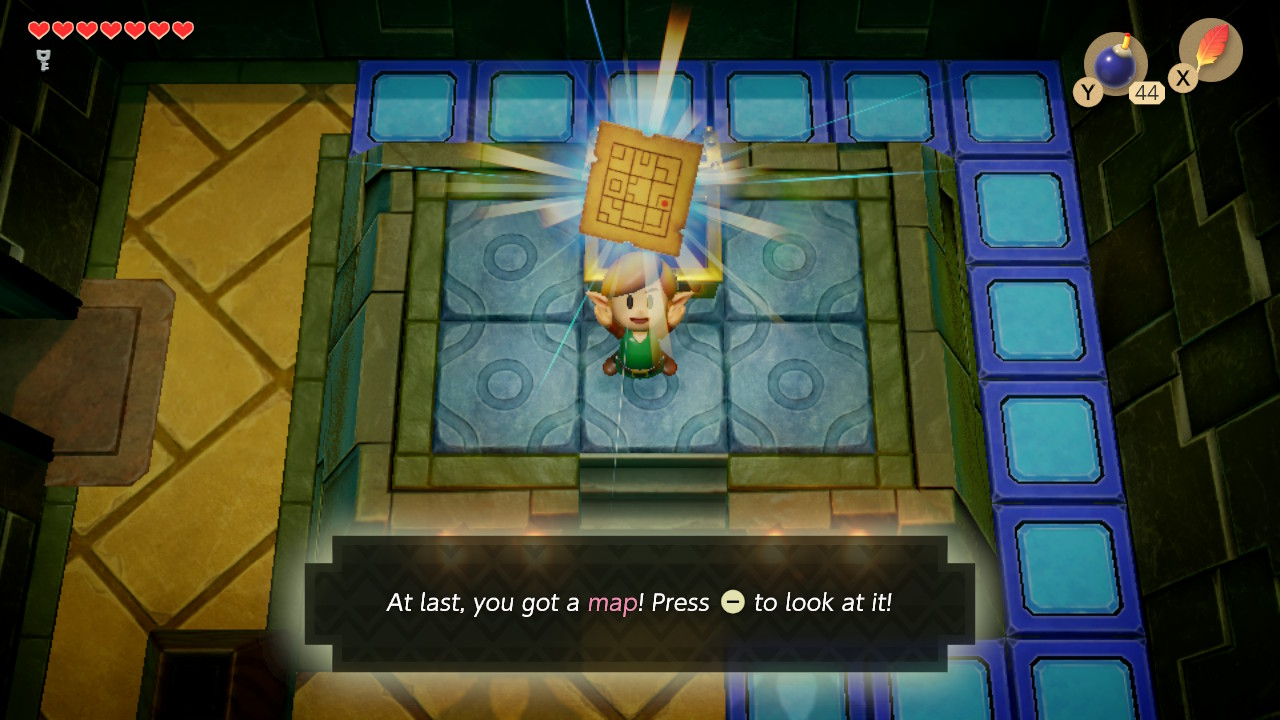
From where you got the Stone Beak, go one screen down, and then one right to enter the room here and see all of the blue tiles have been lowered. Walk around and climb the stairs and defeat the shrouded stalfos. Here you will find a chest containing the dungeon map. Go down the stairs, push the block to your left, and head back to the room with four doors from before.
Small Key #5
 |
 |
Go into the right room now, and maneuver around the Pairodd and Keese (make the pairodd vanish away by slashing with your sword if needed) to reach the stairs. Climb up the stairs, defeat all of the Zol that appear in this room (you will need to walk around the room a bit) to obtain small key #5, then proceed to the northern room.
Small Key #6
In this room, avoid the shrouded stalfos and head left. Defeat the red zol here to open the two doors. Go into the left door and defeat the Pairodd (with bombs) and Zol in this room to reveal small key #6. Head into the room above this and defeat the stalfos and two red zol to reveal a chest (you will be unable to reach it currently). Continue straight through the revolving door.
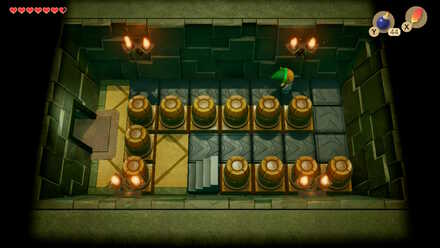
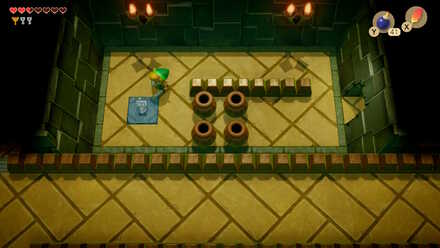
50 Rupees and Finding the Mini-Boss
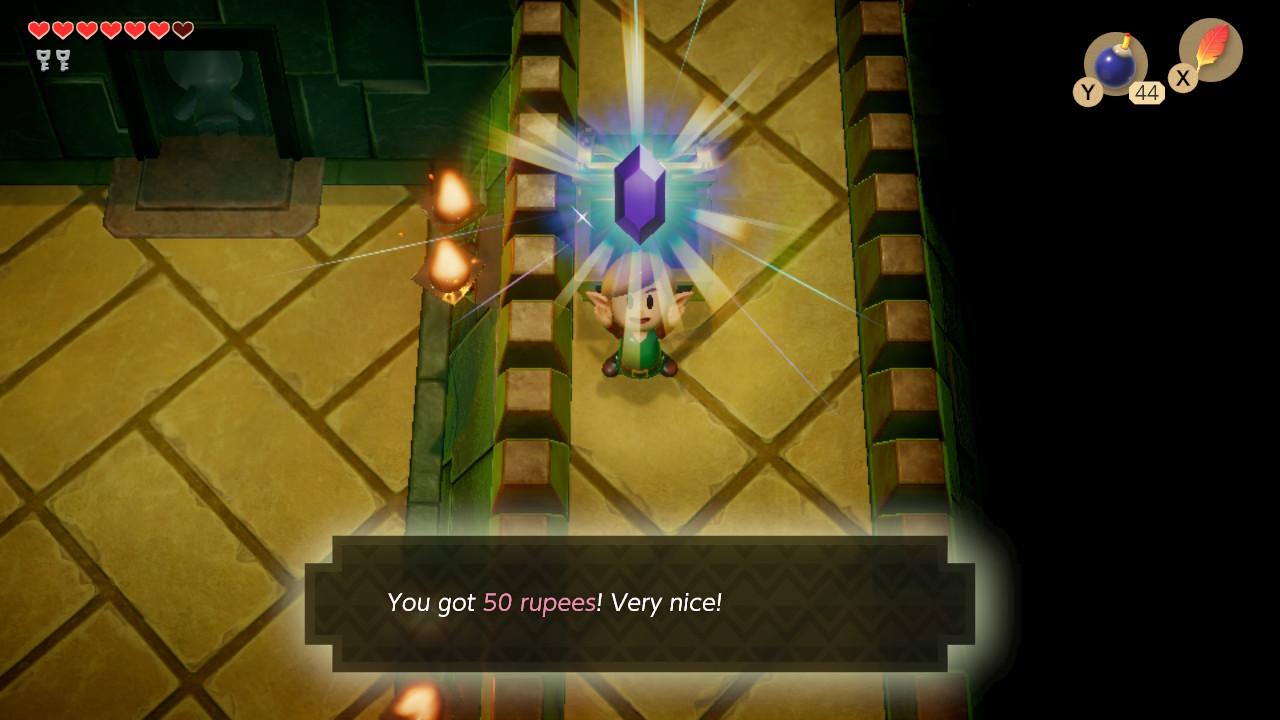
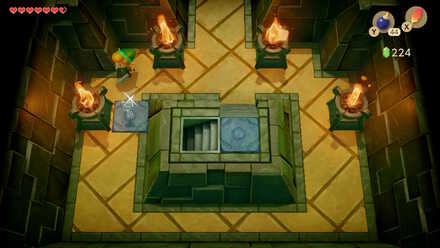
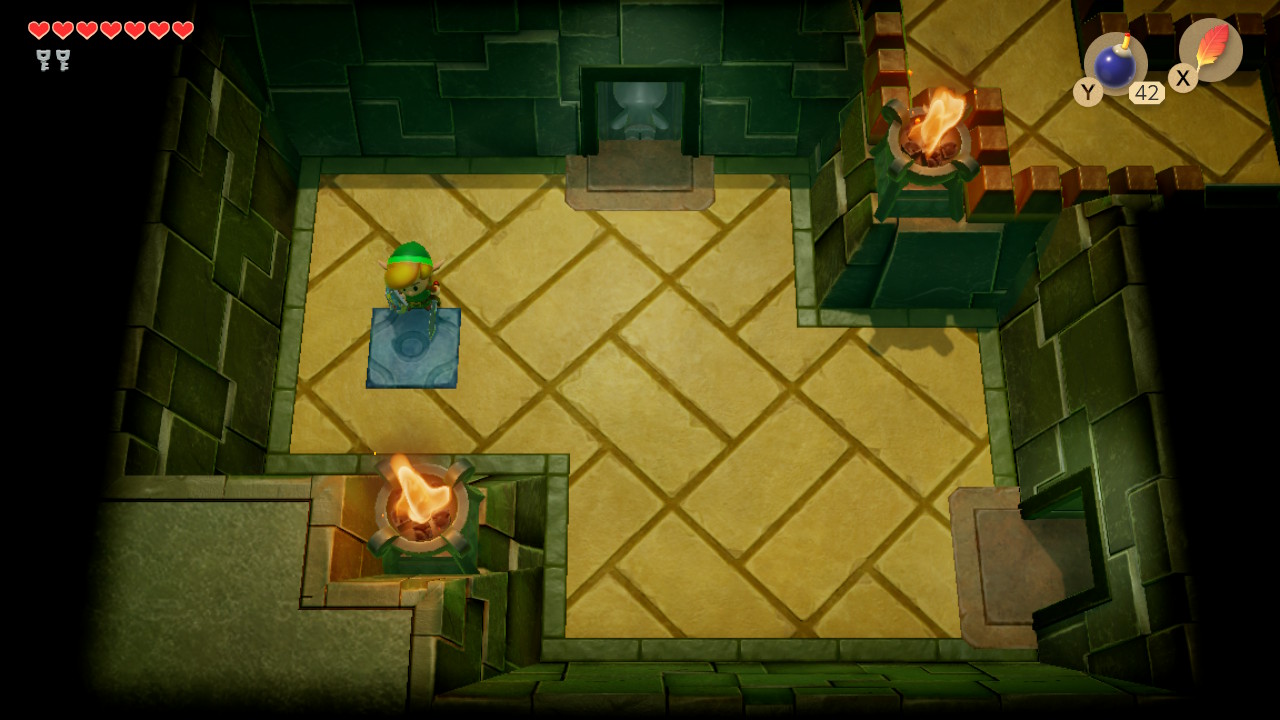
This next room contains two bombites as well as a shrouded stalfos. Defeat the enemies, move the pots, and use Roc's Feather to obtain the 10 bombs here. Head up the stairs, and go straight ahead (south) to get the chest from a minute ago. Open it to obtain 50 rupees. Continue south, push the block out of the way, then go into the door here on your right.
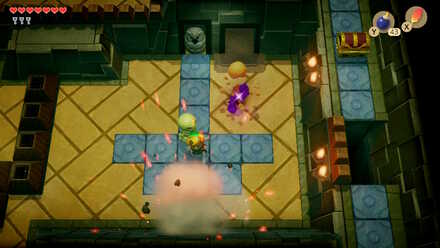
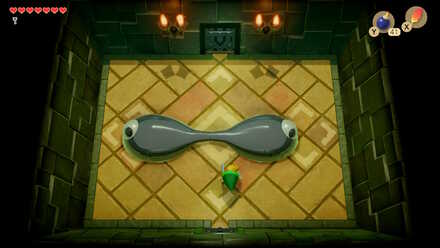
Mini-Boss: Dododngo Snakes
 |
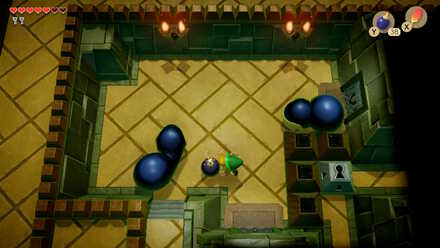 |
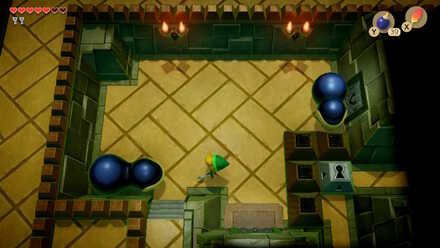
The Dodongo Snakes are two large slow moving creatures that open their mouths each time they move forward. Any long time player of the Zelda series will know that a monster that opens its mouth is hungry for bombs. You must drop a bomb in front of it right before it opens the mouth. Laying it down too soon will make the snakes avoid eating it. Feed them each three bombs to blow them up and grab the fairies they drop. This will also make a warp point to the start of the dungeon spawn.
Pegasus Boots
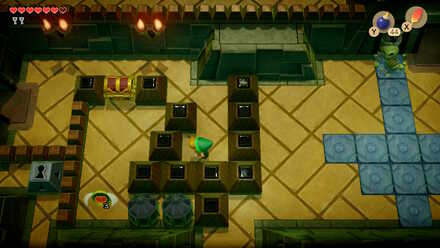 |
 |
Continue on to the top right room. Walk around from the right side, and push the blocks to open a path (as shown in the images above). Open the chest to reveal the Pegasus Boots. These babies will let you break the green crystal-like objects that block your path (such as the two at the bottom of the screen) by dashing into them with the L or ZL button. In addition, use them together with Roc's Feather to hop over large gaps in the floor.
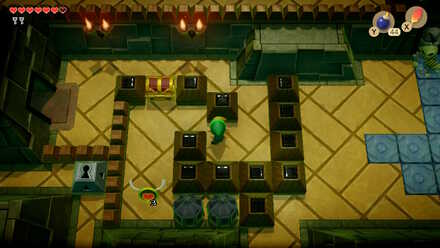
Small Key #7
 |
 |
Use the warp point to travel back to the beginning of the dungeon. In the room to your immediate right, there is a Vacuum Mouth stopping you from reaching the chest here. Use your new boots and dash into this annoying creature to reach the chest containing small key #7. Head back to the previous room, and this time head north.
300 Rupees
 |
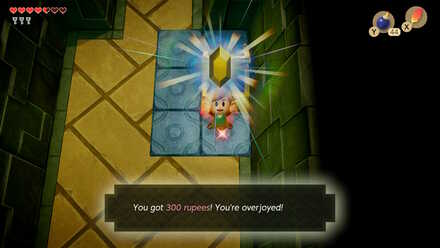 |
From this room, you will want to go left and straight. There are some obstacles blocking your path, so you can dash right through them with your boots to reach the next screen. On this next screen, a red Zol will appear, so defeat it, then head back to the room just north of where the trick treasure chest containing a Zol was located. Defeat the stalfos this time to reveal a chest containing a whopping 300 rupees. (Fishing pond here I come!). Now head south and take the warp again to return to the room where you fought the mini-boss.
Compass
 |
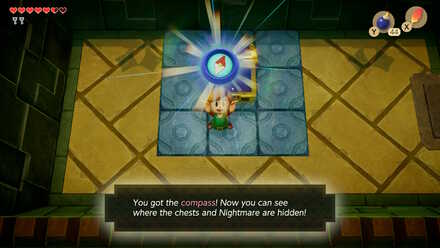 |
Break the obstacles south of the chest that contained the Pegasus Boots and go down a screen. Then go back up and right this time, and then through the doorway. In the next room, you will encounter some Green Bombites and Zol. These bombites will detonate after the time drops to one, but they will stay close to you. Avoid their explosions by slashing them at the last second, and defeat them all to proceed. In the next room, defeat the enemies and pick up the Compass from the treasure chest.
Small Key #8
 |
 |
Place a bomb on the left wall of this room. There are several bombites in this room. Strike the closest one with your sword and it should move towards the other ones, casuing them all to detonate. Defeat them all, and small key #8 will drop down. There is also a fairy in one of the pots nearby, so pick it up if you are low on hearts.
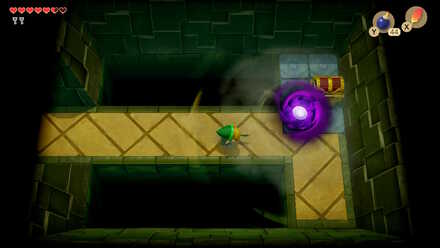
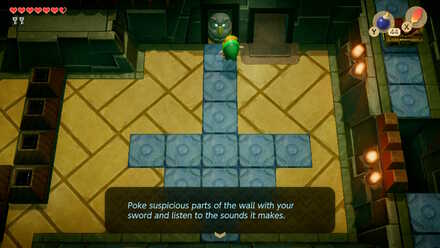
Nightmare Key
 |
 |
 |
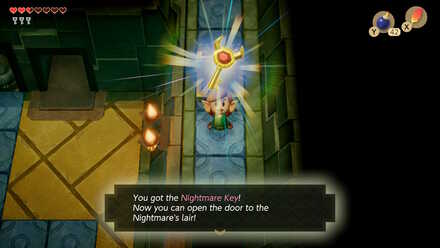 |
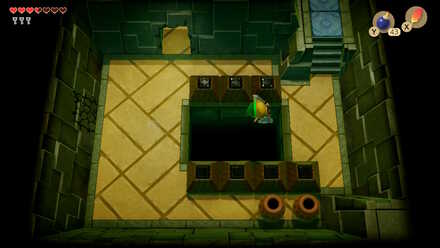
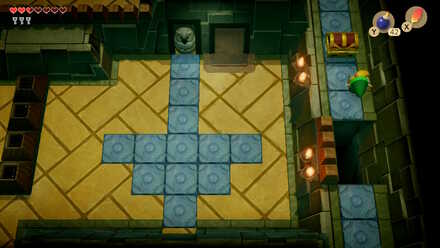
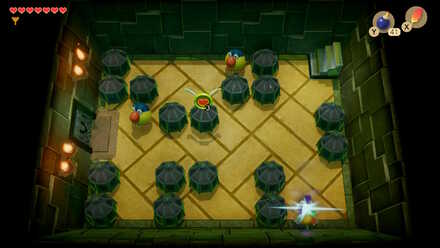
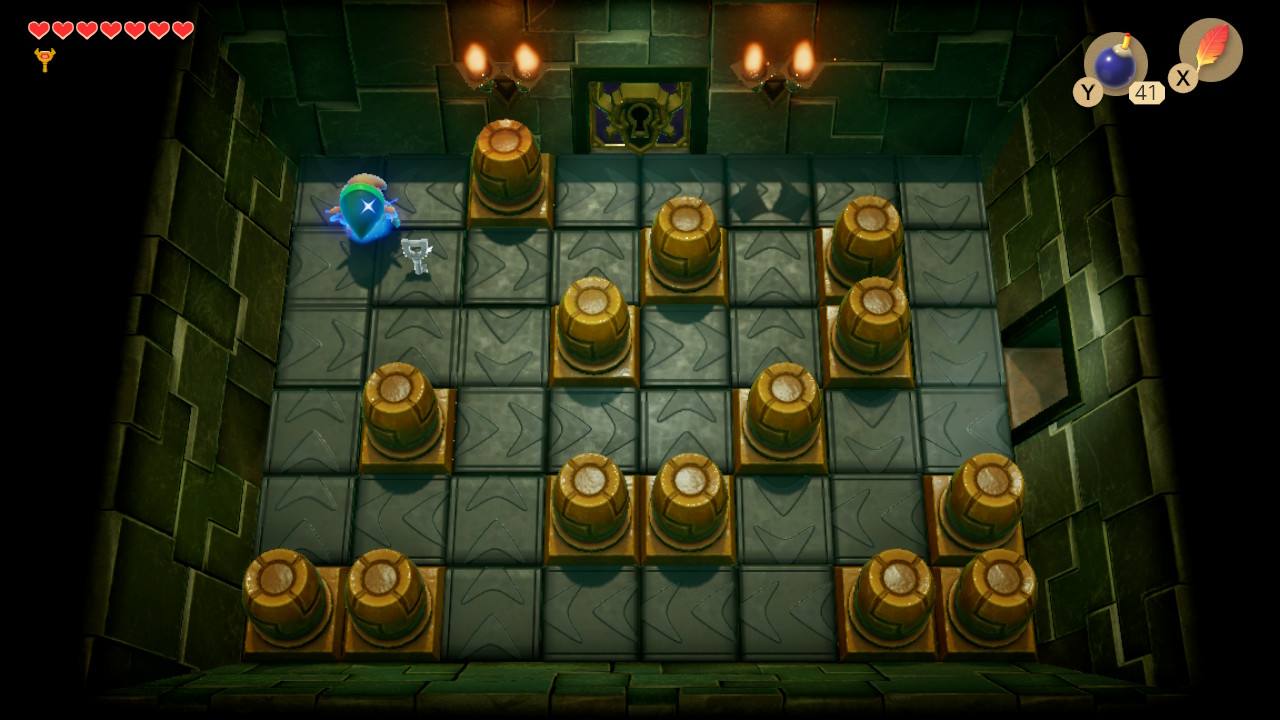
Going back a couple screens to where you saw the stone owl, you may notice that the floor looks like a big arrow. Placing a bomb at the tip of this arrow will blow up a wall, revealing a hidden room. Go into this room and you will notice the large gap. Time to put your jumping skills to the test. Use your boots to dash and then jump right at the ledge to reach the other side. Go up the stairs and do this once more to reach the chest containing the Nightmare Key. Back track, and blow up the cracked wall in the previous room.
Getting to the Nightmare Lair
 |
 |
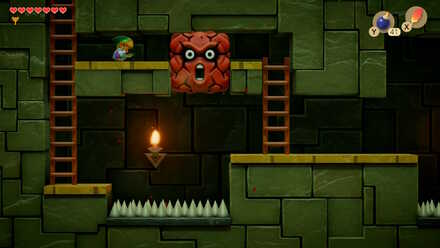
Go back towards the doorway you entered to fight the mini-boss and find the locked block here. Continue forward, unlocking all of the blocks in your way (you should have accumulated enough small keys for each one). Unlocking the last one will lead you to a stairwary. In this section, a large Red Thwomp blocks your path, so you will need to dash into it to make it drop down. Continue forward, dash-jumping over the spikes to reach the end.
Small Key #9
The next room contains three Pairodds and breakable blocks. You can easily defeat the Pairodds now by just dashing into them with the Pegasus Boots. Go into the next room to meet a conveyor belt and several Keese. Defeat the Keese and pick up small key #9 if you would like (it is totally useless at this point). Then proceed on into the Nightmare Lair.
Key Cavern Nightmare: Slime Eye
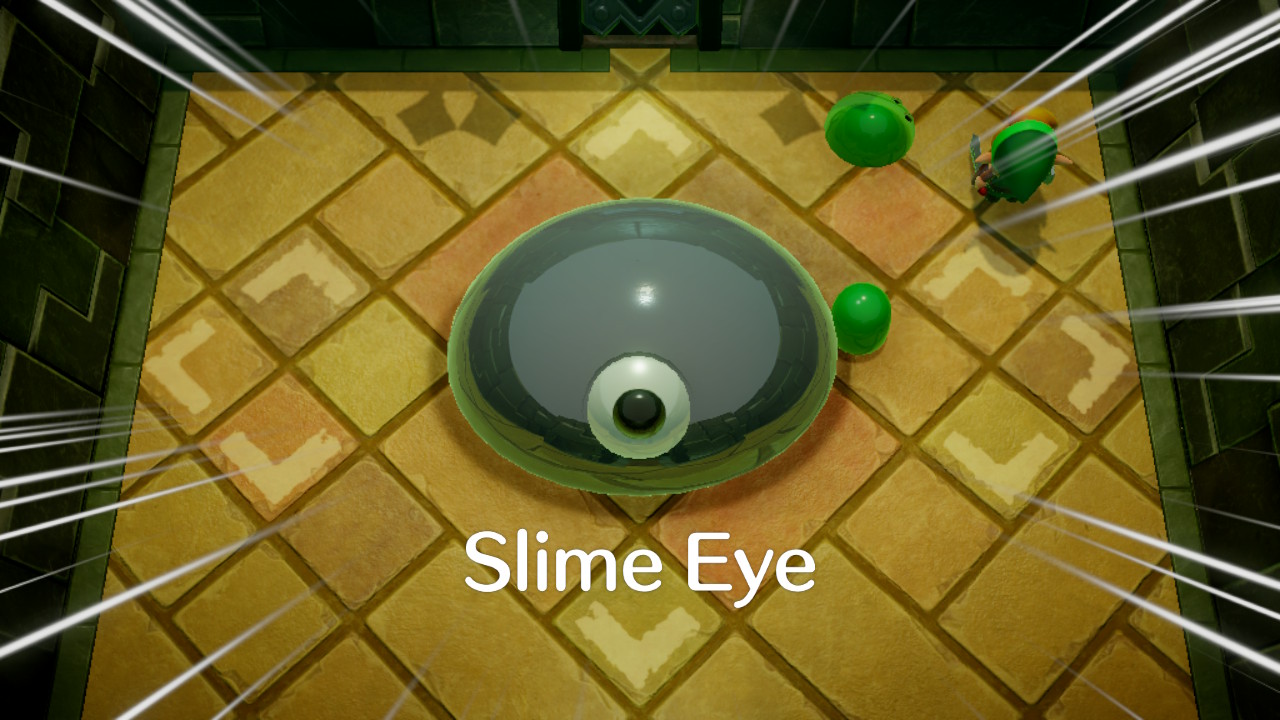
Upon entering the room, a voice will mock you, saying that you cannot find them. Dash into a wall to make Slime Eye drop down from the ceiling to begin the battle.
 |
 |
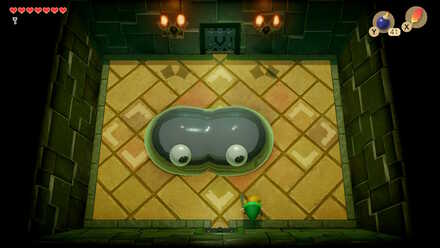
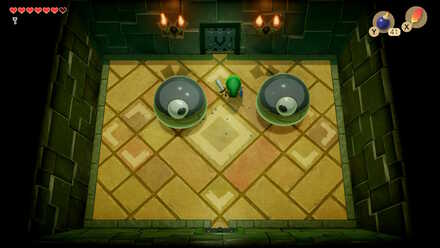
This boss is incredibly easy to deal with. Begin by slicing at the center eye, which will cause Slime Eye to split in two. Continue slashing at its eye until it looks like a dumbell, meaning that it is almost separated. Go in front of it and quickly dash through the center with your boots to separate it.
 |
 |
 |
 |
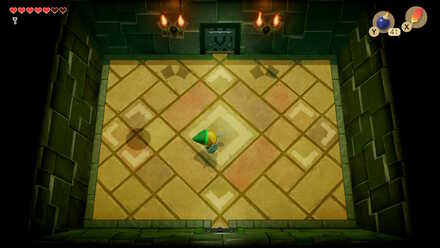
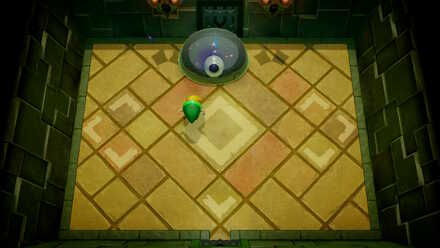
Now target just one of the slimes and slash away at its eyes a few times to kill it. They may try and jump up and fall down on you, so be wary of this, and dash away if necessary. Slash both eyes three or four times to defeat them, revealing a Heart Container. Proceed into the next room to obtain the Sea Lily's Bell and complete the dungeon.
Link's Awakening Related Guides

List of All Dungeons and Story Walkthrough
All Dungeon Walkthroughs
Author

The Legend of Zelda: Link's Awakening Walkthrough & Guides Wiki
Level 3 - Key Cavern Walkthrough
Please participate in our site
improvement survey
03/2026
improvement survey
03/2026
Would you assist in
improving Game8's site?
improving Game8's site?

×
We are listening to our users' valuable opinions and discussing how to act on them.
The information collected through this survey will be used for the purpose of improving our services. In addition, the information will only be disclosed a part of a statistic in a format that will not allow identification of personal information.
Begin Survey
Not Now
×
Please rate each item regarding Game8.co's Advertisements.
Amount of Ads
Very Dissatisfied
Somewhat Dissatisfied
Fine
Somewhat Satisfied
Highly Satisfied
Placement of Ads
Timing of Ad Display
Ad Loading Speed
Safeness of Ads
Content of Ads
×
Please rate each item regarding Game8.co's Quality of Articles.
Amount of information
Very Dissatisfied
Somewhat Dissatisfied
Fine
Somewhat Satisfied
Highly Satisfied
Frequency of updates
Speed of new information
Accuracy of articles
Understandibility of articles
Readability of sentences
×
Please rate each item regarding Game8.co's Usability of the Site.
Ease of finding information
Very Dissatisfied
Somewhat Dissatisfied
Fine
Somewhat Satisfied
Highly Satisfied
Loading Speed
Use of Color
Font Size
Visibility of Images
Easy to Understand Layout
×
Please rate each item regarding Game8.co's Message Boards, Comments.
Ease of Writing
Very Dissatisfied
Somewhat Dissatisfied
Fine
Somewhat Satisfied
Highly Satisfied
Readability
Ease in Finding Information
Comment Quality
Comment Quantity
Admin Response
×
Please rate each item regarding Game8.co's Site's new design.
Please rate our site's new design
Very Dissatisfied
Somewhat Dissatisfied
Fine
Somewhat Satisfied
Highly Satisfied
Do you think that the website's design change makes the site easier to use?
Has the new design made it easier for you to find information on the site?
Has the new design improved the overall visual appeal of the site?
How would you rate your overall satisfaction with the new design of the site?
×
How likely are you to recommend Game8 to someone you know?
Very Unlikely
0
1
2
3
4
5
6
7
8
9
10
Very Likely
If you have other opinions regarding potential improvement to the website, please share them with us. We would appreciate your honest opinion.
Note: This is a free response section, so you can proceed without entering anything.
Note: Please be sure not to enter any kind of personal information into your response.
Note: Please be sure not to enter any kind of personal information into your response.
×
Thank You
×
Thank you for participating in our survey! Your answers will help us to improve the quality of our website and services.
We hope you continue to make use of Game8.
We hope you continue to make use of Game8.
Close
Rankings
- We could not find the message board you were looking for.
Gaming News


![Everwind Review [Early Access] | The Shaky First Step to A Very Long Journey](https://img.game8.co/4440226/ab079b1153298a042633dd1ef51e878e.png/thumb)

![Monster Hunter Stories 3 Review [First Impressions] | Simply Rejuvenating](https://img.game8.co/4438641/2a31b7702bd70e78ec8efd24661dacda.jpeg/thumb)
Popular Games

Genshin Impact Walkthrough & Guides Wiki
Honkai: Star Rail Walkthrough & Guides Wiki
Umamusume: Pretty Derby Walkthrough & Guides Wiki
Pokemon Pokopia Walkthrough & Guides Wiki
Resident Evil Requiem (RE9) Walkthrough & Guides Wiki
Monster Hunter Wilds Walkthrough & Guides Wiki
Wuthering Waves Walkthrough & Guides Wiki
Arknights: Endfield Walkthrough & Guides Wiki
Pokemon FireRed and LeafGreen (FRLG) Walkthrough & Guides Wiki
Pokemon TCG Pocket (PTCGP) Strategies & Guides Wiki


Recommended Games
Diablo 4: Vessel of Hatred Walkthrough & Guides Wiki
Fire Emblem Heroes (FEH) Walkthrough & Guides Wiki
Yu-Gi-Oh! Master Duel Walkthrough & Guides Wiki
Super Smash Bros. Ultimate Walkthrough & Guides Wiki
Pokemon Brilliant Diamond and Shining Pearl (BDSP) Walkthrough & Guides Wiki
Elden Ring Shadow of the Erdtree Walkthrough & Guides Wiki
Monster Hunter World Walkthrough & Guides Wiki
The Legend of Zelda: Tears of the Kingdom Walkthrough & Guides Wiki
Persona 3 Reload Walkthrough & Guides Wiki
Cyberpunk 2077: Ultimate Edition Walkthrough & Guides Wiki


All rights reserved
© 1993-2019 Nintendo
The copyrights of videos of games used in our content and other intellectual property rights belong to the provider of the game.
The contents we provide on this site were created personally by members of the Game8 editorial department.
We refuse the right to reuse or repost content taken without our permission such as data or images to other sites.