Putrid Bog (Sunlit Wetlands) Map and Points of Interest
★ All Updates for Patch 5
☆ Beginner Guides for All Starter Players
★ Simple Character Creation Guide for beginners
☆ A Full Guide to Multiclassing
★ All Side Quests and Event Points
☆ All Races and Subraces
In Baldur's Gate 3 (BG3), the Putrid Bog is an area under an illusion spell to appear as the Sunlit Wetlands, and is located south of the Blighted Village. Read on to view the map of Putrid Bog and Sunlit Wetlands, and to find out all the locations, dungeons, and other points of interest in the area.
List of Contents
Putrid Bog (Sunlit Wetlands) Map
Putrid Bog Full Map
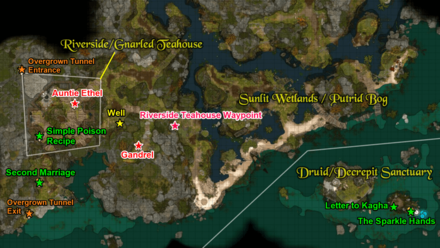
Putrid Bog is located south of the Blighted Village, and first appears as the Sunlit Wetlands, a beautiful swamp filled with flourishing plants and peaceful animals.
It can be revealed that this is an illusion casted by Auntie Ethel, a hag who lives in her house in the area. The place is actually the Putrid Bog, a swamp full of rot and death, and the animals are revealed to be monsters who answer to Auntie Ethel.
There are a lot of traps around the area, so be careful! They'll trigger even when you're seeing the area as the Sunlit Wetlands.
How to Reveal the Putrid Bog
| Insert Text Here |
|---|
|
|
While you can dispel the illusion of the Sunlit Wetlands through a few different ways, it doesn't matter which method you use or when you do it.
Pass the Check Upon Entering the Area
The Putrid Bog can be immediately revealed upon entering the area; a dialogue will start of you feeling that you're being watched. If you pass the roll to investigate, the illusion will wear off and reveal the Putrid Bog.
Expose or Attack the Disguised Sheep

There are some sheep roaming around the area. If you talk to any of them, you can initiate a roll that will expose the sheep's true form as goblins; this will reveal the Putrid Bog as well. They won't attack you if you reveal them this way.
Alternatively, you can simply attack any of them, but this would result in a surprise attack from all of them, so be careful!
Talk to Auntie Ethel in the Teahouse
Lastly, you can simply talk to Auntie Ethel, who's in her teahouse in the area. If the dialogue progresses where she reveals her true form, she'll reveal the Putrid Bog's true form as well.
Putrid Bog (Sunlit Wetlands) Locations
Gnarled Teahouse (Riverside Teahouse)
| Gnarled Teahouse (Riverside Teahouse) |
|---|
 |
| Coordinates: (-58, 251) |
The Gnarled Teahouse is where you'll find Auntie Ethel, located at the east part of Putrid Bog. Before you dispel the illusion, the area will appear as the Riverside Teahouse instead.
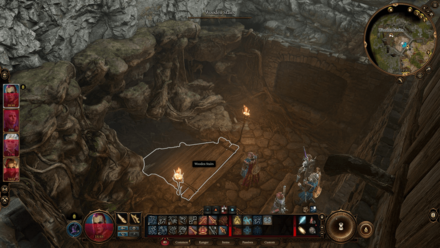
Decrepit Sanctuary (Druid Sanctuary)
| Decrepit Sanctuary (Druid Sanctuary) |
|---|
 |
| Coordinates: (96, 229) |
The Decrepit Sanctuary is located south of the Putrid Bog, accessible from jumping over the water southeast of the area. Before you dispel the illusion, the area will appear as the Druid Sanctuary instead.
No matter how you're seeing the area, there will be a bunch of Wood Woads and Ancient Mud Mephits that will be hostile and attack you as soon as you enter.
Putrid Bog (Sunlit Wetlands) Points of Interest
| Putrid Bog (Sunlit Wetlands) Points of Interest |
|---|
|
|
Riverside Teahouse Waypoint
| Riverside Teahouse Waypoint |
|---|
 |
| Coordinates: (-9, 249) |
The Riverside Teahouse Waypoint is located at the middle of the Putrid Bog, in front of the Teahouse.
People of Interest
Auntie Ethel and Mayrina
| Auntie Ethel and Mayrina |
|---|
|
| Coordinates: (-58, 262) |
Auntie Ethel can be found inside the Teahouse, holding Mayrina captive. If you attack Auntie Ethel, she'll take Mayrina away down into her dungeon underneath the house.
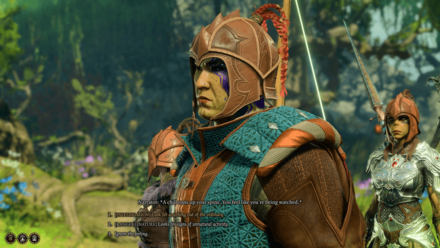
Gandrel
| Gandrel |
|---|
 |
| Coordinates: (-26, 240) |
Gandrel is a monster hunter that you'll encounter southeast of the waypoint. He's searching for Astarion; you'll have the option to turn in Astarion (who'll be permanently removed from your party), kill Gandrel, or just leave him be.
If you chose the last option, he'll stay in the area as a trader, and will have some available wares for you. He doesn't have much gold if you're looking to sell things to him, though.
Overgrown Tunnel Entrances
Wooden Stairs Behind Fireplace
| Wooden Stairs Behind Fireplace |
|---|
 |
| Coordinates: (-72, 270) |
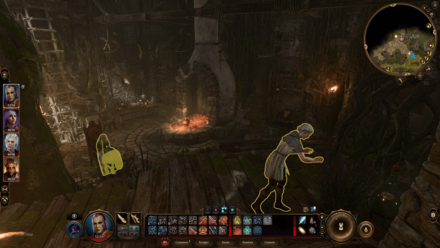
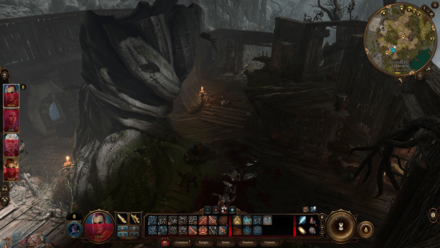
The entrance to the dungeon where Auntie Ethel will retreat into is the Wooden Stairs. This entrance is located behind the Fireplace in the Teahouse; interact with the Fireplace to turn the fire off, then walk behind it to find the stairs.
Go down the stairs to find the Overgrown Tunnel dungeon, where you'll find Auntie Ethel at the end of it.
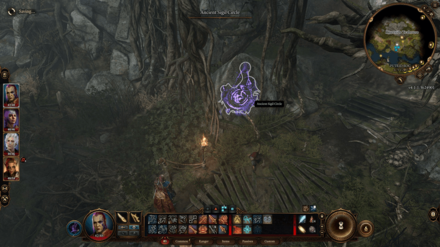
Mushroom Circle
| Mushroom Circle |
|---|
 |
| Coordinates: (-71, 208) |
This passage is located at the beach south of the Teahouse, but will not be accessible before you dealt with Auntie Ethel. At the end of the Overgrown Tunnel dungeon, in the Workshop, go to the Mushroom Circle to be enter and unlock this passage.
If you saved Mayrina, you'll find her near this passage upon exiting.
Valuables
Wooden Chest: The Sparkle Hands
| Wooden Chest: The Sparkle Hands |
|---|
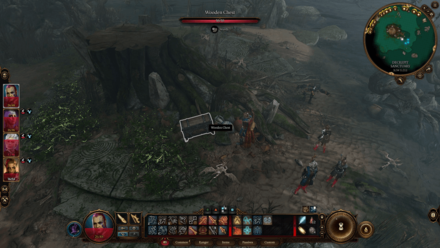 |
| Coordinates: (94, 211) |
Loacted in the Decrepit Sanctuary/Druid Sanctuary, you'll find a Rare equipment, The Sparkle Hands, inside a Wooden Chest beside the tree trunk at the middle of the area.
Wooden Crevice: Letter to Kagha
| Wooden Crevice: Letter to Kagha |
|---|
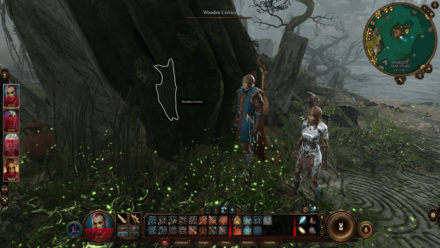 |
| Coordinates: (85, 211) |
The Letter to Kagha is instrumental to one of the routes to how the Save the Refugees quest can be resolved.
The letter is located inside a Wooden Crevice in the tree trunk at the middle of the Decrepit Sanctuary/Druid Sanctuary area, at the south side of the trunk. You'll need a successful perception check to spot it.
Save the Refugees Walkthrough
Basic Poison Recipe
| Basic Poison Recipe |
|---|
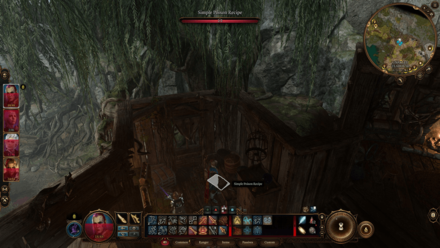 |
| Coordinates: (-69, 244) |
Inside the Teahouse, you'll find the Simple Poison Recipe book, which puts the Basic Poison recipe in your list of Alchemy recipes.
Second Marriage
| Second Marriage |
|---|
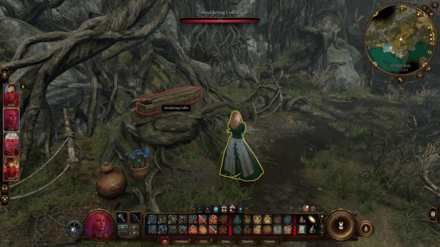 |
| Coordinates: (-67, 224) |
At the coast south of Auntie Ethel's house, if you haven't finished her questline yet, you'll find a coffin with an Arcane Barrier around it. This barrier will disappear after you deal with Auntie Ethel.
After dealing with Auntie Ethel inside the dungeon take the Bitter Divorce wand in her workshop, which is an item related to Mayrina's questline. Go to Mayrina at the coast, and you'll be able to revive Connor, her husband inside the Mouldering Coffin.
A cruel decision you can make is taking the wand and the now-undead husband for yourself; the Bitter Divorce will become the Second Marriage wand, which you can then use to summon Connor in battle.
Drinking Well
| Well |
|---|
 |
| Coordinates: (-36, 251) |
To the east of the Teahouse, you'll find a well. You can drink from it; it will usually give a Refreshed boost, which gives your character +10 Max HP until the next Long Rest. Sometimes, though, it will instead give a Nausated debuff, which will make you more vulnerable to damage.
You can return to this well and regain the boost after it disappears (be careful of getting the Nausated debuff instead, though).
Baldur's Gate 3 Related Guides

Faerûn All Locations
| Prologue Locations | |
|---|---|
| Nautiloid | |
| Act 1 Locations | |
| Wilderness | Chapel Ruins |
| Emerald Grove | Owlbear Nest |
| Blighted Village | Whispering Depths |
| Putrid Bog (Sunlit Wetlands) | Overgrown Tunnel |
| The Risen Road | Zhentarim Basement |
| Goblin Camp | Mountain Pass: Rosymorn Monastery |
| Creche Y'llek | Underdark |
| Arcane Tower | Grymforge |
| Act 2 Locations | |
| Shadow-Cursed Lands | Reithwin Town |
Author

Putrid Bog (Sunlit Wetlands) Map and Points of Interest
Rankings
- We could not find the message board you were looking for.
Gaming News
![Neverness to Everness (NTE) Review [Beta Co-Ex Test] | Rolling the Dice on Something Special](https://img.game8.co/4414628/dd3192c8f1f074ea788451a11eb862a7.jpeg/show)


Popular Games

Genshin Impact Walkthrough & Guides Wiki
Honkai: Star Rail Walkthrough & Guides Wiki
Arknights: Endfield Walkthrough & Guides Wiki
Umamusume: Pretty Derby Walkthrough & Guides Wiki
Wuthering Waves Walkthrough & Guides Wiki
Pokemon TCG Pocket (PTCGP) Strategies & Guides Wiki
Abyss Walkthrough & Guides Wiki
Zenless Zone Zero Walkthrough & Guides Wiki
Digimon Story: Time Stranger Walkthrough & Guides Wiki
Clair Obscur: Expedition 33 Walkthrough & Guides Wiki


Recommended Games
Fire Emblem Heroes (FEH) Walkthrough & Guides Wiki
Pokemon Brilliant Diamond and Shining Pearl (BDSP) Walkthrough & Guides Wiki
Diablo 4: Vessel of Hatred Walkthrough & Guides Wiki
Super Smash Bros. Ultimate Walkthrough & Guides Wiki
Yu-Gi-Oh! Master Duel Walkthrough & Guides Wiki
Elden Ring Shadow of the Erdtree Walkthrough & Guides Wiki
Monster Hunter World Walkthrough & Guides Wiki
The Legend of Zelda: Tears of the Kingdom Walkthrough & Guides Wiki
Persona 3 Reload Walkthrough & Guides Wiki
Cyberpunk 2077: Ultimate Edition Walkthrough & Guides Wiki


All rights reserved
© 2023 Larian Studios. All rights reserved. Larian Studios is a registered trademark of arrakis nv, affiliate of Larian Studios Games ltd. All company names, brand names, trademarks and logos are the property of their respective owners. © 2020 Wizards of the coast. All rights reserved. Wizards of the coast, Baldur’s Gate, Dungeons & Dragons, D&D, and their respective logos. Are registered trademarks of wizards of the coast LLC
The copyrights of videos of games used in our content and other intellectual property rights belong to the provider of the game.
The contents we provide on this site were created personally by members of the Game8 editorial department.
We refuse the right to reuse or repost content taken without our permission such as data or images to other sites.
You CAN unlock the magic mushroom circles before ever encountering Auntie Ethel. You just enter into withering through the well or basement in blighted village, drop into underdark, go left at ruined castle, climb the mushrooms, pass a perception check, go through fake wall illusion , and now you're in Sunlit forest/Putrid Bog, right behind Auntie Ethel's Cabin/teahouse. Not that this is easier, just how I ended up there accidently through exploration. So it is possible even if not sensible.