Best Field Upgrades | Field Upgrade Guide
☆ Camo Challenges | List of Blueprints
★ DMZ Key Locations and Map
☆ Ashika Island: DMZ Keys | Weapon Cases | Map Guide
★ How to Get Weapon Cases
Field Upgrades are equipment in Call of Duty: Modern Warfare 2 that can grant certain advantages on the battlefield but need to be manually activated. Read on to learn what the best field upgrades are, how to use them as well as the different types of field upgrades available.
Best Field Upgrades
| Jump to a Field Upgrade |
|---|
|
|
Portable Radar
 |
|
|---|---|
| Operator Archetype | Offensive Archetype |
| Progression Rank Unlocked | Rank 6 |
| Official Description | Emits a periodic radar ping to detect nearby enemies. |
| Recommended Loadout | M4 |
| VEL-46 | |
| Recommended Game Modes | Hardpoint Team Deathmatch Free-For-All Kill Confirmed |
As the first Field Upgrade you unlock, the Portable Radar lets players plant a radar that pings nearby enemies on your minimap. For game modes like Hardpoint or Control, deploying this can help you protect an area by marking any enemies trying to sneak an attack.
Deployable Cover
 |
|
|---|---|
| Operator Archetype | Defensive Archetype |
| Progression Rank Unlocked | Unlocked by default |
| Official Description | Portable, rapidly deployable ballistic cover. |
| Recommended Loadout | MCPR-300 |
| P890 | |
| Recommended Game Modes | Team Deathmatch Domination Search and Destroy Hardpoint Headquarters |
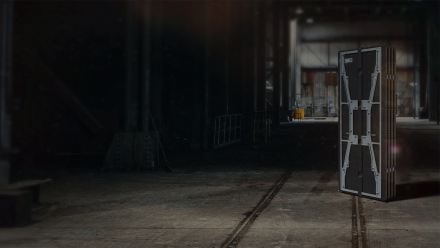
While there are players that regularly rush, there are also players that prefer holding down an area and waiting for enemies to come to them. Setting up the Deployable Cover allows players to safely wait for their targets and pounce at the perfect moment.
Munitions Box
 |
|
|---|---|
| Operator Archetype | Defensive Archetype |
| Progression Rank Unlocked | Rank 16 |
| Official Description | Deploy a box of ammo and equipment for you and your teammates. |
| Recommended Loadout | M4 |
| VEL-46 | |
| Recommended Game Modes | Viable in any game mode. |
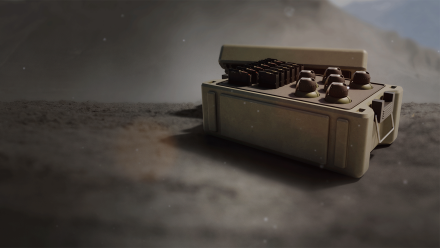
Ammo and throwables are the most vital resources you have in a match and running out of both can spell disaster for a player. Deploying a Munitions Box lets you (and your teammates!) replenish these necessary resources and continue playing on.
Loadout Drop
 |
|
|---|---|
| Operator Archetype | Reactive Archetype |
| Progression Rank Unlocked | Rank 45 |
| Official Description | Call in a team-based loadout crate with limited uses. Each player can only use it once. |
| Recommended Loadout | M4 |
| VEL-46 | |
| Recommended Game Modes | Team Deathmatch Search and Destroy Hardpoint |
Another Field Upgrade that you can share with your teammates, the Loadout Drop lets you call in a crate that you and your teammates can use to swap out their current loadout. Each player can only use this once so make sure you're swapping out for the right loadout!
Dead Silence
 |
|
|---|---|
| Operator Archetype | Aggressive Archetype |
| Progression Rank Unlocked | Rank 51 |
| Official Description | Temporarily makes your footsteps silent. Gun, melee, and throwing knife kills refresh duration. |
| Recommended Loadout | FSS Hurricane |
| P890 | |
| Recommended Game Modes | Viable in any game mode. |
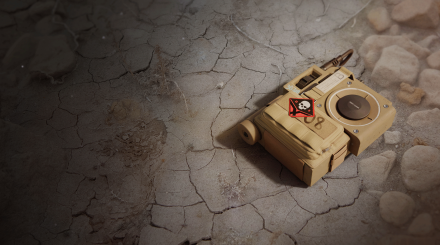
Dead Silence returns as a Field Upgrade and is still one of the best upgrades players can equip. Taking away audio cues in a game where knowing your enemy's location is the key to getting an advantage only makes it worse for the opposing players. Adding to the fact that certain eliminations refresh its duration and you've got yourself an unstoppable player
List of Field Upgrades
Deployable Cover
 |
|
|---|---|
| Operator Archetype | Defensive Archetype |
| Progression Rank Unlocked | Unlocked by default |
| Official Description | Portable, rapidly deployable ballistic cover. |
| Recommended Loadout | MCPR-300 |
| Expedite 12 | |
| Recommended Game Modes | Domination Search and Destroy Hardpoint |
Should you find yourself with nowhere to hide or would just like to have more cover, the Deployable Cover could provide the safety you need. Utilizing this shield can also act as a mountable surface for to shoot weapons more accurately.
Tactical Insertion
 |
|
|---|---|
| Operator Archetype | Reactive Archetype |
| Progression Rank Unlocked | Rank 43 |
| Official Description | Marks a location as your next spawn point. |
| Recommended Loadout | M4 |
| Expedite 12 | |
| Recommended Game Modes | Control Domination Free-For-All Hardpoint |
Tactical Insertion works best in Ground War maps where objectives are located far away from deployable areas. This is also viable for carrying out sneak attacks by marking your spawn point behind enemy lines.
Note: Tactical Insertion does not have an effect in one-life modes.
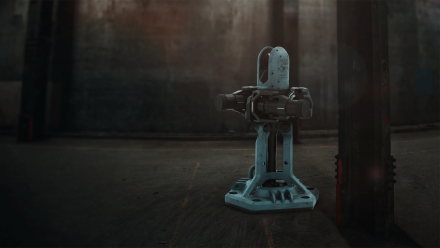
Trophy System
 |
|
|---|---|
| Operator Archetype | Defensive Archetype |
| Progression Rank Unlocked | Rank 8 |
| Official Description | Deployable autonomous defense system that destroys up to three nearby pieces of equipment and projectiles. Some larger targets may take multiple shots.. |
| Recommended Loadout | M4 |
| VEL-46 | |
| Recommended Game Modes | Domination Hardpoint Team Deathmatch Free-For-All Kill Confirmed |
Perfect for those setting up camp in a particular area, the Trophy System acts as your first line of defense when securing objectives. Since there are targets that take multiple hits, it would be good to fight alongside this as to maximize its damage output.
Portable Radar
 |
|
|---|---|
| Operator Archetype | Offensive Archetype |
| Progression Rank Unlocked | Rank 5 |
| Official Description | Emits a periodic radar ping to detect nearby enemies. |
| Recommended Loadout | M4 |
| VEL-46 | |
| Recommended Game Modes | Hardpoint Team Deathmatch Free-For-All Kill Confirmed |
Proactive players will find the most success with the Portable Radar as you can play off its pings. Pairing this with the Birds’ Eye perk ensures that while enemies can try to run, there is no place you wouldn't be able to locate them.
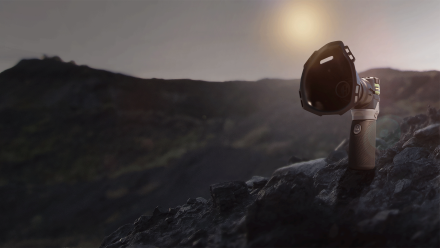
Battle Rage
 |
|
|---|---|
| Operator Archetype | Aggressive Archetype |
| Progression Rank Unlocked | Rank 24 |
| Official Description | Experimental stimulant that gives you an adrenaline rush. Health regenerates quickly, Tactical Equipment is resisted, and Tactical Sprint is constantly refreshed. |
| Recommended Loadout | FSS Hurricane |
| P890 | |
| Recommended Game Modes | Team Deathmatch Free-For-All Kill Confirmed Team Deathmatch Free-For-All Kill Confirmed |
Battle Rage is great for rushing into enemies and taking control of areas especially when you work with your team to set you up. On the other hand, this could also work for getting yourself out of a tight spot since you can continuously Tactical Sprint while resisting Tactical Equipment.
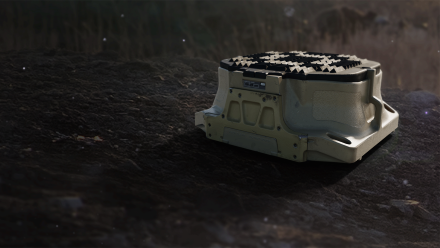
Suppression Mine
 |
|
|---|---|
| Operator Archetype | Defensive Archetype |
| Progression Rank Unlocked | Unlocked by default |
| Official Description | Trip mine that, when triggered, emits a constant sound wave that disrupts enemy vision and slows their movement. |
| Recommended Loadout | M4 |
| VEL-46 | |
| Recommended Game Modes | Team Deathmatch Free-For-All Kill Confirmed Team Deathmatch Free-For-All Kill Confirmed |
The Suppression Mine helps players control areas of interest on the map. Secure objectives and protect yourself from enemies trying to sneak an attack.
Loadout Drop
 |
|
|---|---|
| Operator Archetype | Reactive Archetype |
| Progression Rank Unlocked | Rank 45 |
| Official Description | Call in a team-based loadout crate with limited uses. Each player can only use it once. |
| Recommended Loadout | M4 |
| VEL-46 | |
| Recommended Game Modes | Team Deathmatch Search and Destroy Hardpoint |
Call in a Loadout Drop and swap loadouts for yourself and your team mid-combat. A well-timed Loadout Drop could be the difference between victory and defeat given the fast-paced nature of the game. Players can only use this once per drop so make sure use this wisely.
Tactical Camera
| Operator Archetype | Defensive Archetype |
|---|---|
| Progression Rank Unlocked | Rank 12 |
| Official Description | Remote-controlled camera that marks enemies. Use the Field Upgrade command to throw it, then do it again to connect to it. When left on its own, the camera will monitor the area, and warn players of nearby enemies by sound. |
| Recommended Loadout | M4 |
| VEL-46 | |
| Recommended Game Modes | Control Domination Free-For-All Headquarters Search and Destroy Team Deathmatch |
Operators that excel in teamplay and have good communication with their squad are sure to get multi-kills with the Tactical Camera. Apart from setting up teammates, this is also useful for monitoring an area and will send you a warning if enemies are near.
Munitions Box
 |
|
|---|---|
| Operator Archetype | Defensive Archetype |
| Progression Rank Unlocked | Rank 16 |
| Official Description | Deploy a box of ammo and equipment for you and your teammates. |
| Recommended Loadout | M4 |
| VEL-46 | |
| Recommended Game Modes | Viable in any game mode. |
Deploying the Munitions Box is useful for any scenario since replenishing your resources is always helpful. While it would be much safer to be use this away from combat, players shouldn't shy away from deploying this at any time especially if the opportunity for a play presents itself.
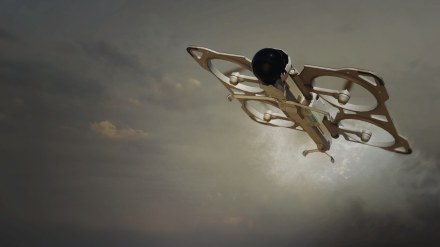
Smoke Airdrop
 |
|
|---|---|
| Operator Archetype | Reactive Archetype |
| Progression Rank Unlocked | Rank 30 |
| Official Description | Call in a line of drones to deploy a smoke wall at a targeted location. |
| Recommended Loadout | Expedite 12 |
| .50 GS | |
| Recommended Game Modes | Control Domination Headquarters Kill Confirmed Prisoner Rescue |
Provide cover way from marksmen and snipers by calling in a Smoke Airdrop and shroud yourself from their line of sight. Unless your enemies have the means to see through smokes, these drones are ideal for diverting attention from you.
Inflatable Decoy
| Operator Archetype | Defensive Archetype |
|---|---|
| Progression Rank Unlocked | Rank 49 |
| Official Description | Proximity activated decoy mine. Upon activation, the Kevlar target is violently deployed to confuse and distract. Use the Field Upgrade command a second time for manual activation. |
| Recommended Loadout | FSS Hurricane |
| P890 | |
| Recommended Game Modes | Domination Kill Confirmed Search and Destroy Headquarters Team Deathmatch |
Using an Inflatable Decoy can be useful almost anywhere on maps but can provide the most utility as bait. Operators that are defending an area can play off the decoy since it can be activated manually.
Recon Drone
 |
|
|---|---|
| Operator Archetype | Reactive Archetype |
| Progression Rank Unlocked | Unlocked by default |
| Official Description | Remote-controlled drone that has manual and auto marking capabilities. |
| Recommended Loadout | M4 |
| VEL 46 | |
| Recommended Game Modes | Hardpoint Headquarters Search and Destroy Team Deathmatch |
While scouting for intel can easily be done by using the Recon Drone, players will be have to find safe areas to do this since entering drone more will leave you vulnerable to attacks. Slapping a C4 on to this can make for a cheeky Bomb Drone.
DDOS
| Operator Archetype | Aggressive Archetype |
|---|---|
| Progression Rank Unlocked | Rank 38 |
| Official Description | Activates a device that deactivates electronics, and disrupts enemy sensors in the immediate area for a short time. |
| Recommended Loadout | FSS Hurricane |
| VEL 46 | |
| Recommended Game Modes | Control Domination Hardpoint Headquarters Search and Destroy |
The DDOS can render any placeable equipment useless since it can detect and destroy them. If an area or objective will be laden with enemy equipment, using this could make all the difference. Combining the Spotter perk alongside the DDOS can easily give your team the equipment advantage on the battlefield.
Anti-Armor Rounds
 |
|
|---|---|
| Operator Archetype | Reactive Archetype |
| Progression Rank Unlocked | Rank 20 |
| Official Description | Gives weapon ammo that applies bonus damage against armored targets; this includes vehicles, equipment, body armor, and targets behind penetrable cover. |
| Recommended Loadout | M4 |
| VEL 46 | |
| Recommended Game Modes | Viable in any game mode. |
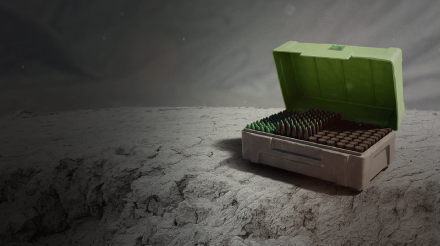
Ideal for Ground War game modes where players will be using vehicles frequently, Anti-Armor Rounds gives a weapon bonus damage against armored targets. Equipping weapons that can cover mid to long distances such as LMGs or Sniper Rifles synergize well with this Upgrade.
Dead Silence
 |
|
|---|---|
| Operator Archetype | Aggressive Archetype |
| Progression Rank Unlocked | Rank 51 |
| Official Description | Temporarily makes your footsteps silent. Gun, melee, and throwing knife kills refresh duration. |
| Recommended Loadout | M4 |
| VEL-46 | |
| Recommended Game Modes | Viable in any game mode. |
Operators that have a stealthier approach to the game might find Dead Silence to be the most optimal upgrade they can use. Combining this with the Ghost perk makes for the perfect assassin on the battlefield.
How to Use Field Upgrades
| Jump to a Field Upgrade |
|---|
|
|
Activate Them in Battle
There are 15 Field Upgrades in total and each player can initially choose 1 to equip per match. Players can equip a 2nd Field Upgrade when they reach Level 45. To use them, you will need to make sure their meter is filled up then you can activate them.
Get Kills for Faster Activation
In order to use Field Upgrades, you will have to fill up the circle meter at the bottom-right corner of the HUD. This meter fills slowly over time but can also build up faster by getting kills.
Choose an Upgrade to Augment Your Playstyle
Each Field Upgrade was designed to be used with the 3 most common playstyles: Aggressive, Reactive, and Defensive Operators. Aggressive Operators are characterized by their quick plays, ofter rushing enemies.
Reactive Operators observe their surroundings and opt for a more tactical plan of attack. Defensive Operators prefer to hold a position and stand their ground. Whichever playstyle you choose, there is sure to be a Field Upgrade to supplement your gameplay.
Synergize With Perks
Finding combinations for Perks and Field Upgrades can significantly help gun fights go your way. Make sure to check out the different available perks and play around with the different equipment to find the best loadout that fits your playstyle.
Perks Guide: How Do Perks Packages Work?
Call of Duty: Modern Warfare 2 (MW2) Related Guides

All Tips & Tricks
Author
Call of Duty: Modern Warfare 2 (MW2) Walkthrough & Guides Wiki
Best Field Upgrades | Field Upgrade Guide
improvement survey
02/2026
improving Game8's site?

Your answers will help us to improve our website.
Note: Please be sure not to enter any kind of personal information into your response.

We hope you continue to make use of Game8.
Rankings
- We could not find the message board you were looking for.
Gaming News
Popular Games

Genshin Impact Walkthrough & Guides Wiki

Arknights: Endfield Walkthrough & Guides Wiki

Honkai: Star Rail Walkthrough & Guides Wiki

Wuthering Waves Walkthrough & Guides Wiki

Umamusume: Pretty Derby Walkthrough & Guides Wiki

Zenless Zone Zero Walkthrough & Guides Wiki

Pokemon TCG Pocket (PTCGP) Strategies & Guides Wiki

Clair Obscur: Expedition 33 Walkthrough & Guides Wiki

Digimon Story: Time Stranger Walkthrough & Guides Wiki

Where Winds Meet Walkthrough & Guides Wiki
Recommended Games

Fire Emblem Heroes (FEH) Walkthrough & Guides Wiki

Diablo 4: Vessel of Hatred Walkthrough & Guides Wiki

Super Smash Bros. Ultimate Walkthrough & Guides Wiki

Yu-Gi-Oh! Master Duel Walkthrough & Guides Wiki

Pokemon Brilliant Diamond and Shining Pearl (BDSP) Walkthrough & Guides Wiki

Elden Ring Shadow of the Erdtree Walkthrough & Guides Wiki

Monster Hunter World Walkthrough & Guides Wiki

The Legend of Zelda: Tears of the Kingdom Walkthrough & Guides Wiki

Persona 3 Reload Walkthrough & Guides Wiki

Cyberpunk 2077: Ultimate Edition Walkthrough & Guides Wiki
All rights reserved
© 2021-2022 Activision Publishing, Inc. ACTIVISION, CALL OF DUTY, CALL OF DUTY VANGUARD, CALL OF DUTY WARZONE, WARZONE, and RICOCHET ANTI-CHEAT are trademarks of Activision Publishing, Inc. All other trademarks and trade names are the property of their respective owners.
The copyrights of videos of games used in our content and other intellectual property rights belong to the provider of the game.
The contents we provide on this site were created personally by members of the Game8 editorial department.
We refuse the right to reuse or repost content taken without our permission such as data or images to other sites.


