This survey will take about 1 minute.
Your answers will help us to improve our website.
Rainbow Six Mobile (R6M)
Types of Walls and How to Use
★ The Game is Now Released Globally.
★ Latest News: Platforms | Free Rewards
★ Current Season: Operation Sand Wraith
★ Guides: Tier List | Operators | Weapons | Abilities | Gadgets
There are various wall types that interact differently with Operators in Rainbow Six Mobile (R6M). Learn how to use each type of wall tactically and strategically in your games.
List of Contents
Types of Walls
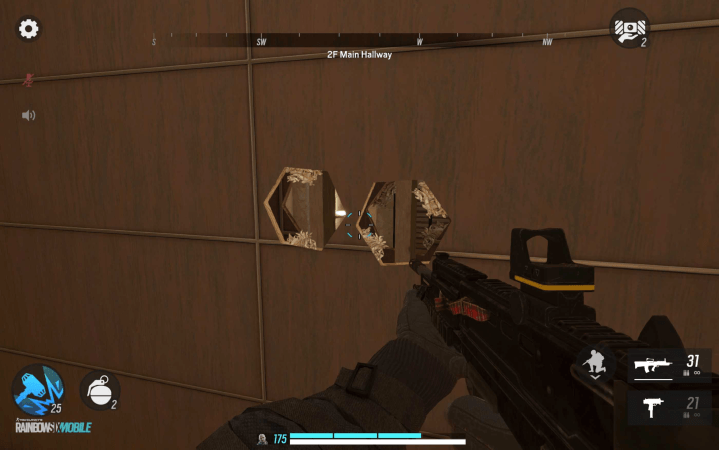
Soft Walls
 |
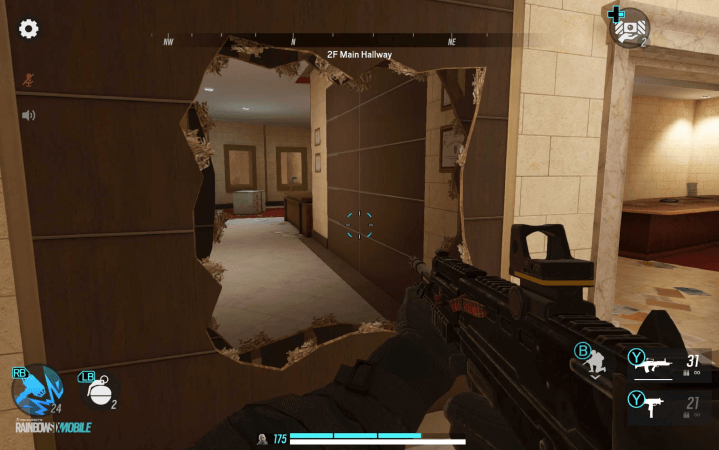 |
Soft walls, usually seen as having a wooden texture, are penetrable surfaces. They can be penetrated by bullets and melee hits to create peek holes, but they will not break down and will leave the wall structure mostly intact.
To create a fully passable hole on soft walls, you will need to use specific operator abilities or gadgets.
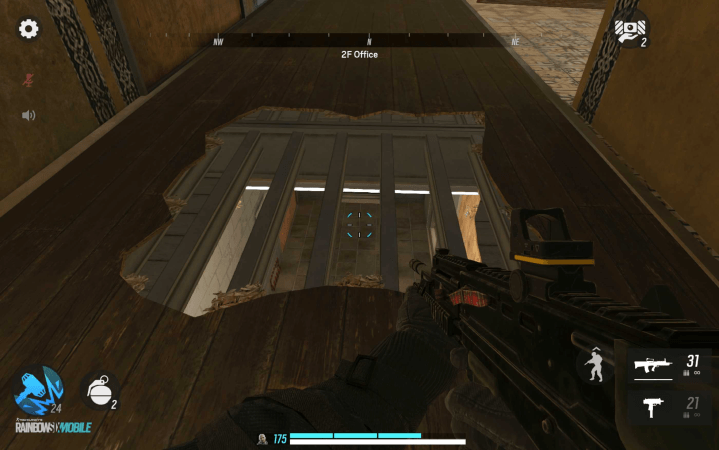
Floors and Ceilings can be Soft
 |
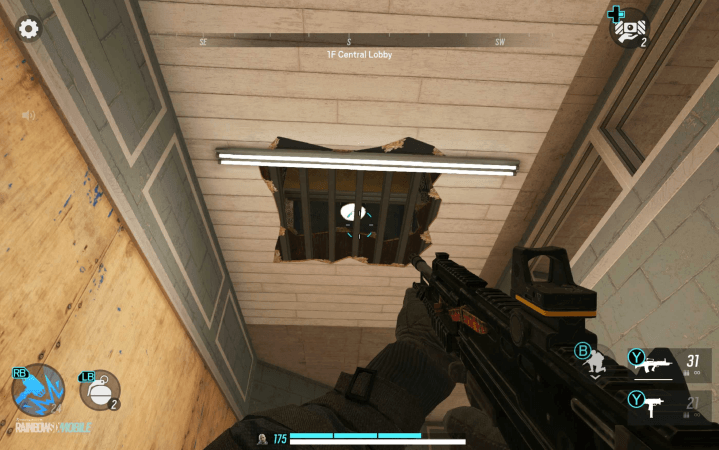 |
Vertical play is a fundamental aspect of Rainbow Six. One of the ways to take advantage of this is by knowing which floors and ceilings are breachable and bringing operators who can take advantage of this fact.
Sledge, for example, can use his hammer multiple times to create holes above a site, creating pressure towards the defenders as it adds a line-of-sight to be wary about. On the other hand, Buck can use his shotgun to create holes in the ceiling, creating the same pressure but from below.
Hatches can be Soft-breached
While most breachable floors and ceilings can only be used to make peekholes, hatches are available at specific positions of certain maps. As attackers, this can provide an additional point of entry towards a site. As defenders, this can potentially be used as a way to flank attackers.
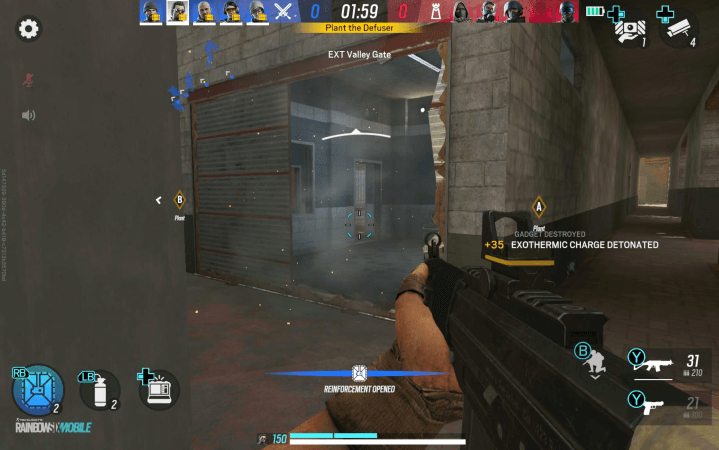
Reinforced Walls
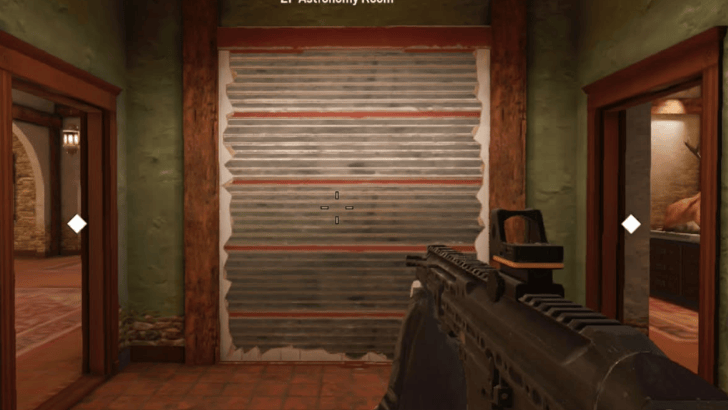
Most wooden walls can be reinforced with metal plates. Reinforced walls are bulletproof, and can only be penetrated by Operators with strong entry abilities such as Thermite.
Impenetrable Walls
These are any other kind of walls that can't be penetrated or destroyed by any means.
How to Use Walls
| As Attackers | ・Destroy Using Gadgets and Abilities |
|---|---|
| As Defenders | ・Reinforce Walls to Protect Site ・Destroy Soft Walls for Rotations |
| As Both | ・Create Peek Holes to Surprise Opponents |
As Attackers
Destroy Using Gadgets and Abilities
The most effective way to mess up a defense is to find and open holes in their plan, literally. The strength of the defenders comes from being prepared to defend certain entrypoints and angles. Creating new line-of-sights and entrypoints will allow attackers to put the defenders in a state of panic or take them by surprise.
| Abilities | Gadgets | |
|---|---|---|
| Soft Breachers | ||
| Hard Breachers | None |
As Defenders
Reinforce Walls to Protect Site
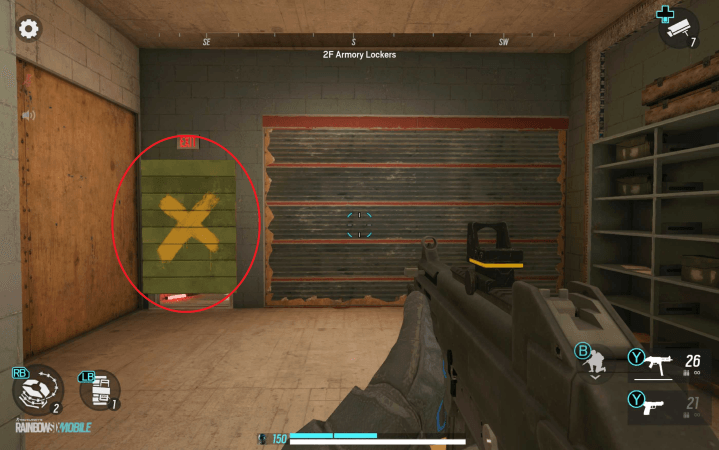
Reinforcing walls is very important as it limits the points of entry of the attacking team. Unless they have a hard-breacher, reinforced walls, like in the example image above, may force attackers to bottleneck at a single entrypoint, making them easier targets.
Reinforcing walls also decreases the chance of more line-of-sights opening up, making protecting the site a lot easier.
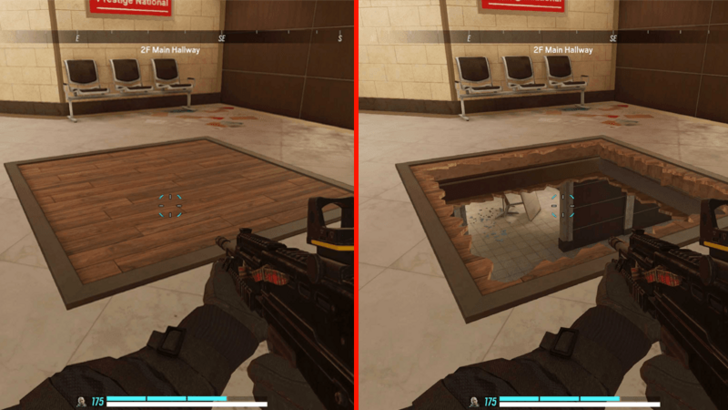
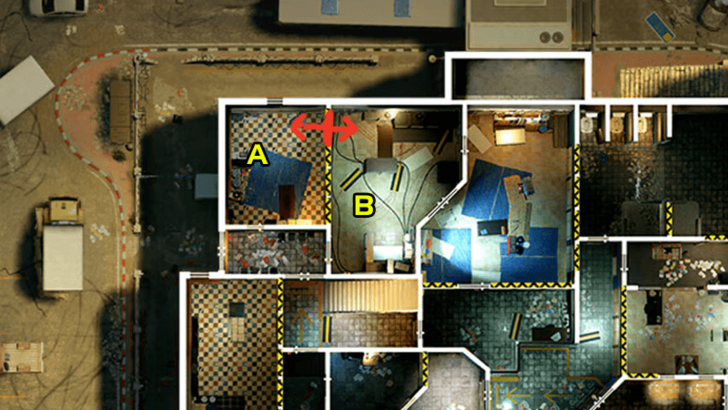
Destroy Soft Walls for Rotations
 |
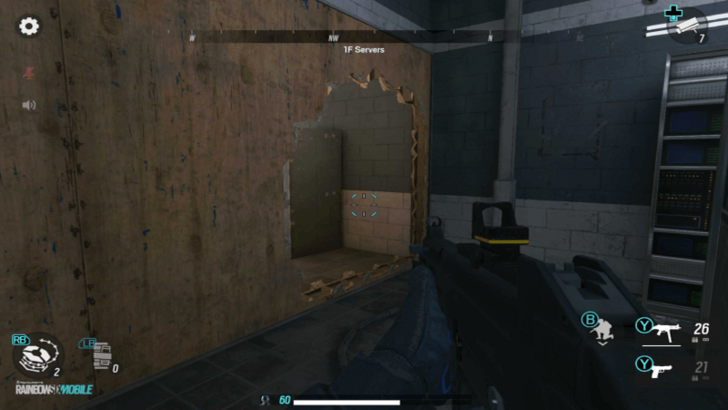 |
While it may seem counterintuitive at first, destroying walls inside the site you are protecting, some bomb sites may be too tight that you and your teammates could end up like fish in a barrel. Opening up rotations will allow you some breathing room in terms of movement. You can use rotations to get out of an area that has been overrun, for instance.
In the example images above, the two bomb sites that need protecting are divided by a wall. If the well is to be kept intact, you will need to split the team to protect both sites. However, if a rotation is opened up between the two sites, a single player in a good position can potentially guard both, allowing others a chance to move around and flank enemies.
As Both
Create Peek Holes to Surprise Opponents
Gadgets and abilities aside, the most basic yet effective tool in every operator's arsenal is the element of surprise. If you have gathered intel, whether through audio, drone, or teamcomms, that an enemy is on the other side of a wall, the best way to score easy kills is to take them by surprise by creating a line-of-sight that wasn't there previously.
Rainbow Six Mobile (R6M) Related Guides

Beginner's Guide: Tips and Tricks
All Tips and Tricks
| How to Pre-Select Operators | Controller Support Guide |
| Types of Walls and How to Use | How to Farm Renown |
| How to Invite Friends | How to Prone |
Comment
Author

Types of Walls and How to Use
Please participate in our site
improvement survey
03/2026
improvement survey
03/2026
Would you assist in
improving Game8's site?
improving Game8's site?

×
We are listening to our users' valuable opinions and discussing how to act on them.
The information collected through this survey will be used for the purpose of improving our services. In addition, the information will only be disclosed a part of a statistic in a format that will not allow identification of personal information.
Begin Survey
Not Now
×
Please rate each item regarding Game8.co's Advertisements.
Amount of Ads
Very Dissatisfied
Somewhat Dissatisfied
Fine
Somewhat Satisfied
Highly Satisfied
Placement of Ads
Timing of Ad Display
Ad Loading Speed
Safeness of Ads
Content of Ads
×
Please rate each item regarding Game8.co's Quality of Articles.
Amount of information
Very Dissatisfied
Somewhat Dissatisfied
Fine
Somewhat Satisfied
Highly Satisfied
Frequency of updates
Speed of new information
Accuracy of articles
Understandibility of articles
Readability of sentences
×
Please rate each item regarding Game8.co's Usability of the Site.
Ease of finding information
Very Dissatisfied
Somewhat Dissatisfied
Fine
Somewhat Satisfied
Highly Satisfied
Loading Speed
Use of Color
Font Size
Visibility of Images
Easy to Understand Layout
×
Please rate each item regarding Game8.co's Message Boards, Comments.
Ease of Writing
Very Dissatisfied
Somewhat Dissatisfied
Fine
Somewhat Satisfied
Highly Satisfied
Readability
Ease in Finding Information
Comment Quality
Comment Quantity
Admin Response
×
Please rate each item regarding Game8.co's Site's new design.
Please rate our site's new design
Very Dissatisfied
Somewhat Dissatisfied
Fine
Somewhat Satisfied
Highly Satisfied
Do you think that the website's design change makes the site easier to use?
Has the new design made it easier for you to find information on the site?
Has the new design improved the overall visual appeal of the site?
How would you rate your overall satisfaction with the new design of the site?
×
How likely are you to recommend Game8 to someone you know?
Very Unlikely
0
1
2
3
4
5
6
7
8
9
10
Very Likely
If you have other opinions regarding potential improvement to the website, please share them with us. We would appreciate your honest opinion.
Note: This is a free response section, so you can proceed without entering anything.
Note: Please be sure not to enter any kind of personal information into your response.
Note: Please be sure not to enter any kind of personal information into your response.
×
Thank You
×
Thank you for participating in our survey! Your answers will help us to improve the quality of our website and services.
We hope you continue to make use of Game8.
We hope you continue to make use of Game8.
Close
Rankings
- We could not find the message board you were looking for.
Gaming News


![Monster Hunter Stories 3 Review [First Impressions] | Simply Rejuvenating](https://img.game8.co/4438641/2a31b7702bd70e78ec8efd24661dacda.jpeg/thumb)
Popular Games

Genshin Impact Walkthrough & Guides Wiki
Honkai: Star Rail Walkthrough & Guides Wiki
Umamusume: Pretty Derby Walkthrough & Guides Wiki
Pokemon Pokopia Walkthrough & Guides Wiki
Resident Evil Requiem (RE9) Walkthrough & Guides Wiki
Monster Hunter Wilds Walkthrough & Guides Wiki
Wuthering Waves Walkthrough & Guides Wiki
Arknights: Endfield Walkthrough & Guides Wiki
Pokemon FireRed and LeafGreen (FRLG) Walkthrough & Guides Wiki
Pokemon TCG Pocket (PTCGP) Strategies & Guides Wiki


Recommended Games
Diablo 4: Vessel of Hatred Walkthrough & Guides Wiki
Cyberpunk 2077: Ultimate Edition Walkthrough & Guides Wiki
Fire Emblem Heroes (FEH) Walkthrough & Guides Wiki
Yu-Gi-Oh! Master Duel Walkthrough & Guides Wiki
Super Smash Bros. Ultimate Walkthrough & Guides Wiki
Pokemon Brilliant Diamond and Shining Pearl (BDSP) Walkthrough & Guides Wiki
Elden Ring Shadow of the Erdtree Walkthrough & Guides Wiki
Monster Hunter World Walkthrough & Guides Wiki
The Legend of Zelda: Tears of the Kingdom Walkthrough & Guides Wiki
Persona 3 Reload Walkthrough & Guides Wiki


All rights reserved
© 2022 Ubisoft Entertainment. All Rights Reserved. Rainbow Six Mobile, Ubisoft and the Ubisoft logo are registered or unregistered trademarks of Ubisoft Entertainment in the U.S. and/or other countries.
The copyrights of videos of games used in our content and other intellectual property rights belong to the provider of the game.
The contents we provide on this site were created personally by members of the Game8 editorial department.
We refuse the right to reuse or repost content taken without our permission such as data or images to other sites.