Best Formations Tier List
This wiki is still a work-in-progress! Sign in and select Add to Watchlist under the page's title to be notified of any updates!
These are the best formations available in eFootball to dominate the pitch. Read on to see a tier list ranking of formations and the best formations explained here!
List of Contents
Best Formations Tier List
| Tier 1 | ||
|---|---|---|
 |
 |
 |
 |
 |
 |
| Tier 2 | ||
 |
 |
 |
 |
 |
 |
| Tier 3 | ||
 |
 |
 |
 |
 |
 |
| Strong Team Style Synergy | The formations were selected as they emphasized strengths of the unique team playstyles. Stronger formations match better with their chosen team playstyle, such as high pressure positions for Quick Counter or good player spacing with Possession Game. |
|---|---|
| Consistent Against Divison Opponents | The formations were selected by how frequent and consistent their appearances in Division play is, as well as if it was mainly used by Division 1 players in online matches. |
Best Formations and Tier List Explanation
| Jump to a Tier! | ||
|---|---|---|
| Tier 1 | Tier 2 | Tier 3 |
Tier 1 Formations
| Formation | Recommended Team Style Overview |
|---|---|
|
|
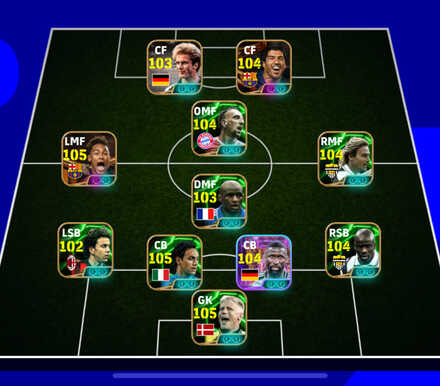
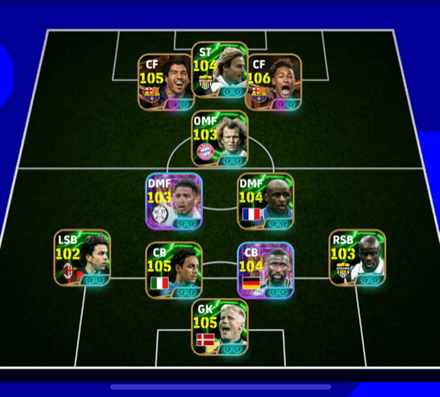
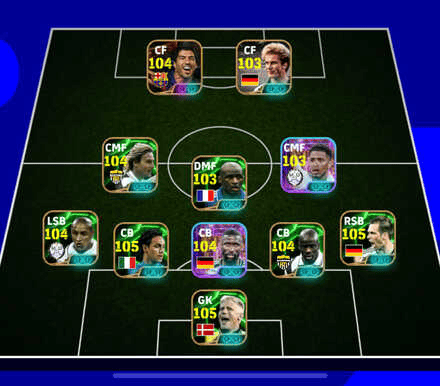
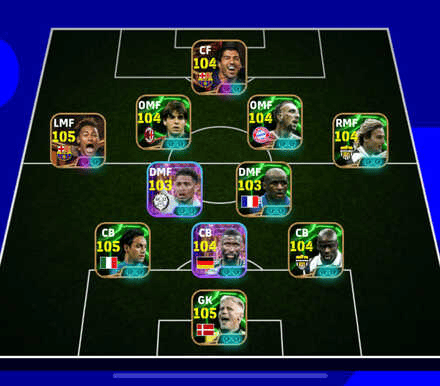
・Quick Counter ・Long Counter ・The passing combinations of the 3 CF's are highly effective. ・The 4-back + 3-MF setup allows for a solid defense that transitions easily into counterattacks. ・Midfield can be customized with either AMF or CMF player roles. |
|
|
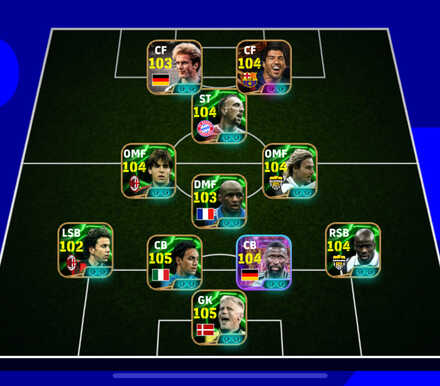
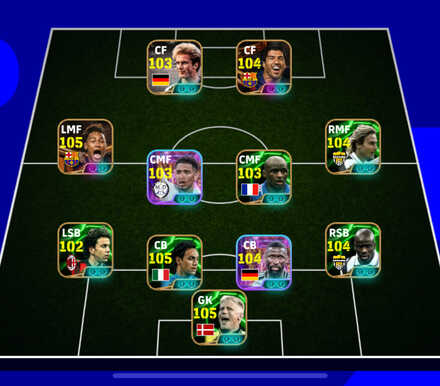
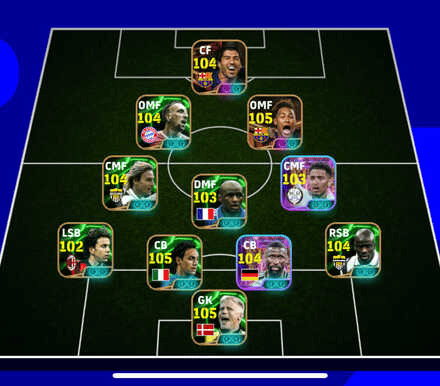
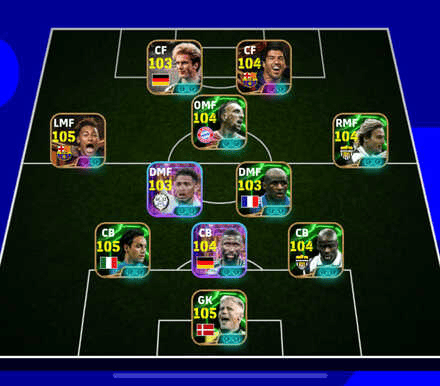
・Possession Game ・Quick Counter ・Long Counter ・DMF + CMF × 2 + AMF creates strength in numbers in the center. ・Two CF's give versatile scoring patterns. ・The AMF often serves as the starting point for attacks through passing, dribbling, or mid-range shots. |
|
|
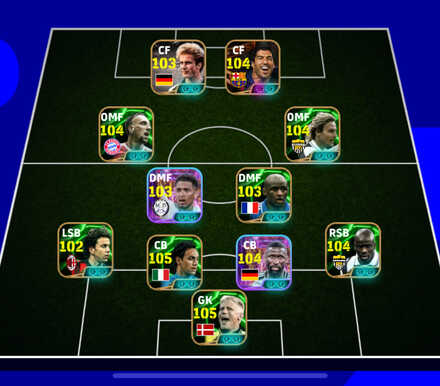
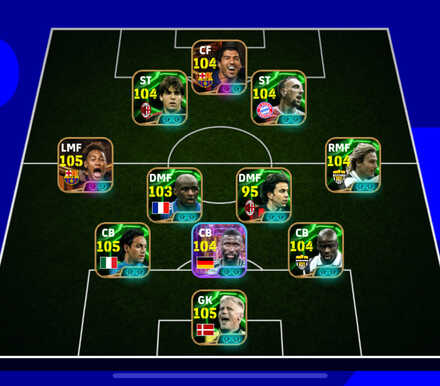
・Quick Counter ・Long Counter ・A solid defense with 4 defenders + 2 DMF's, and high attack with AMF's and a 2 Strikers. ・AMFs can move freely, making it easy to break down defenses. ・Diagonal passes facilitate easy link-up play, enabling attacks that cut straight through the center. |
|
|
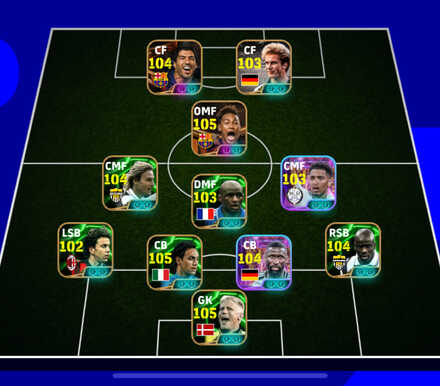
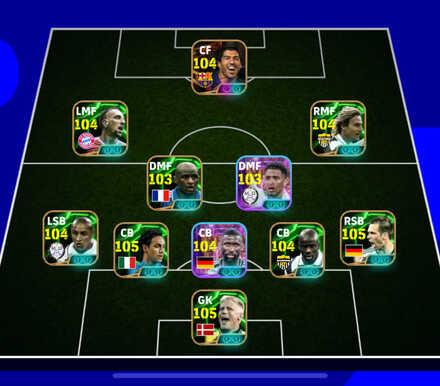
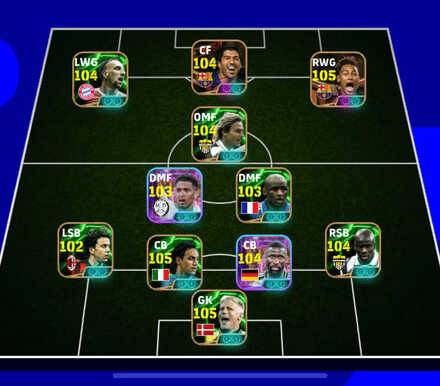
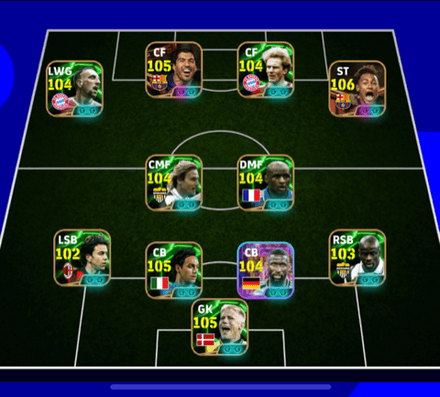
・Quick Counter ・Long Counter ・Out Wide ・With an AMF + 2 CF's, attacks like one-twos, through passes, and mid-range shots are more potent. ・Wingers often find space, making flank attacks and crosses dangerous. ・Numerous passing lanes to midfielders to generate build-up play. |
|
|
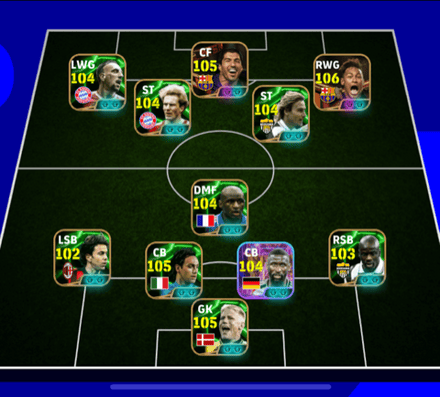
・Possession Game ・Quick Counter ・Long Counter ・Out Wide ・Diverse attacking patterns from the center and wings. ・Stable build-up play by having numbers in the midfield. ・High-pressure front five allows for counterattacks with a numbers advantage if the ball is won. |
|
|
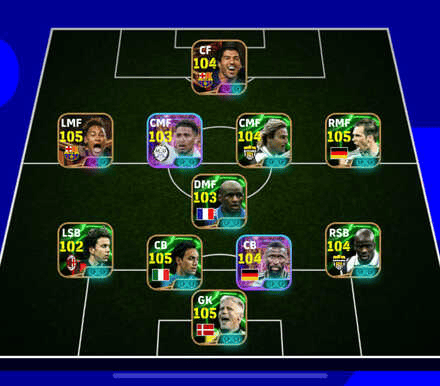
・Long Counter ・Out Wide ・Numerous attacking options, with strong central breakthroughs and side attacks. ・Excels in passing and recovering loose balls. ・Solid central defense, but vulnerable to attacks from the wing. ・Powerful counterattacks when winning the ball high up the pitch. ・High stamina consumption. |
Tier 2 Formations
| Formation | Recommended Team Style Overview |
|---|---|
|
|
・Long Counter ・Long Ball ・Easier to recover loose balls from forwards. ・Solid defense with a five-back formation. |
|
|
・Possession Game ・Quick Counter ・Long Counter ・Out Wide ・Well-balanced offense and defense, with potent wing attacks from Wing Midfielder and Fullback. ・Two DMFs provide solid defense, while two CFs deliver strong scoring power. |
|
|
・Quick Counter ・Long Counter ・Long Ball ・With three players up front, it's easier to thread through-balls. ・The central defensive block is solid with two defensive midfielders and a four defenders. |
|
|
・Quick Counter ・Long Counter ・Long Ball ・High-positioned wingers can break through the flanks to create numerous chances. ・Compared to a 4-1-2-3, the ability to deploy two defensive midfielders allows for stronger central defense. |
|
|
・Possession Game ・Long Counter ・Out Wide ・With midfielders positioned side-by-side, counterattacks generate strong vertical attacking power・Connecting play from one flank to the opposite side creates opportunities to receive the ball unmarked |
|
|
・Quick Counter ・Long Counter ・Long Ball ・Capable of deploying 2 CFs + 3 AMF formation for ultra-high firepower attacks. ・With numerous players on the front line, they can apply high-pressure, enabling quick short counters when winning possession. |
Tier 3 Formations
| Formation | Recommended Team Style Overview |
|---|---|
|
|
・Possession Game ・Quick Counter ・Long Counter ・Stable defense with a 5-back + DMF setup, while maintaining central attacks. ・Strong finishing ability with a 3-man midfield and two CFs. ・Wing attacks rely heavily on the fullbacks. |
|
|
・Possession Game ・Quick Counter ・Long Counter ・Excels in the center with passing and breaking down defenses. ・The AMF is central in breaking through the defense. |
|
|
・Possession Game ・Quick Counter ・Long Counter ・Long Ball ・Overwhelming attacking power with a 4-top formation. ・Specializes in wing attacks and crosses. ・Central defense is stable with two defensive midfielders. ・Midfield numbers are low, making build-up and possession difficult. |
|
|
・Possession Game ・Long Counter ・Long Ball ・High attacking numbers with 3 CFs + 2 WFs for excellent scoring potential. ・Capable of attacking both out wide and in the center. ・Midfield leaves major holes in defense and build-up play. |
|
|
・Possession Game ・Long Counter ・Out Wide ・Midfield dominance and potent attacks for versatile play that utilizes the wings. ・A tactically flexible formation capable of adapting to both possession-based play and counterattacks. |
|
|
・Possession Game ・Long Counter ・Out Wide ・With AMF and 2 CFs, you have powerful central attacks with one-two passes, through balls, and midfield runs. ・Wing Midfielders tend to get free easily, making wing attacks and crosses effective. ・Abundant passing lanes to midfielders facilitate stable build-up play. ・Using only one DMF often places a heavy defensive burden, creating risks in central defense. |
eFootball Related Guides

Recommended Guides
| Tier Lists | |
|---|---|
| Best Players | Best Managers |
| Best Formations | Best Featured Players |
| Best Center Forwards (CF) | Best Goalkeepers (GK) |
| Best Playstyles | - |
eFootball Wiki
 Packs Packs |
 Players Players |
 Tips and Tricks Tips and Tricks |
 News News |
Author
Best Formations Tier List
Rankings
- We could not find the message board you were looking for.
Gaming News

![The Liar Princess and the Blind Prince Review [PC] | Lovely to Look at but Tedious to Play](https://img.game8.co/4442586/8d95f5faf05780f1765ce7e0938bd825.jpeg/show)
![Monster Hunter Stories 3 Review [First Impressions] | Simply Rejuvenating](https://img.game8.co/4438641/2a31b7702bd70e78ec8efd24661dacda.jpeg/thumb)
![The Seven Deadly Sins: Origin [First Impressions] | A Promising Start](https://img.game8.co/4440581/584e0bfb87908f12c4eab6e846eb1afd.png/thumb)

Popular Games

Genshin Impact Walkthrough & Guides Wiki
Umamusume: Pretty Derby Walkthrough & Guides Wiki
Pokemon Pokopia Walkthrough & Guides Wiki
Honkai: Star Rail Walkthrough & Guides Wiki
Monster Hunter Stories 3: Twisted Reflection Walkthrough & Guides Wiki
Arknights: Endfield Walkthrough & Guides Wiki
Wuthering Waves Walkthrough & Guides Wiki
Zenless Zone Zero Walkthrough & Guides Wiki
Pokemon TCG Pocket (PTCGP) Strategies & Guides Wiki
Monster Hunter Wilds Walkthrough & Guides Wiki


Recommended Games
Fire Emblem Heroes (FEH) Walkthrough & Guides Wiki
Diablo 4: Vessel of Hatred Walkthrough & Guides Wiki
Cyberpunk 2077: Ultimate Edition Walkthrough & Guides Wiki
Yu-Gi-Oh! Master Duel Walkthrough & Guides Wiki
Super Smash Bros. Ultimate Walkthrough & Guides Wiki
Pokemon Brilliant Diamond and Shining Pearl (BDSP) Walkthrough & Guides Wiki
Elden Ring Shadow of the Erdtree Walkthrough & Guides Wiki
Monster Hunter World Walkthrough & Guides Wiki
The Legend of Zelda: Tears of the Kingdom Walkthrough & Guides Wiki
Persona 3 Reload Walkthrough & Guides Wiki


All rights reserved
©Konami Digital Entertainment
The copyrights of videos of games used in our content and other intellectual property rights belong to the provider of the game.
The contents we provide on this site were created personally by members of the Game8 editorial department.
We refuse the right to reuse or repost content taken without our permission such as data or images to other sites.
While browsing the https://nowgoal.ink/live-scores/betway/ section I appreciated how quickly goal events and match changes appeared on screen. The layout is streamlined enough for monitoring several fixtures at once, which is helpful when I’m tracking multiple games simultaneously. On the downside, I noticed that certain match pages lacked detailed breakdowns (like cards, substitutions or line-ups) compared to specialised live-score platforms. So if you’re a fan who prioritises in-depth analytic