☆ Earn bonuses before you start the DLC.
★ Clear campaign & sub-quests | Get max lvl
☆ Learn all the ingredients in this new Gourmet Saga!
★ Get all Beyond the Dawn Trophies with these guides:
☆ Ryugola Weapons | All Portraits | Hero of the Summit
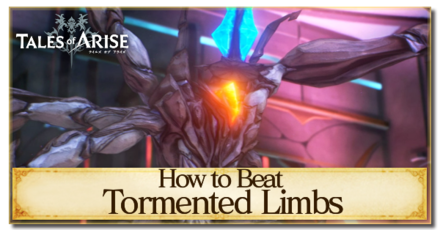
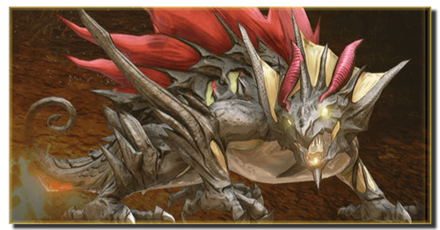
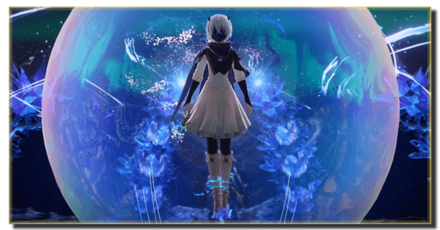
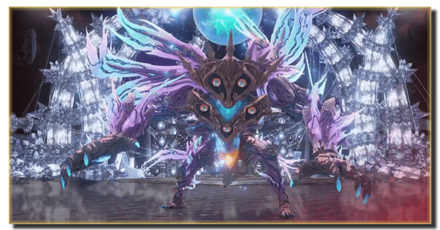
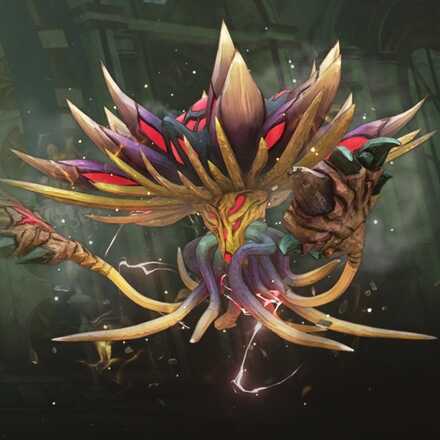
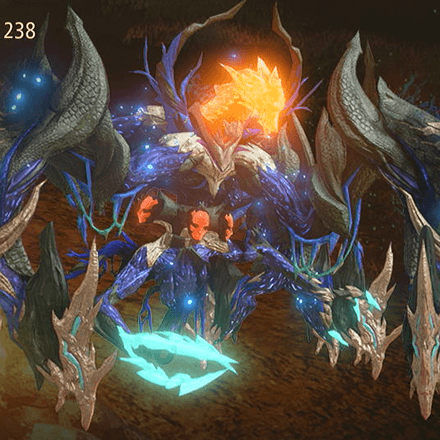
Tormented Limbs is a boss you fight in the Tales of Arise (Beyond the Dawn)! Read on to learn more about tips on how to beat Tormented Limbs, as well as stats, weaknesses, attack patterns, and the best party setup including Artes and Equipment in this boss guide!
List of Contents
| Recommended Level: 44 | |||
|---|---|---|---|
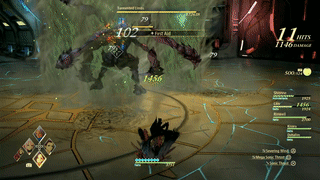
 HP: 182310 |
|||
| Attack | 2401 | Defense | 890 |
| Elemental Attack | 2183 | Elemental Defense | 843 |
| Penetration | 2514 | Resistance | 2647 |
| Weakness | Resistance | ||
To aid in your battle against Tormented Limbs, here are some tips that you can utilize in your fight.
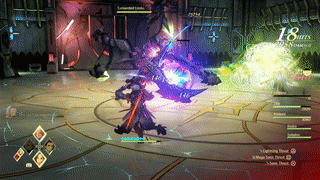
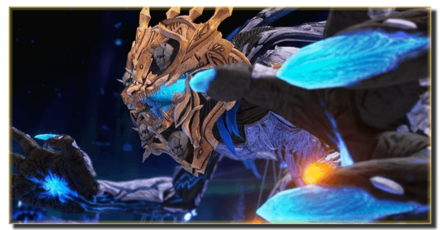
As a Zeugle that is strong in Dark, Tormented Limb's weakness is that element's polar opposite – Light. Arm your party with light-based Artes to deal more damage per hit against the beast. In particular, Artes that can deal multiple hits per execution such as Alphen's Lightning Thrust work best to shorten the length of the fight.
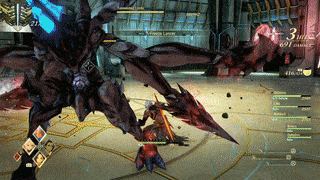
With its Weak Point placed on its chest, it is difficult to attack Tormented Limbs head-on due to the possibility of its counterattacks. By making use of Alphen's Boost Attack, you can stagger the monster, allowing you to freely target its chest until it recovers.
Whenever Tormented Limbs will try to attack you with its forward-facing attacks such as Poison Bombs or Energy Beam, it will its backside open to attack. Take advantage of the situation to freely attack it from behind – be sure to watch out for its melee attacks that can allow it to turn around to face you immediately, however, such as its Teleport Attacks.
| Leader | Members | ||
|---|---|---|---|
 Alphen Alphen
Lv.44 |
 Law Law
Lv.44 |
 Rinwell Rinwell
Lv.44 |
 Shionne Shionne
Lv.44 |
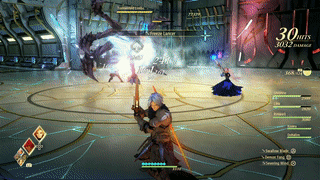
The entire area that Tormented Limbs dwells in is quite a challenging area to go through even at the suggested level. The distance from where you appear in the area to where you get to Tormented Limbs is filled with enemies and no campfires to take a rest from. There is a Recovery Point that you can touch before the fight, but in case that you need healing from the regular enemies you fight if you run out of CP, consider bringing along plenty of recovery items.
|
Alphen
Lv.44 |
Equipment |
|---|---|
| Atonement Edge | |
| Absolute | |
| Protect Ring | |
| Ground Artes | Aerial Artes |
| First Set | |
| Lightning Thrust | Rising Falcon |
| Reigning Slash | Stardust |
| Dragon Swarm | Mirage |
| Second Set | |
| Swallow Blade | - |
| Demon Fang | - |
| Severing Wind | - |
The Artes Lightning Thrust is an effective way to deal elemental damage against Tormented Limbs. Spam it frequently, and combine it with Rising Falcon to immediately come crashing back down to the ground. Repeat this motion until the beast attacks again, or if Alphen's Boost Attack is available – you can trigger the Boost Attack and repeat this action, or focus now on its Weak Point.
|
Law
Lv.44 |
Equipment |
|---|---|
| Tyrant Fists | |
| Kingly Vest | |
| Protect Ring | |
| Ground Artes | Aerial Artes |
| First Set | |
| Dragon Shot | Eagle Dive |
| Talon Storm | Eagle Assault |
| Fang Blast | Death Blossom |
| Second Set | |
| Super Swallow Dance | Glimmer Dragon |
| Talon Hurricane | Fang Bolero |
| - | - |
Law's Mystic Artes can cause significant damage against Tormented Limbs. Depending on your level and equipment, he can cause as much as 6000+ damage in one use of his Mystic Artes against the beast.
|
Rinwell
Lv.44 |
Equipment |
|---|---|
| Nature's Beauty: 3rd Ed. | |
| Diamond Cloak | |
| Magic Emblem | |
| Ground Artes | Aerial Artes |
| First Set | |
| Holy Lance | Electric Discharge |
| Thunder Blade | Celestial Hammer |
| Photon Flash | - |
| Second Set | |
| - | - |
| - | - |
| - | - |
While you can keep her other Artes enabled in her Artes List, it is recommended that you turn them off if you're not planning on controlling Rinwell directly. This allows her to automatically use nothing but Light-based attacks, making her a good primary damage dealer by way of her elemental attacks.
|
Shionne
Lv.44 |
Equipment |
|---|---|
| Supreme Ignis Roar | |
| Diamond Once Piece | |
| Magic Emblem | |
| Ground Artes | Aerial Artes |
| First Set | |
| Tonitus Celestra | Displode |
| Luke Celestra | Scorched Earth |
| Magna Ray | - |
| Second Set | |
| Healing Circle | - |
| Burning Strike | - |
| Flare Tornado | - |
So long as you can keep disrupting Tormented Limbs' attacks, you can effectively receive little to no damage from the beast, allowing Shionne to make use of her own Light-based Artes against it.
Nonetheless, if you're planning on deactivating any of her Artes, be sure to keep recovery Artes active so that there is at least one person in your active party that can provide you with healing.
While it can perform this attack during the first half of the battle, it will more frequently repeat this attack when it enters its Over Limit mode in the second phase of the fight until it tires out. It is best to avoid these attacks and keep your distance rather than trying to execute a Perfect Dodge.
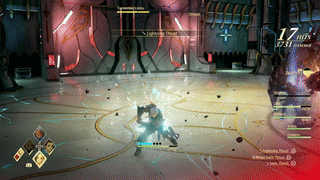
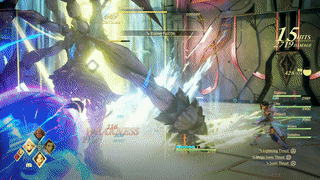
With the ends of its limbs all glowing green, Tormented Limbs will shoot out balls of poison at you and your party. Getting hit by this attack too much will result in being inflicted with the Poison Physical Ailment, causing you damage until you can heal from it.

As it usually performs this attack in the middle of the area, it is easy to tell when this attack is coming. You can choose to either perform a Boost Attack from Alphen on it to disrupt its actions or simply allow it to fire. It is easy to avoid its beam, allowing you to attack it from behind.
An attack that it seldom performs, the beast will have its limbs glow red before darting forwards at your party, spinning around to inflict as much damage as it can against you. Disrupt this attack with a well-placed Boost Attack from Alphen or Kisara, or simply dodge out of the way to avoid the possibility of damage.
| Story Bosses | |
|---|---|
 Nimus Pandemonium Nimus Pandemonium |
 Venoflage Venoflage |
 Nazamil Nazamil |
 Nazamil Nether Nazamil Nether
|
 Ooze Hive Ooze Hive |
Nazamil Nether (2nd Encounter) |
| Nazamil Nether (3rd Encounter) |
 Captive Nazamil Captive Nazamil |
 Oppressor Oppressor |
 Emergence Suppressor Emergence Suppressor |
| Optional Bosses | ||
|---|---|---|
 Ruthless Ruthless
|
 Boisterous Roper Boisterous Roper
|
 Cruel Keeper Cruel Keeper |
 Megawrecker Megawrecker |
 Ghoulish Arms Ghoulish Arms |
 Nimus Juggernaut Nimus Juggernaut |
 Grinymuk Grinymuk |
 Mother Boomy Mother Boomy |
- |
Tormented Limbs Boss Guide: Recommended Setup and How to Beat

Genshin Impact Walkthrough & Guides Wiki

Honkai: Star Rail Walkthrough & Guides Wiki

Pokemon Scarlet and Violet (SV) Walkthrough & Guides Wiki

FF7 Rebirth Walkthrough & Guides Wiki

Stellar Blade Walkthrough & Guides Wiki

Monster Hunter Rise: Sunbreak Walkthrough & Guides Wiki

Persona 3 Reload Walkthrough & Guides Wiki

Palworld Walkthrough & Guides Wiki

Pokemon UNITE Walkthrough & Guides Wiki

Call of Duty Modern Warfare 3 (MW3) Walkthrough & Guides Wiki

Elden Ring Walkthrough & Guides Wiki

Super Smash Bros. Ultimate Walkthrough & Guides Wiki

Pokemon Legends: Arceus Walkthrough & Guides Wiki

FF7 Remake Walkthrough & Guides Wiki

New Pokemon Snap Walkthrough & Guides Wiki

Hyrule Warriors: Age of Calamity Walkthrough & Guides Wiki

The Legend of Zelda: Breath of the Wild Walkthrough & Guides Wiki
© BANDAI NAMCO Entertainment America Inc. All third party content, brands, names, and logos are used under license and remain property of their respective owners. All rights reserved.
The copyrights of videos of games used in our content and other intellectual property rights belong to the provider of the game.
The contents we provide on this site were created personally by members of the Game8 editorial department.
We refuse the right to reuse or repost content taken without our permission such as data or images to other sites.

 Balseph
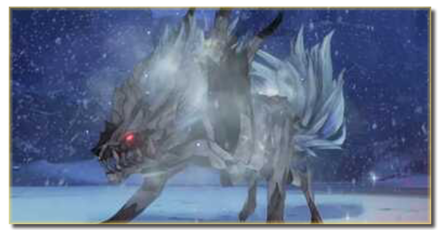 Ice Wolf Leader
 Ooze Hive
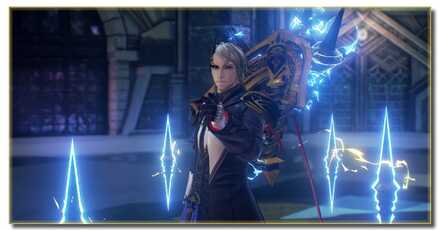 Lord Ganabelt
 Zacarania
 Kisara
 Dohalim
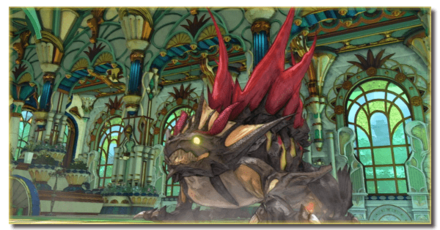 Venoflage
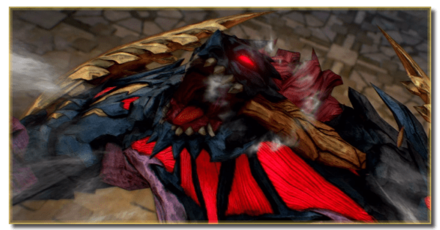 Temararus
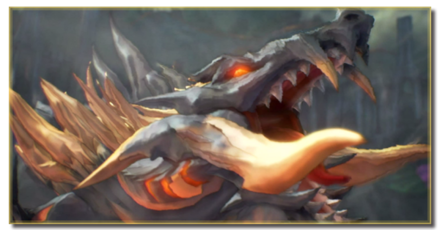 Grinymuk
 Almeidrea & Mesmald
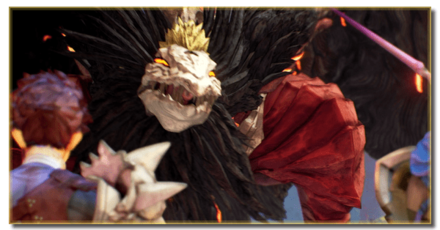 Meria Phein
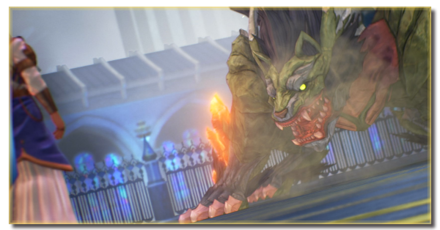 Kalmarzel & Kaldinzel
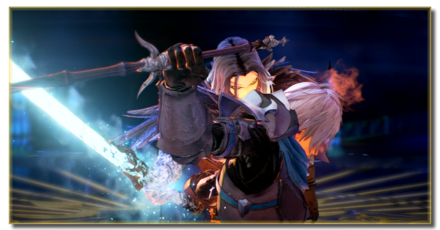 Vholran
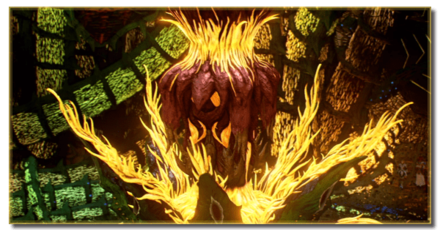 Eljarania
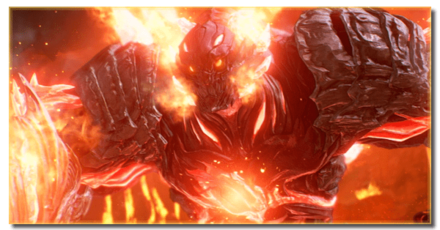 Efreet
 Tormented Limbs
 Red Woman
 Valclynimus
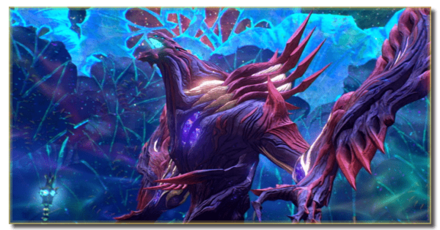 Great Astral Spirit
 Subsumer
 Vholran (Final Boss)
 Toxidillo
 Boisterous Roper
 Polycephus
 Great Dragon
 Relentless Charger
 Flamewrecker
 Alpha Reaper
 Stormbringer
 Elemental
 Regent Bee
 Agony Keeper
 Mother Boomy
 Ruthless
 Thunderite
 Mantis
 Calamity Arms
 Meneiys
 Ezamamuk
 Sword Dancer
 Undine Drop
 Luo Undine
 Grand Gnome & Vas Phein
 Masher Mare & Masher Bull
 Procella Sylph & Sylph Zloa
 Mesmald
 Edna
Edna Nimus Origin
 Eizen
Eizen Edna & Eizen
 Chronos
 Dulneiys, Maleiys, & Vasneiys