This is a page for Speedrunning Shortcuts and Skips you can do in The Legend of Zelda: Link's Awakening (Remake) for the Nintendo Switch. Read on to see how to execute Shortcuts and Skips for a faster clear!
List of Contents
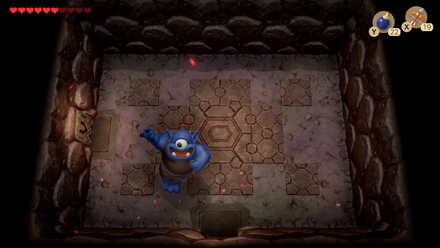
This skips over the BowWow rescue and goes straight to Bottle Grotto.
You need to carry a cuccoo from Mabe Village to the northern end of Mysterious Forest near Tal Tal Mountain Range. Lure the like-like near the signpost, and before it reaches you, throw the cuccoo on the signpost and quickly escape from the like-like.
You will have to do Tracy's Boost on the specific stone left of Pothole Fields.
First, you need to have Secret Medicine applied on you.
Second, you will need to lure the fox to this area from Mabe Village to Pothole Fields. Your must have exactly one and a half heart, and you must be carrying a bomb.
Third, perform Tracy's Boost with the fox beside the stone. This will revive you on top of the stone so you can get to the other side.
This will get you into Angler's Tunnel without having to obtain the Angler Key.
You need to have Secret Medicine applied on you.
Go to Mabe Village and lure the fox to the ladder on Ukuku Prairie and have the fox jump onto the top by using a bomb.
Next, lure the fox onto the ledge left of the warp point near Dampe's Shack
From the ledge, lure the fox to the ladder in Tal Tal Heights, and pushi it off by attacking it and pushing it with your shield.
Now, lure the fox to the lock in front of Angler's Tunnel, make sure you have exactly one and a half heart, and perform Tracy's Boost with the fox. This will revive you on top of the lock so you can pass through it and into Angler's Tunnel.
This is also reffered to as Mirror Shield Skip as it skips getting the Mirror Shield, which is required to pass through the flame cave.
Go to the ladder on Tal Tal Mountain Range that is just below Turtle Rock.
Perform an air climb and before you reach the highest point of the climb, hold the analog stick to up-right direction and jump using Roc's Feather.
Right after jumping, push the analog stick right, then throw the rooster.
After throwing the rooster, immediately jump onto the ledge.
Doing this skip is very difficult if you do not set it up properly.
First, you must have both the Bomb and Arrow equipped. Upon entering Turtle Rock, go north and then west. Heading north again will bring you to the hinox room. Approach the hinox room while hugging the right side of the entrance.
On entry, hold the left stick towards the left while holding L trigger. Link will start the dashing to the left as soon as the animation ends.
As soon as link hits the wall, point the left analog stick down-right. Use the Bomb Arrow as soon as Hinox grabs you. This will cause Link to disappear on the screen while being grabbed. When the Hinox throws you to the ground, you will instantly spawn in the Nightmare Room.
You will be able to skip the whole dungeon and the Nightmare Boss by going directly to the Instrument room above. This glitch must be done on a specific frame so it may take a couple of tries to execute this properly.
This skips getting through the trading sequence to get the Magnifying Lens. You need the flying rooster to perform this skip.
Go to the ladder near the mermaid's statue on Martha's Bay. Perform an air climb on this ladder and glide near the trees on your left and above the ledge to your north.
Throw the rooster as soon as you hover above the ledge to drop down. Stay on the outer side of the ledge and move slowly to avoid dropping off of it.
Move around the ledge until you reach the corner southwest of the mermaid statue. From this corner, move northeast and you will land "inside" the mermaid statue and to the room below.

| Speedrun Guides | |
|---|---|
| Speedrun Guide (Any%) | Speedrun Guide (100%) |
| Movement Information and Tips | Speedrunning Techniques and Glitches |
| Shortcuts and Skips | - |

The Legend of Zelda: Link's Awakening Walkthrough & Guides Wiki
Shortcuts and Skips

Honkai: Star Rail Walkthrough & Guides Wiki

Genshin Impact Walkthrough & Guides Wiki

FF7 Rebirth Walkthrough & Guides Wiki

Pokemon Scarlet and Violet (SV) Walkthrough & Guides Wiki

Palworld Walkthrough & Guides Wiki

Dragon's Dogma 2 (DD2) Walkthrough & Guides Wiki

Persona 3 Reload Walkthrough & Guides Wiki

Monster Hunter Rise: Sunbreak Walkthrough & Guides Wiki

Pokemon UNITE Walkthrough & Guides Wiki
Fire Emblem Heroes (FEH) Walkthrough & Guides Wiki

Elden Ring Walkthrough & Guides Wiki

Pokemon Legends: Arceus Walkthrough & Guides Wiki

FF7 Remake Walkthrough & Guides Wiki

New Pokemon Snap Walkthrough & Guides Wiki

Hyrule Warriors: Age of Calamity Walkthrough & Guides Wiki

Super Smash Bros. Ultimate Walkthrough & Guides Wiki

The Legend of Zelda: Breath of the Wild Walkthrough & Guides Wiki
© 1993-2019 Nintendo
The copyrights of videos of games used in our content and other intellectual property rights belong to the provider of the game.
The contents we provide on this site were created personally by members of the Game8 editorial department.
We refuse the right to reuse or repost content taken without our permission such as data or images to other sites.


When performing the BowWow skip, it is important to know that if you complete Bottle Grotto before saving BowWow, you will not be able to unlock the Dampe's Dungeon Adventure mini-game. Basically if you complete Bottle Grotto first and then save BowWow, the Owl won't load outside of the Moblin's cave. If you talk to Madam MeowMeow after completing Bottle Grotto but before saving BowWow, you won't be able to pickup BowWow at all from the Moblin cave and Dampe being ready is never triggered.